|
Building a Standard Pygmy
Goldeneye
in Juneau, Alaska - Fall to Summer
by Katy McKerney Katy_McKerney@envircon.state.ak.us
| My friend, Johanne Nelson (Joey) and I wanted kayaks in the worst
way. After all, we both live a stone’s throw away from an Alaska Inside Passage
waterway. Joey insisted that she wanted to build a wooden kayak. BUILD ONE? She patiently
explained that since we are both of Norwegian descent, we HAD to build one..a Nordic
tradition. All I reasoned was that I didn’t want her to have a cool, one-of-a-kind
kayak with me having an anyone-can-own store bought kind. We both live in condos so, we
decided to build them at the only place we could find, the University of Alaska-Southeast
Marine Technical Center. |
 We
decided to pick our own stitch and sew kit design, although we really didn’t know
what stitch and sew meant exactly. We naively imagined that all we had to do was.. stitch
and sew boat parts, glue stuff…grab our paddles and head for the nearest Alaska
postcard scene, like a whale siting or glacier, where photographers would be waiting to
snap shots of us (cool Alaskan dudettes) for Outside Magazine. We
decided to pick our own stitch and sew kit design, although we really didn’t know
what stitch and sew meant exactly. We naively imagined that all we had to do was.. stitch
and sew boat parts, glue stuff…grab our paddles and head for the nearest Alaska
postcard scene, like a whale siting or glacier, where photographers would be waiting to
snap shots of us (cool Alaskan dudettes) for Outside Magazine. |
| With maybe…oh..at the outside..an hour of research (and
someone said they saw a Pygmy boat and it looked real neat and real wooden) we
decided to buy Pygmy Goldeneye kits from Port Townsend, Washington at $600.00 per kit. |
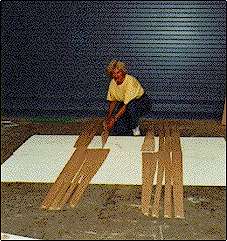 |
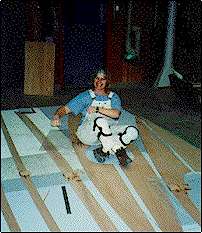
With great anticipation we peered into the kit boxes and gingerly
laid out 20 hull panels for one kayak. The panels were cut from 4 mm marine grade mahogany
ply. We stared in disbelief at $600.00 worth of very flat, very un-kayaky-looking pieces
of super-thin plywood. All the panels were odd shaped and none of them looked remotely
like they fit together. We learned that because boats are curved for floating, the pieces
are cut to fit once the hull is curved into position. They don’t fit laying on a flat
surface. Still, we tried to suppress an element of panic thinking we just got soaked for
$1200.00 and who’s idea was this anyway? JOEY?? |
| Apprehension was replaced by serious concentration as we spent our
first 4 hours of kayak building trying to read the kit design directions and figure out
which hull panels went together in order to join them with butt plates. Why do they call
them butt plates? We never did figure that one out. |
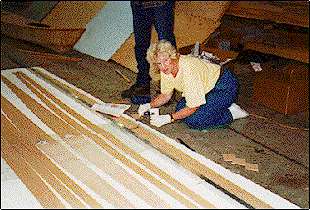
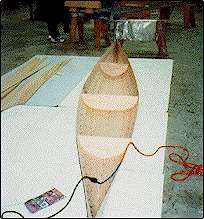
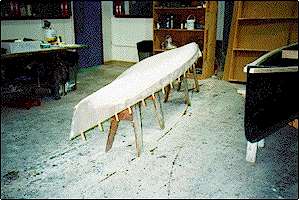
| Every six inches, 1/16 inch holes had to be drilled along the
upper edge of each of the hull planks except the sheer. Assembling the
hull involved wiring the two keel panels together and then gluing in temporary frames.
Then we cut a bunch of wire into 3 ½" lengths and inserted them into the drilled
holes and twisted the wire ends. |
 |
 |
This is where stitch and sew boat building gets its name. Our
fingers got pretty sore after doing all the panels. Hey, no one told us we’d get SORE
building a kayak. It was the first of many times we would reflect on how some hidden
muscle on us ached from the endless sanding or from getting into yet another Houdini
position to glue something.
|
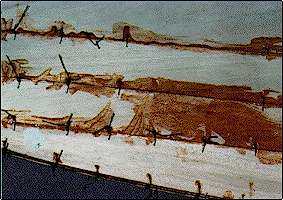
| Once the inside and outside hull seams are glued,
then all the "stitches" or wires have to come out. The exercise of getting the
wires out proved to be interesting since they were essentially epoxied in.
|
 |
 |
It is very easy to slather on the glue especially
with the thought in mind that you don’t want your boat to leak. Joey did just that,
using epoxy generously to seal the seams, but it gushed out all over the hull. All the
extra glue then has to be sanded off before doing the next step. Initially, neither of us
realized how much sanding we were in for throughout the project. Glue then sand, glue then
sand fa la la la la. |
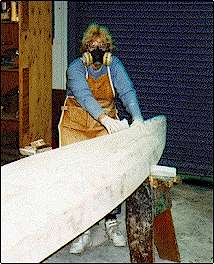
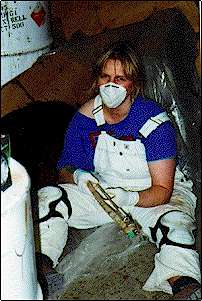
| Another thing we didn’t realize is that we would look like
large insects most of the time due to wearing breathing apparatus. Our vision of being
sexy little boat builders vanished with the first lesson on how toxic epoxy is to breathe
and get on your skin. |
 |
 |
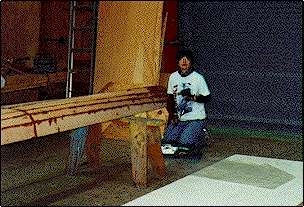
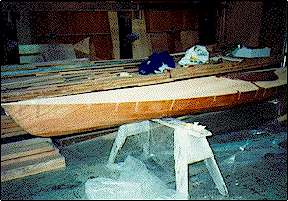
The hull then had to be glassed with sheathing cloth.
Many of the steps are awkward to do alone so Joey enlisted the help of her boyfriend. The
sheathing cloth is very slippery and wants to be in a heap on the shop floor. I
had to become somewhat creative to keep the sheathing cloth on the hull. For example, I
used clothespins to hold the cloth in place. |
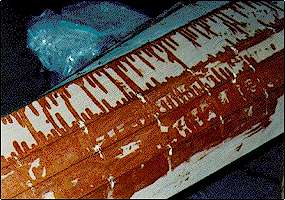
| Once the epoxy is spread onto the cloth sheathing, it
turns from white to clear and the wood grain magically appears |
 |
 |
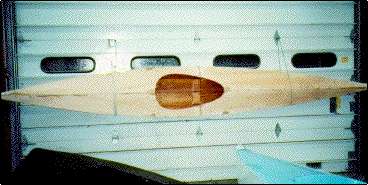
The deck was then reinforced, wired and positioned on the hull to
ensure that it would fit properly. This step was tricky. It was also why we were glad we
bought pre-cut pieces, especially being novices. If the pieces aren’t cut just right,
they won’t fit together. The deck is then removed and we come back to it later. Someone
in the shop built a kayak from scratch and made a few modifications to the original
design. They forgot to make some critical adjustments and when they went to try out the
kayak in late spring, it kept tipping it’s builder out into the icy sea. The kayak
was a total loss. |
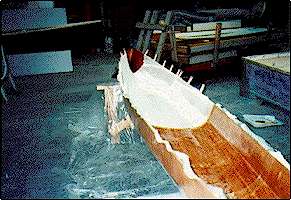
| Glassing the inside of the hull was next. This was
also challenging because the sheathing cloth wants to slide to the bottom of the boat.
Annoying epoxy bubbles take on a life of their own in this step. Every time I thought I
had them all smoothed out they would mischievously bloop up again. arghhh… |
 |
 |
Gluing on the deck came next. Although the boat designer stated in
the directions that the way to glue on the deck was to tip the boat up on it’s sheer
on the floor, it is an understatement to say that it didn’t work for me. I just
wallowed around on the cold, cement floor, half in and half out of the boat squirting glue
everywhere but on the seams. This approach only served as entertainment for the other boat
builders. I also learned my first lesson about coming into contact
with freshly sanded, uncured epoxy. I wore a tee shirt on my first attempt at gluing on
the deck and ended up with a nasty epoxy rash all over my arms. |
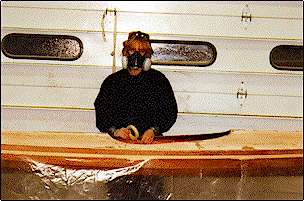
| Finally someone took pity on me and said that the best way to glue
on the deck is from a standing position achieved by hanging the kayak on large garage
doors. Everything went much smoother once I did that. |
 |
 |
Once the deck is glued on, then the next step is to
glass the deck. After my initial case of epoxy rash, I wore long sleeved coveralls and
duct-taped my wrists so no epoxy dust could get in! |
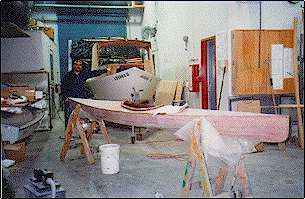
| The cockpit coaming was then installed. Joey decided
not to put in bulkheads and hatches and opted for the simpler approach. I decided to
install bulkheads and hatches, and we both had to install the seats, mount the foot
pedals, hand toggles, deck rigging, and finish the hull. It took me about a month to
finish the hull with several coats of varnish. |
 |
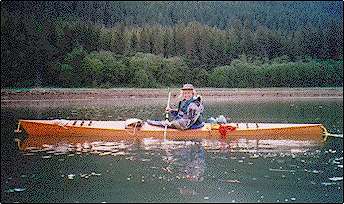 Joey and I took our kayaks on a maiden voyage to
Berner’s Bay located north of Juneau. The weather turned and we never made it out of
the cove. Joey took this picture minutes before high winds came rolling into the cove and
we had to scamper back to the boat launch. Later on, after a week trip around
Wrangell Island in SE Alaska I decided that a rudder would be a definite asset. I
installed a rudder with the help of a fellow boat builder. As usual, it turned out to be
more complicated than I expected! Beware of boat designers who state up front that it will
only take a measly number of hours to build a boat using their kit. HA HA HA HA HA HA Joey and I took our kayaks on a maiden voyage to
Berner’s Bay located north of Juneau. The weather turned and we never made it out of
the cove. Joey took this picture minutes before high winds came rolling into the cove and
we had to scamper back to the boat launch. Later on, after a week trip around
Wrangell Island in SE Alaska I decided that a rudder would be a definite asset. I
installed a rudder with the help of a fellow boat builder. As usual, it turned out to be
more complicated than I expected! Beware of boat designers who state up front that it will
only take a measly number of hours to build a boat using their kit. HA HA HA HA HA HA
|

|