|
Orion
design by Bob Austin
Editor's note: Bob is looking for someone to draw up a set of plans for this boat. If you can help him with this, please give him a shout. |
Gavin Atkin suggested I send you something about my 6-meter windsurfer-rigged cat-ketch sharpie "Orion," which I launched in the summer of '98 and have been sailing successfully on the Chesapeake and her tributaries since. Below is a line drawing. I have an Ian Oughtred Stickleback, which I've also rigged for sail, with a windsurfer mast and a 45 sq ft spritsail.
Click image for larger view
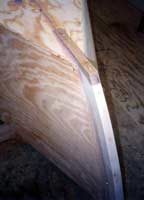
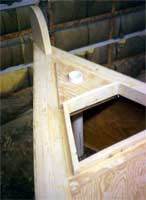
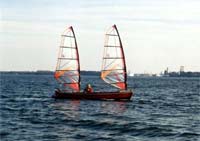
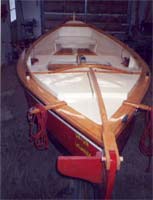
The rig has stayed consistent, at 2 x 7.5 sq meters, with a couple of smaller sails aboard for "reefing" on the beach if it breezes up. I tried a set of larger, 9.0 sq. meter sails, but as most of that area is at the tops they put too much strain on the masts. In fact, the only time I broke one it was with one of the larger sails. The boat has been through three iterations: the more modern-lined coachroof model (see photos below); an open, beach cruising model - best for carrying more than one passenger; and the classical-looking, crowned coachroof model I now sail it as.
 |
Here is the more modern-lined coachroof model...
(click images for larger views) |
|
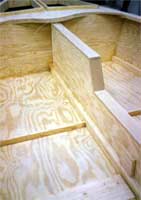
| ... the open, beach cruising model... |
|
|
 |
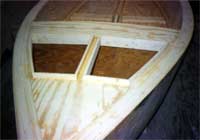
... and and the classical-looking, crowned coachroof model I now sail.
|
|
Although I have no more line drawings and no plans, I do have a set of offsets generated by Plyboats software that I would be happy to share with fellow readers/strictly amateur builders.
|

|
|
click the images for full size offsets |
|
This is about everything I have on my windsurfer rigs and Orion. The building particulars (see below) were drawn up for a prospective draftsman who could not in the end produce. I am currently looking for someone who could produce a set of drawings and plans from what you see here. If you are interested in such a project or know anyone who might be, please email me.
| I am currently looking for someone who could produce a set of drawings and plans from what you see here. If you are interested in such a project or know anyone who might be, please email me. |
|
|
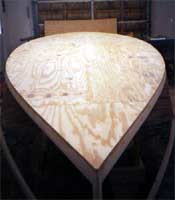
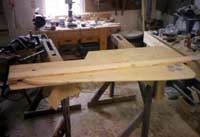
I would change nothing in the boat. FYI, for ease of construction and to provide some support for those large spans of flat ply in the bottom, I butted all ply joints, including some 2x6 stock amidships. Bottom could be a little thicker - I had some bulging of the 1/2 ply aft where it set on the trailer crosspieces and had to install ply backing pads in the bilge.
I sailed with no ballast until this season. It was never necessary for stability, apparently, and its lack kept trailering, launching and recovery weights down. Then I added 160# of weight machine metal forward of midships which helps hold the bow down and reduce pounding in chop, especially when I have passengers aft. My longest trip to date was 140 miles over five days, from Hampton, VA to St. Michaels, MD for the 1999 Wooden Boat Show. Did it in the open version, camping on islands two nights and aboard bigger cruisers as a guest the other ones.
 |
My longest trip to date was 140 miles over five days, from Hampton, VA to St. Michaels, MD for the 1999 Wooden Boat Show. Did it in the open version, camping on islands two nights and aboard bigger cruisers as a guest the other ones. |
|
When I moved from a Cruise 'n' Carry to a much heavier 4-stroke Yamaha 4hp, I moved the motor mount to the port quarter, accessible from the cockpit. I use the motor very little, however, and unless I plan to go a long way from the ramp and there's a chance the wind might quit altogether, I don't even take it along.
Building Particulars
“Orion”
20-foot windsurfer-rigged
Cat-ketch
Stem and sternpost: get out of 2x6 mahogany. Stem in front of stemhead is laminated oak, 1/8" laminations nailed and glued.
Skeg 1-1/4 x 6 mahogany, or laminate. Runs from back of CB slot where it is about 1" high.
Gripe - mahogany, teak or oak, 1-1/4 net.
Sheathing: bottom ½" Doug fir ply (I personally use AB grade exterior, bad side out, which I fill with thickened epoxy and fair before glassing);
sides 3/8 ply; bulkheads 3/4 ply; decks and hatches 3/8 ply;
enterboard case 3/8 ply.
Centerboard: I edge-glued 2x4s and planed down to approx 1-1/8 thickness, but you could just as well build up ply to that thickness. Took about 30 pounds of lead plugs to sink, even after glassing with two layers of 8-oz. Pivot pin is 3/4" galvanized pipe through PVC bushing in CB. Insert through holes in CB case and through CB, then epoxy beveled ½" plywood caps to cover hole in CB case. CB hoist is 1/8" SS cable, direct lift, swaged onto a thimble shackled to a SS screw eye set into trailing edge of CB. CB is glassed and coated with epoxy/graphite, as is bottom of boat up to nominal waterline. Whole exterior is glassed.
Keelson 1-1/2 by approx 3-1/2 doug fir.
Chine logs: 1-1/2 x 3/4, laminated to two-ply (i.e. 1-1/2 square).
Sheer logs 1 x ½ laminated to two=ply.
Side decks 3/4" square edge-glued and screwed to desired width (I ripped from hand-picked construction grade pine, i.e. framing lumber). Maximum possible lengths, butted.
Rub rail (upper) 1x1 mahogany planed to 3/4" outboard.
White stripe below upper rub rail 3/4"x2 pine.
Toe rails 3/4" wide at base to ½" wide at top x 1" high mahogany.
Cabin sides and coamings fore and aft 3/4"x2" pine, edge glued and screwed with SS decking screws. Note I added cabin over existing coamings from open version.
Front of cabin ½" fir AB ply with 1/8" mahogany or okume veneer glued to front side.
Sails are 7.5 square meters each with standard windsurfer booms.
Sheeting should be apparent from the photos, but is essentially made up of separate port and starboard sheets for each sail, starting from a becket on a block on a padeye, running through a block on the boom, coming back to the block on the padeye, and running forward or aft as the case may be to the jam cleats seen in the photos. I have found that free-standing masts do not support sails larger than 7.5 square meters when it begins to breeze up, especially as newer designs put more area up high and thus more leverage on the masts.
Masts are maximum length and stiffness epoxy of minimum cost. Originally extended with an oak plug bottom and a laminated insert top. Now extended bottom with two sawed-off sections of a salvage mast (found in local Trading Post classified) inserted telescope-style about 30 inches into bottom end of mast. Top extension same as before.
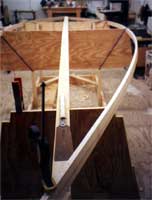
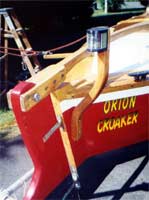
As for that mooring bitt, which one wag named a “salmon post”, I built the boat with stem and sternpost standing on shop floor and screwed to braces. When I detached them and turned the hull over, there was a screw hole that reminded me of a fish’s eye, so I cut the profile to shape to take advantage of it.
If you need further dimensions or details, just email me. I will leave you some license to make minor modifications of construction details that make sense to you and allow for easier building, but I want to keep the overall dimensions, shapes and concept as built. It sails fine as is and, at least to me, pleases the eye.
|