|
Applying Graphics to Trixie B |

|
|
By Jerry Church - Santa Rosa, California - USA |
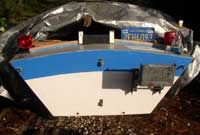
I always wanted to put some nice letters on my San
Francisco Pelican 12 Trixie B
so everyone would know who she is, but typical store-bought lettering does not
appeal to me. I obtained my graphics from Duckworks as soon as I saw their new
advertisement. I was able to get custom lettering through Duckworks that isnt
readily available elsewhere, that I know of. They offer many fonts and colors.
I chose the Brush Script in royal blue. It almost matches my blue paint. If I
was going to do it again, Id get larger letters. Id suggest printing or
drawing the lettering about full size to get an idea of what it will look like
before committing to ordering the letters.
The whole job was pretty painless, but I would wait until
afterward to open a cold one. I spent an hour and fifteen minutes overall, and
that included removing the tarp covering my boat, changing a flat trailer tire
so I could make some working space, and getting everything together so I could
take pictures for this write-up. I think getting organized ahead of time
probably saved time overall, versus my usual run-and-get-it-as-I-need-it
method.
I ordered the graphic from Duckworks using their online order form.
From date of order to receipt of the graphics took about two weeks, including a
couple of rounds of questions and answers. As usual, Duckworks service was
extraordinary.
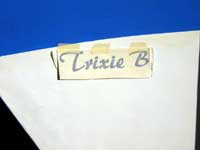
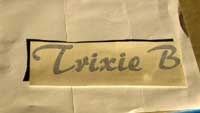 The graphic came in an envelope with paper linings on both
sides of it. One side has typical label backing material, and the other side is
covered with a paper tape of some sort. The photo is taken from the paper tape
side, the ends of which were wrapped around the backing to keep everything
nicely wrapped during transit and while waiting for application. A very
detailed instruction sheet was included. The graphic came in an envelope with paper linings on both
sides of it. One side has typical label backing material, and the other side is
covered with a paper tape of some sort. The photo is taken from the paper tape
side, the ends of which were wrapped around the backing to keep everything
nicely wrapped during transit and while waiting for application. A very
detailed instruction sheet was included. |
(click images for larger views) |
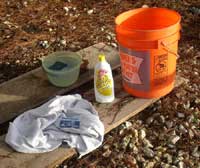
| Tools and Supplies: Bucket of clean water, mild cleanser, mild detergent and water, sponge, towel, West Marine Rewards card (or other suitable squeegee), and masking tape. |
|
|
Step 1: Surface prep. Clean the surface with mild cleaner followed with detergent and water rinse. Dry the surface thoroughly.
 |
Before scrubbing:
|
|
I’m amazed the difference is visible in the photos:
| After scrubbing |
|
|
Step 2: Position the graphic in place with masking tape.
 |
You’ll want to get this right, after you’re finished there are no do-overs. |
|
Step 3: Prepare to apply the graphic. Up until now, it’s pretty simple stuff. The instruction sheet describes a “hinge” method for applying a large graphic one half at a time by taping down the center of it. My graphic is quite small, so I opted to change the procedure slightly.
| I taped the upper edge and applied the graphic by rolling it downward from above. |
|
|
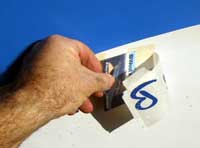
Step 4: Remove the adhesive backing.
 |
If you use the instruction sheet’s “hinge” method, you would only do one half of the graphic at a time.
|
|
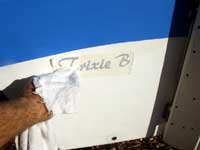
Step 5: Apply “Rapid Tac” to the graphic and the bonding surface, or use the alternative - 1 tbsp detergent to one gallon of water. This is what I used. I applied the solution with a sponge.
Step 6: Press the graphic onto the surface. If you’ve used the “hinge” method, you would peel off the second half of the backing at this time and press it down as well. This picture is posed, I’m right-handed and so is my camera and I was unable to work and photograph at the same time.
I started pressing while rolling the graphic from the upper left corner and rolling it down to the lower right corner. I rolled the graphic to prevent trapping air bubbles under it. I pressed the graphic with the squeegee behind the “roll” as I applied the graphic. This “rolling” technique is a method that I’ve used successfully numerous times for applying adhesive-backed optical quality film onto glass in my line of work.
| It worked well for this application, also. No air bubbles appeared at any time during the application. |
|
|
 |
I squeegeed the whole thing afterward, then pressed it gently with a towel-wrapped finger.
|
|
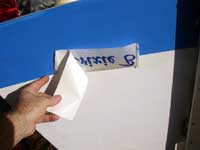
Step 7: Spray the paper backing with window cleaner, letting it soak for a few minutes.
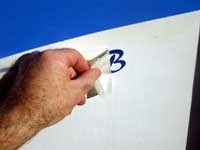
Step 8: Gently and SLOWLY peel back the paper backing. This was the trickiest part of the whole process, so be ready to be patient and watch what’s going on very closely. The starting corner of each letter may or may not lay down when you peel off the backer. My letters are pretty small and petite, so they may be more prone to lifting than larger block style lettering. Overall, this was pretty easy for me – just take your time.
| I used the squeegee card to hold down the front edge of any letters that wanted to lift up. |
|
|
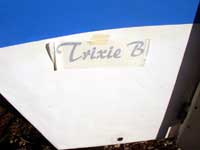
Step 9: Press and carefully rub the newly-applied letters gently with a towel. Let them sit without disturbance for quite a while. I bravely checked to see if the letters were firmly attached right after application, and they can be removed pretty easily. Make sure they won’t be disturbed.
 |
It has been a week since the letters were applied, and they passed my “fingernail lift test”. I think they’ll stay just fine.
|
|
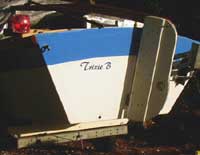
The finished product looks professional and everyone who has seen it is quite impressed. I’m very pleased with the end result and the application process is both quick and easy. This is about the easiest way to get professional-looking custom lettering without hiring a sign painter that I know of.

Other articles by Jerry Church:
|