| Polepunt
is a cheap and simple boat, and it might not seem
worth a building article at all. But there are a few
technical details where a short discussion might save
the next builder some time. However, the reason I
started writing this article is different.
Working with kids
At six years, my eldest daughter, Thalia, was ready
to help dad with a project. She got interested in
Polepunt when I pointed out that she could row it
with kid-sized oars. She has always wanted to help
with the rowing, but the oars in the light schooner
are far from kid-sized. Polepunt is also the right
size and complexity level that a kid can take a meaningful
part in the project without losing all interest before
it is complete.
Maybe this seems trivial, but I don’t think
so. Once the boatbuilding bug bites you, you will
need to find a way to get your family involved or
you’ll never see them! (I exaggerate, but less
than you might think.) The trouble is that most of
us don’t know how to do shop work with a kid.
Let me offer some ideas.
Drawing the lines
Thalia took great pride in striking the lines once
dad lined up the straightedge. I showed her the numbers
on the plans, then she would find the number on the
tape so I could make the marks. She learned all about
getting your body in the right place to make a good
mark. And she also got to strike the curved lines
while dad held the batten in place.
While she liked making the lines, she wanted to be
far away while power tools were in use. Smart kid.
I showed here the use of the hand saw and planning
to a line, but she’ll need a bit more physical
size to make these tools work right.
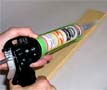
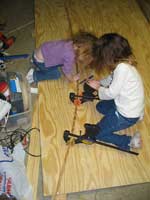
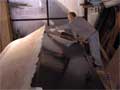
Of course they do get bored fast, and it’s
hard to keep them occupied. Here they are destroying
some Styrofoam. You can see why I seldom throw things
away.

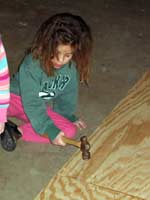
Driving nails
Kids love driving nails. It’s good to have
lots of cheap little nails and some scrap wood for
them to practice on. Thalia actually helped with the
real nails on the wales and bulkheads. I’d start
them and she’d get a few of them close to finished,
then I’d drive them flush. She especially enjoyed
clenching. There might be lapstrake in her future.
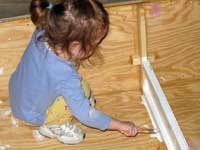
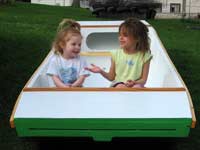
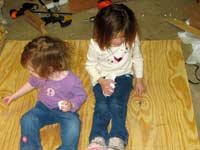
Painting
Kids really love painting. Even Rhea, the three-year-old
could help paint. Make the most of it!
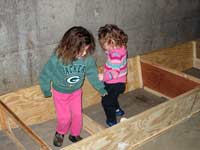
Going 3-D
This is a magical moment for any boat builder. A
pile of parts becomes a boat. They mostly just handed
fasteners to dad, but it is no less magical for kid
boat builders.
Bending the Chines
OK, here begins the technical part. In the plans,
Jim is not kidding about finding good bending stock
for the chines. I broke the best I was willing to
pay for, which was admittedly not very good. (I picked
through the entire pile of cheap construction grade
lumber.)
With this tight a bend and a 1.5” section,
any grain runout will cause a break. 1.5” at
this radius generates enough force to rip screws out
of the edge of the plywood. I decided this was too
much force on the fasteners and laminated the chines.
But I didn’t laminate the whole thing because
that seemed like a waste of space and glue. Only the
ends. I did it with three plies, but that was mostly
because I had some thin scraps with the correct bevel
already sawn. Two plies would probably work fine.
Actually, it was a lot easier to glue up with the
bevel already sawn on one piece – this helped
force at least one ply down against the plywood jig..
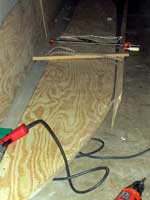
I used some blocks cut from the broken chine to make
the laminating form, then painted on some melted candle
wax to be sure no glue would stick. That bevel angle
forces the first piece of the lamination flat against
the base of the form. This tends to reduce any tendency
of the lamination to creep upward. But be ready to
clamp downward if you need to.
By the way, the curved cutout on the plywood is unnecessary.
I just used the piece the side panel was cut from
because it was convenient. And yes, I know you’re
supposed to heat wax in a double boiler. Outside the
frame is a bucket of sand for dealing with potentially
spilled, burning wax.
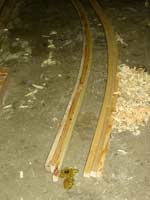
Here is what the newly laminated chine pieces look
like, along with one already dressed with a plane.
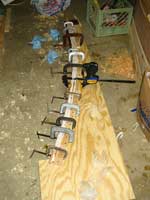
Scarphing
Once bent, I needed to cut scarph joints so the middle
part of the chine could be fitted later. For this
I made a scarph guide. Two pieces of 1x cut at an
8:1 angle, and a base board. It’s all glued
and screwed together, and just wide enough for a cheap
block plane to ride on. In use I kneel on it on the
floor, so no need for clamping. The stock is rough
cut to an approximate angle to reduce planing.
From here it is an easy matter to run a plane over
it until it is flat. You’ll know you’re
done because it stops cutting. And of course now I
have the scarphing jig for next time I need it. (Probably
soon, with as bad as cheap lumber seems to be getting.)
I used Titebond III, but epoxy would let you get away
with joints that are not fit as well. I would not
use PL400 for this kind of joint – you want
a stronger, harder-setting glue.

Nailing these chine ends to the side panels is just
as simple as any other bit of nail and glue construction.
But fitting the straight piece is slightly tricky,
since it has to fit accurately to the scarph joints
on both ends. This is not the place for “measure
twice and cut once”. Better to make it deliberately
oversized and shave it down bit by bit until it fits
exactly.
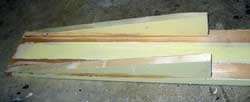
I ended up with a straight part that wasn’t
quite as wide as the laminated part. This was mostly
because I didn’t feel like adding another ripping
step to even them up. I asked Thalia whether we should
try to even it up with a Dremel or call it good and
move on. She thought it would look OK once it was
painted. She was right. Smart kid.
Anyway, these chines might have been easier with
good bending stock, but maybe not. With a scarph jig
it was pretty easy. It just took a little longer because
of more glue-drying steps. But that fits pretty well
with fitting such a project around work and other
commitments.
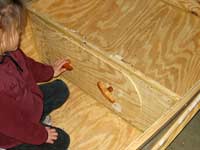
Hatch Covers
Tim Lehman came up with a great way of doing hatch
covers. We’ll take a closer look at these in
a future article, but here are some photos so you
can see how it works.
The first cool thing about these was showing Thalia
how to make trammel points from a piece of scrap cardboard.
She was suitably impressed. Dads don’t have
many years as a hero, so we have to make the most
of it.
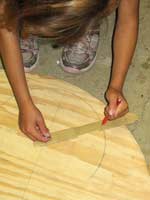
And yes, I do have a drawing compass…somewhere.
I really never bother finding it because it is so
easy to poke two holes in a scrap of something one
radius apart.
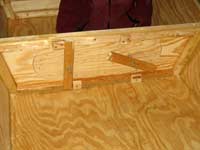
Note that the holes for the tension knobs cannot
be at the center of these semicircles. They must be
closer to the centerline to allow space for the retainer
bar to be withdrawn from the hatch. I figured it out
by cutting the bars, then laying them on the hatch
cover and drilling through the hole in the bar.
The next cool thing for Thalia to help with was clench
nailing the parts of the cover together. I cut the
oversize plywood piece and planed the edges. Together
we clenched nails.
And finally, we added the stop blocks inside the
compartments after the bottom was on. This might be
easier to do before the bulkheads get installed, but
maybe not, since you would have to trim them to fit
the bottom.
But I’m getting ahead of myself…
Hardwood Pieces
There was a wrinkle in putting the hull together.
The 3” framing sticks on the sides of the transoms
have to restrain all the force of the bend in the
chine and wale. I know most folks put the wale and
chine on after assembly for this very reason, but
it is a lot easier to nail things flat on the floor.
You don’t need to pay for screws or worry about
holding a backing iron.
But cheap construction grade pine couldn’t
stand up to these screw forces. The transom side frames
split as soon as I put the first screw in. I guess
it is a lot to ask of a 3” piece of 1x2. But
I had some scrap ¾” red oak flooring,
so I replaced these “cheek” pieces on
the transoms with the harder wood. When pre-drilled
it held the screws just fine. For these four small
pieces, the increase in weight is imperceptible.
A Transom Change?
That does raise another minor issue. Forming these
transoms from two 1x2s on a 3” tall plywood
panel leaves a tiny slot between the pieces of wood.
This slot is very difficult to paint and clean. I
think it would be easier to make this from a single
1x4 instead of two strips. This would also provide
a better surface for mounting handles or other hardware,
and at the expense of hardly any weight. I know it
seems inelegant to glue a full width board to a plywood
backing. Maybe one could skip the plywood except to
use it as a gusset at each end, to fasten the cheek
piece. Maybe an alternative would be to biscuit join
the cheek pieces to the transom planks and skip the
plywood. I guess it is pretty convenient to have the
plywood there to serve as a template if nothing else.
A bevel mistake
Speaking of plywood templates, I ran into one other
problem going 3-D. I’m absolutely certain this
is my fault, too. After beveling and assembling, I
wound up needing to add shim strips about ¼”
thick to get the top of the bulkheads up to the same
level as the sheer.
I’m pretty sure this means I somehow did the
bevels with the line on the wrong side. This is easy
to do. Let’s look at a transom as an example.
The measured transom is supposed to coincide with
the very end of the boat. But the framing sticks take
up some of that space. So if you measure and cut the
plywood to the recommended end-of-the-boat lines,
you have to plane the framing smaller to get the bevels.
Now your transom at the end of the boat is smaller
than on the plans. This is why Jim provides not only
transom angles, but also the additional measurement
that should be added to the dimensions of the plywood
transom. I figured out too late why he provided those
measurements.
Of course this is a small difference and the boat
still works fine.
Cartopping Tricks
I asked Jim about how to tie down camping gear and
he suggested making some holes just below the gunwale.
I was shocked at first, but he pointed out that the
true effect on freeboard is slight. Water can’t
come in that fast through several 1/2” holes,
and at that point you’re likely to be taking
more significant water over the gunwale anyhow. And
anyway, this is not a sailboat that will be heeled
over for hours on end.
The gunwale holes led me to a cool way of cartopping.
With the cleats on the boat I didn’t need anything
more than a factory roof rack and a bit of foam pipe
insulation for padding. But a set of gunwale holes
had to line up with rack. Each cartopping line runs
from an eyebolt in the thwart frame, through the hole,
under the roof rack, over the boat, under the roof
rack on the other side, through the hole on the other
side, and back to the cleat on the thwart frame. This
lets the same line restrain the boat fore and aft
as well as down.
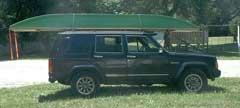
I have five feet between racks, and five feet unsupported
fore and aft. It seems I wouldn’t need a bow
line with this system, but I did. The rack started
ripping out of the roof of the Jeep at highway speed!
I guess these racks don’t really resist upward
loads too well. The rubber well nuts start to get
chewed up. In any case, the final touch was to add
screweyes to the stern to flag the overhanging load.
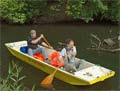
Parting Thoughts
The Polepunt is a LOT of boat for a cartopper under
$200. In future articles we’ll have a look at
some of the things it is good at.
Rob Rohde-Szudy
Madison, Wisconsin, USA
robrohdeszudy@yahoo.com

Click
Here for Other Articles by Rob Rohde-Szudy
|


 Graphite bottom coating