| It was a year ago that I wrote the first
part of this saga, and it seems time
for an update.
We have made lots of progress on our boats, Someday
and Trinkel. It has been a challenge and
a lot of fun as well. We had hoped to get the Micro
Trawler done in time for the Minnesota Mess About
last year, but did not make it. Lots of things come
up when you are building a boat. Things like the wedding
of the eldest child. These sort of things take time,
and money, that could be used for the boat. Not that
I am complaining, you understand, just a comment!
Trinkel
 |
Emily and her
mom in the pram
click images
to enlarge |
Emily finished her pram in July of ’06, and
entered it in the county fair as 4H wood working project.
There were days that I was not sure we would ever
see the pram done, but she stuck with it. For those
of you that did not see the first
story, Emily has Ataxic Cerebral Palsy.
This type of CP affects muscle tone, balance, depth
perception and hand eye coordination. I must confess,
I am VERY proud of her and her pram, and the fact
that she stuck with it. This is in no small part due
to the encouragement she received from other boat
builders on the internet. Some of you have been to
the web site, www.messing-about.com,
and the folks there were a big part in her finishing
her boat.
 |
Emily sanding
her pram |
Emily and I sanded the inside of the pram, painted
the out side, and varnished the inside. We put a gunwale
that allows for water inside the boat to be poured
out. A piece of oak was ripped into strips first.
Emily cut 2” blocks out of one strip, a ½”
wide, and a ¼ strip was fastened to the outside
of the hull, then one of the blocks, and another strip
on the inside. We left a gap of 2” between each
block, and any water we get in the pram can just be
poured out between the blocks. The out side strip
is the rub rail and adds a fair amount of stiffness
to the hull. She wanted a small dry storage area,
so we put a hatch in the front flotation area. This
pram will not be used with a sail, due to her CP,
but a set of oars or paddles work just fine.
 |
Emily cutting
blocks for the pram gunwale |
When she told me that she wanted to enter the pram
in the fair, I was a little nervous about the judging.
Unfortunately, it went about like I was afraid it
would. The judge did not look at plans, photos or
ask questions about how she made her boat, or how
long it took. But the folks that have built boats
know what it is all about, and told her so. Thanks
again to Frank, Doc, Alda, Oyster, Barnacle Jim, Doug,
Barry, Charlie, Jeff, and any others that I missed
for the encouragement and support.
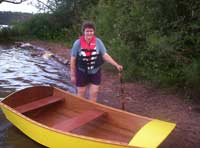 |
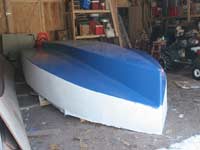
Emily and her
pram |
We splashed the pram on July 31, 2007. I asked Em
where she wanted to launch, and she wanted to go right
to the big lake, Lake Superior. Talk about confidence!
We did, and it was great. We paddled around the bay
with no problems at all.
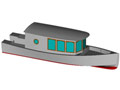
Someday
Well, Emily got her boat on the water in 2006, and
my goal was to do the same. I did not make it there
however.
 |
The hull in
the garage, upside-down on saw horses |
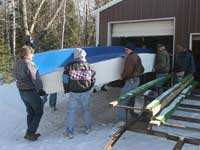
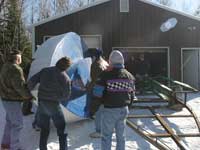
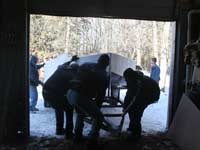
In March I asked a bunch of folks to come over to
the house for some lunch, and to help with the hull.
The hull was in the garage, upside down on saw horses.
It needed to come out of the garage, be flipped over
and put on the trailer, and then be pushed back into
the garage. Once back in the garage, the wheels were
pulled off the trailer, it was leveled, and I put
plastic up around the hull and started to work on
the bulkheads and decks. The plastic allowed me to
put a propane heater in the garage and work with some
comfort in the winter.
 |
Carrying the
hull out of the garage |
 |
Flipping the
hull onto the trailer |
 |
Pulling the
hull and trailer back into the garage |
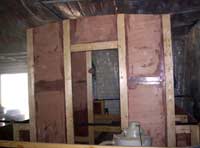
We installed the bulkheads, filleted them in place,
and put the sheer rail on. Then the decks on the sides
of the wheel house and on the bow. We also put a lot
of foam in any area that we could for flotation. I
added 4’ to the length of the hull, so another
bulkhead was needed. That was installed, and them
the aft deck supports and deck were put on.
 |
Fitting bulkheads |
 |
Side deck being
glued in place |
 |
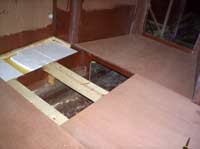
Fitting foam
in the bow of the MicroTrawler |
 |
Rear deck area |
 |
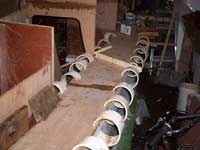
Holding deck
down with weights and PVC clamps while gluing |
Once all the decks are on, we started on the sides
of the wheel house. I put the sides on as full sheets,
and then positioned the windows and cut the holes.
The windows came from an RV supplier, and are a vertical
slide open design, with screens to keep the bugs out.
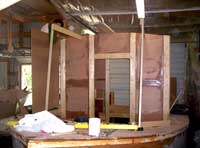 |
Starting on
the wheelhouse sides |
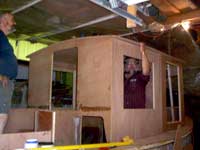 |
Putting the
roof on the wheelhouse |
I scarfed two pieces of plywood together for the
roof, and with the help of a couple friends, we got
that on and in place. Once the roof was in place,
and the window openings were cut, we started to paint.
I took a lot more time to paint the inside with all
the little nooks and crannies then I ever thought
it would.
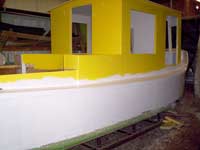 |
Primer and paint
on hull and wheelhouse |
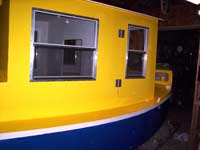 |
Windows and
door in place |
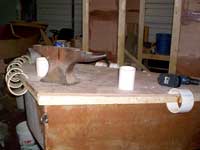
After the priming, we put the galley counter in.
I have a two burner propane stove from an old camper,
and a small sink too. The steering is a Tele Flex
system, and Emily chose the wheel.
I am spending my time now routing and pulling wire,
touching up the paint and trying to get all the little
stuff done. The goal is once again the Minnesota
Messabout, June 1-3 on Lake Pepin. I
hope I make it this year.
Stephen Collins |