|
|
| January
- February - March - April - May - June - July
August - September - October - November - December |
Christmas Cards
Hi again guys,
We came across some nifty Christmas cards yesterday
at our local (small town) marine chandlery. Turns out that they’re
produced by an artist who lives in Brentwood Bay BC, only a
few miles from us.
Her website is: https://www.clarkandmihaly.ca
- and I’ve just discovered that she has an Alden
Malabar Jr.
I have no vested interest in this, other than
providing a link to what I consider some really nifty designs.
Cheers J
George
|
 |
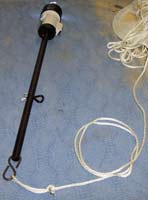
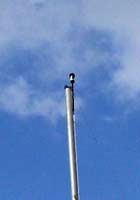
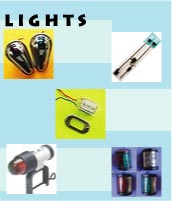
| Anchor
Light
I made a removeable anchor light
from one of your LED stern lights - #IL-560-2113.
here is what I did: - I drilled an extra hole about midway of
the tube and inserted the black eyebolt that came with the light.
I installed an "S" hook in the bottom hole of the tube
and attached a "tail rope" to it.
To use the light, I simply hook
the mainsail halyard to the eyebolt in the center of the tube
and pull up the mast all the way to the top,,,,, secure the halyard
and then pull down on the tailrope which in turn raises the light
(180 degrees) and it is "above" the top of the mast,
allowing 360 degrees visibility.
wha lah!
Bill Tosh
|
|
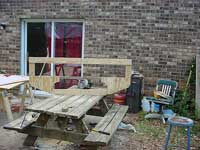
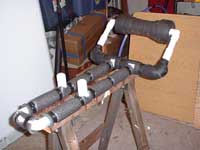
| Curt-A-Loader
This may be a little lengthy but I have to explain
what led to my curt-a-loader.
I use Malone seawing saddles. When I use 2 sets of them, for
shuttling, they overhang each side of the vehicle. I wanted to
buy a wheel loader but the easy ones that do not need to be attached
to anything all fit in the top crack in the rear hatch door. For
me the wheel would be too far off center of the cradle. Also,
there are hinges in my rear door that won’t allow proper
placement for anything other than loading in the middle. The way
I made mine allows for all offsets and obstructions and the kayak
can be slid straight on to the saddle. The loader does not need
to be attached. It simply sits on top of the roof. After the boat
is loaded simply remove the loader. It just sits on the roof as
if you’re laying it on a table. That’s it, done.
 |
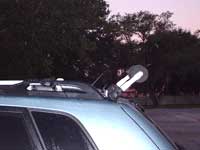 |
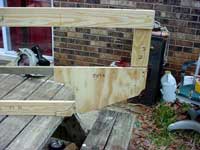
The 2 small nubs that stick up prevent the loader from sliding
forward while loading. The extra length beyond those slip under
the cross rails. When the boat is unloaded the weight of the boat
raises this (there is very little extra room to begin with) to
“hold” on to the under side of the cross rail, preventing
the loader from sliding out of position. I don’t know if
I really need the nubs or the extended portion as I never had
this move on me at all. The length from the nubs to the wheel
is adjustable (hidden under pipe foam) to fit any SUV. The adjustment
device is just pipe couplers with whatever length pipe you need
between them. These are screwed in only. This turned out to be
not needed also but when I built it I did it this way just incase….It
could come in handy if I were to get a new SUV I suppose.
You can see this is made of pvc pipe and pipe insulation. I used
pipe insulation tape to form the tapers on the wheel. All the
joints are glued and screwed. The axle on this is ½”
sch. 80 pvc with a 1” pipe over it. I angled the wheel to
be just beyond the back window. This is what makes the loader
tilt to lock in position when removing the boat. The rest is ¾”
sch. 20 pvc pipe. I loaded 70 lbs with it. If I were to load heavier
kayaks I would use sch. 40 or 80 depending on our needs.
The size to fit my Tucson is about 14” x 24”.
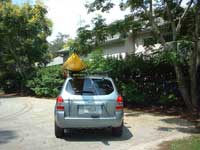
The pictures are pretty clear on how it all goes together and
where it sits on the SUV. I don’t have my saddles on for
the pic but the wheel is just slightly above the saddle for smooth
sliding.
The first time I used it I couldn’t believe how simple
it was. I had “j” cradle autoloaders and that was
not nearly as easy as this. Just as you would any rear wheel loader
device, I lift the front half of the boat and place it on the
wheel. Half the boat having a pivot at the rear makes it very
light. After the bow is on the wheel, the wheel becomes my second
person. Than I just lift the stern, again half the boat and having
a pivot at the wheel is very light, and push the boat forward
to desired position.
Depending on materials used, this type of loader is enough to
load any type of boat that can be loaded on a roof.
Curt G |
|
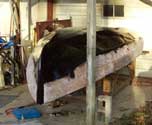
| Chris Craft Runnabout
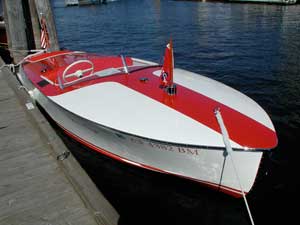
click image for larger view
I'm restoring a vintage 1948 19'
Chris Craft Racing Runabout. New Frames, New Bottom and New topsides.
All Bedded in 3M 5200 with over 2000 screws.
The deck is about to be applied........
3/8" hydrotek 1088 7 ply. This class of runabout after the
2nd world war was not planked with mahogany. It was covered with
3/8 3 ply fir plywood and further covered with a muslin like material,
then painted with copious layers of paint. This was done to hide
imperfections and the read through of the hard & soft grain
of the fir plywood.
Tom P |
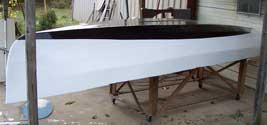
| 500th Navigator
She's ready to roll over. Bill
T |
| Mikesboat
So, I finally got started- 70 degrees
F in Atlanta today! Tempted to glue something, but it will be
too cold tonight and I still can't build indoors. That picnic
table has been used for 5 boats now!
All bulkheads cut, one set of sides and chinepanals laid out.
Think I will go out and layout leeboard, rudder, and stock next.
Bill M |
| Thanksgiving
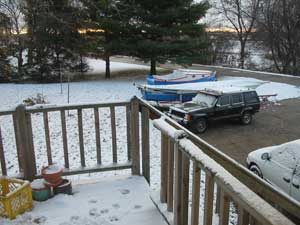
click image for larger view
Jim Michalak once described me
in print as having "boundless energy and enthusiasm".
It's a lovely image, but I think the truth might be closer to
"stir crazy and manic". The attached photo is Thanksgiving
morning 2007 in Madison, Wisconsin. Let's just say that I have
a lot of the year to get stuff done in the shop.
--Rob Rohde-Szudy |
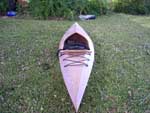
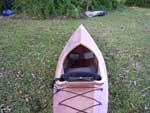
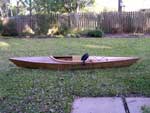
| Laker
My Laker
is almost completed
James H |
|
| Articles?
I'm a long-time reader of Duckworks and a subscriber (mostly
lurker) to the mailing list, writing to see if you folks might
have an interest in a series of articles about a boat in progress.
We needed a boat to use in large Maine lakes, able to be powered
by a small (current thinking is 15-20 hp) 4-stroke outboard, with
a cabin just big enough for minimal shelter and a porta-potty.
There are, of course, quite a few boats that would fit that bill,
but we have an additional requirement that eliminated my favorite--Karl
Stambaugh's camp cruiser REDWING: There's a bridge we have to
get under that allows a maximum of four feet from the waterline
to the topmost part of the boat. I looked at a lot of plans and
bought a few including two designs from Jim Michalak and one from
Wes Farmer and finally settled on a design of my own--I call it
a lake skiff--based loosely on LARK, a traditional Chesapeake
Bay skiff whose plans I got from the Chesapeake Bay Maritime Museum.
I built quite a few minimalist models (these my wife named "ghost
models" because they reminded her of the architectural "ghost
frames" of historical buildings at St. Mary's City, MD) to
evaluate hull shapes, dimensions and so forth. One of those models
is shown in the next photo.
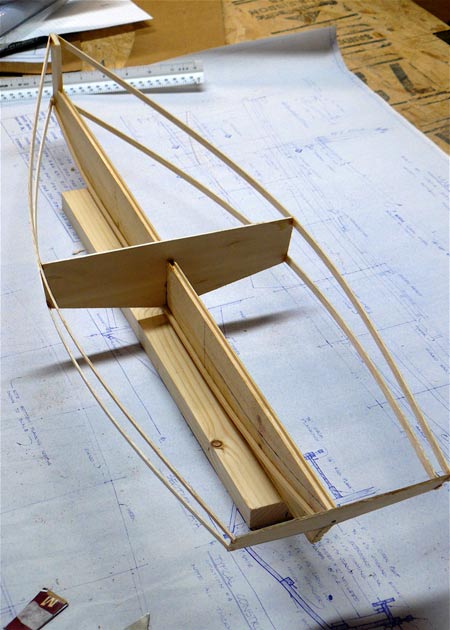
Once I decided to incorporate a round stem in homage to the most
famous craft of our local lakes--the Grand Laker canoes--I had
to figure out how to MAKE a round stem, something I'd never had
to do on any previous projects. I came up with a stitch-and-glue
plywood construction method for what is usually a solid timber.
The model worked, so I made a full-size one.
I have quite a few photos detailing the whole process. Please
let me know if you'd like to see an actual article to get started.
I'll have a bit of time to write in the next few weeks. Thanks
much.
--Charlie E |
|
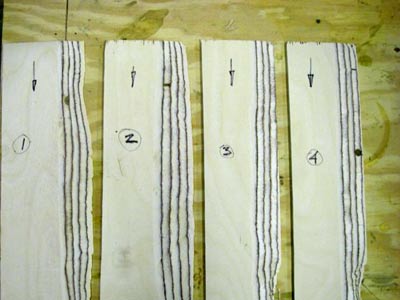
| Three Letters on
Scarfing
Nov 23:
Chuck,
Please look at the four scarph samples below. This is my first
attempt. The samples are 1/4" (6mm) Baltic birch labeled
in order.
The arrows show the direction of cut, leading and trailing edge.
It appears that the cut improves in uniformity somewhat but the
last two show the trailing section near the end of cut falling
apart. I don't know what I'm looking at or for and am not sure
of what a good scarph cut really looks like or what to expect
and what is acceptable.
Can you comment on this?
Thanks.
Best,
Jim
Jim: Practice makes perfect. Also you may be having trouble
with "chatter" - the edge of the plywood vibrating
as you cut the scarf - Chuck
Nov 24
Chuck,
Here is a drawing photo of the scarphing fixture I built, per
instructions that came with the boat plans. This is attached to
the circle saw. The cut is done upside down.
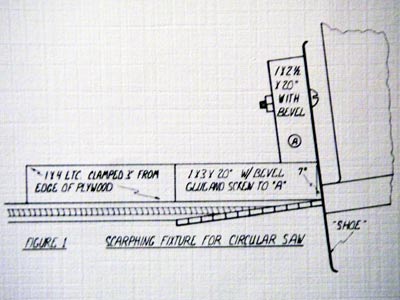
After reading your comments about chatter, I am thinking that
maybe I shouldn't have had the plywood sheet overhanging the edge
of the cutting table. I thought the edge to be scarphed had to
be out from the table's edge several inches so the saw blade didn't
run into the table. I'm thinking that I should have clamped the
ply flush with the table's edge. Maybe the blade doesn't even
cut into the table, or much at all. This part of the procedure
wasn't mentioned in the instructions.
Thanks for your comments.
jim
Jim: it is important to secure the ply when making a cut
like this. The table is supposed to do that - Chuck
Nov 25
Chuck,
These samples photos below were done after your suggestion to
minimize chatter. No. 5 was done flush with the table with the
idea to give complete support to the ply. You can see it was the
worst of the bunch and the saw blade did indeed cut into the table
top as feared. Not good. No.'s 6 and 7 were done with the plywood
at a 2 1/2" overhang. The guide clamp for guiding the saw
fixture was clamped 1/2" in from the table edge. My idea
was to give the weight of the saw and fixture something more to
rest on. The 1/2" dimension also gave the 3" necessary
to fit the fixture's foot. The first attempt looked pretty good
to me. My concern then was repeatability so I tried it again with
the same clamping method as above. No. 7 looks very close to No.
6.
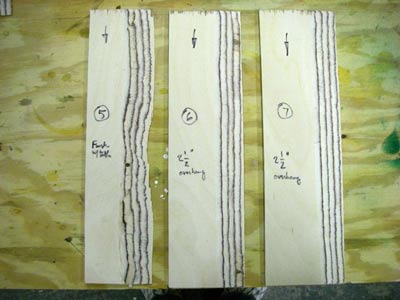
What do you think? Are No's. 6 and 7 acceptable?
I'm going to get my blade sharpened Monday. All this cutting
has started to dull it I'm sure. I didn't photograph some of the
earlier tests - which were much worse. Terrible actually.
jim
Jim: I think you have got it! There is nothing wrong with
6 and 7 above. - Chuck
|
|
|
Free Services Available to Boaters Worldwide |
Traveltrac LLC announces the Version 1 release
of Sailtrac.com to sailing, cruising, and boating enthusiasts
worldwide. Designed as a non-commercial easy to use real time
web hosting domain that integrates mapping tools, Sailtrac provides
users the ability create their own private web pages with complete
with Google maps, remote position reporting, online text journal,
and the opportunity to post photos and videos and share them with
their network of friends back home. Draw your intended route course
and actual course traveled on all bodies of water worldwide in
real time. Integrate Buoyweather reports for that date and location.
Account registration is absolutely free. No need to learn complicated
HTML or other computer programming languages. Using Sailtrac’s
step by step tutorials you can quickly and easily create your
own custom web pages. Provide friends and family back home with
peace of mind and the ability to share your adventures on the
high seas, even if it is just a weekend outing under anchor. Create
an automatic e-mail address book that instantly notifies recipients
of your last reported GPS coordinates, creates a satellite photo
map with zoom features, shares a private link to your automatically
updated Sailtrac pages sharing your private videos, photos, and
journal entries from all along your route available to your private
address book of recipients. If you so choose you can make your
pages “public” and share them with the greater Sailtrac
community.
Let Sailtrac help you host and update your own custom web pages.
It’s FREE. Create your own historic record of voyages and
travels and
share them online. Visit us at www.sailtrac.com
to learn more.
|
|
|
|
|
|