In April 2008, my Seil-18 plans were delivered by the mailman. By then, I had already shaped the mast and gaff to the detail drawings that naval architect François Vivier had sent me in advance (as I was eager to start) while he was still completing his updated drawings. The package contained a roll with three 1:1 drawing sheets and an envelop with a booklet containing building instructions, a manual with boat building techniques and a 1:10 drawing of the entire hull. The full-size patterns on polyester sheets are wonderful to work with. No lofting is required. It's really hard to make any mistake at all (though I managed to do so while marking minute plank notches on a station).
 |
drawings and booklets |
============
One of the key features of the new Seil-18 plan is the sturdy 12 x 16 inch hollow beam that keeps your boat straight while it's being built. In fact, the jig is also a very convenient support to cut out planks from the scarfed, 18 foot (!) boards in case you don't have such a long table on hand. It's also very useful to keep the station moulds in line while you shape the hull.
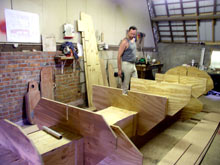 |
The jig - I added battens inside to connect horizontal and vertical parts |
============
Another great feature are the 45 degree supports, which allows you to tilt the boat. I was sceptical about them first, but they proved to be handy to work on the bottom plank after fixing the fourth planks. You might want to brace the supports lengthwise, because they tend to wobble.
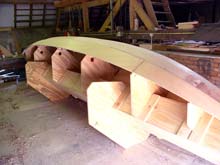 |
Tilted jig after attaching the 4th hull plank on both sides. |
============
Because I settled for a medium quality marine plywood, of light but relatively soft okoume, I decided to cover the entire hull with glass and epoxy to protect it. Therefore I had to fill and sand more than would have been the case with premium plywood. I covered the bottom plank and garboard with 3 layers of light, diagonally woven glass and the other planks with a single layer.
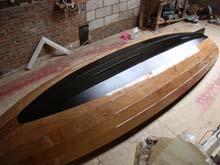 |
The hull is glassed and painted before turning it over (my preference) |
============
So after what felt like a million years, I finally flipped the hull (still very light - it could be lifted by two) to start with the inside arrangement. In this stage, it's very important to keep the hull straight and wedge it well because it can still twist. Concerned about this, I asked François Vivier by e-mail if this was normal, and he assured me that it would become rigid once all inside components were in place, and so it did.
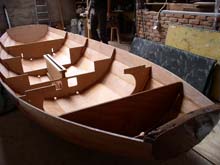 |
The Seil-18 after turning her over |
============
No matter how meticulously a plan is conceived, there's always room for improvisation and even improvement, if I may say so, in the building process. I didn't like the prospect of casting hot lead (ballast inserts in rudder and centreboard). Instead, I chopped up a roll of roofing lead and mixed the snippets with epoxy glue, which was then poured into place. It's a safer method, and this lead-epoxy porridge is more inert and stronger too. Because I glassed and painted the hull on the outside before turning it over, I also had to find a alternate way to fix the skeg from the outside, which seemed impossible to do from the inside while still on the longi supports of the jig).
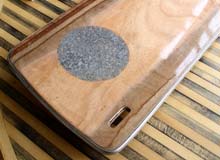 |
Lead snippets-epoxy rudder insert |
=============
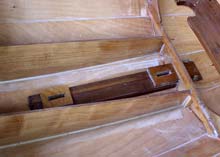
I also added a couple of notches here and there, to glue in difficult-to-clamp parts, like bulkhead #9 and, later on, the quarter knees under the seats.
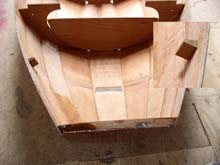 |
Glueing notches at bulkhead #9 |
=============
Though the Seil-18 is basically a jibless boat, François was prepared to draw an additional sail plan with a 35 sqft jib for extra handling possibilities. This required a second mast step further aft (the main shifts about 22 inch aft), bottom reinforcements, and additional eyelets for various pulleys and stays. If you plan to build a Seil with a jib, you could even extend the lower centreboard battens through station #9 to accomodate both mast steps.
 |
Extra mast step, reinforcement plus extra jib eyelet |
============
But you can also stick to Vivier's plan. It's a carefree way of building a classic craft that will sail as well as any other Seil. François Viviers e-mail support is simply great.
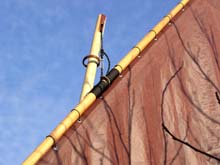 |
Hoisting the halyard |
============
A completed Seil-18 on the lawn, still not launched due to 6 inches of ice.
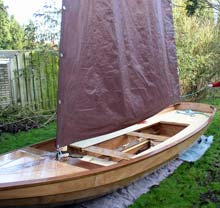 |
Test rigging on the lawn - to be launched soon. |
***** |