|
I find myself frustrated with coolers: they take up too much of my boat's best real estate, OR are too small or poorly insulated to keep my crew of three happy for a long warm weekend. Often both. On one memorable trip we walked a mile-long stone breakwater back to our anchorage with a five pound bag of ice - which weighed three pounds by the time it reached the cooler. The next day we needed ice again (this time I triple-bagged it).
A couple of years ago I cut a little access hatch in the forward seat so that I could keep a cooler in unused space there. A decent store-bought cooler wouldn't fit under the low seat, so I lined a cardboard box with foam board as a makeshift cooler. A miserable flop: too poorly-insulated to stay cold, and too difficult to access, even with my clever hatch.
|
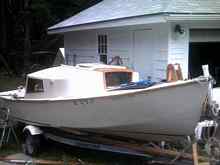
My Core Sound 20 with added cabin |
This year, contemplating a six or seven day trip from New Bedford around Cape Cod to Plymouth or maybe Boston Harbor, I decided to take an under used locker for a built-in cooler. My earlier makeshift cooler had failed because air could circulate through gaps between my foam sheets, and I was never able to cover the top tightly. I knew I would need the built-in version to seal well, with no gaps air could get through. I wanted the new cooler - primed with frozen gallon water bottles and spring water bottles - to keep milk, juice, meat, etc, cold for two or three days. Since the locker is low and narrow to start with, that would mean pretty efficient insulation so I wouldn't need big thicknesses of it. Money is tight, so the insulation couldn't be pricey.
A little background science. Heat travels three ways: conduction (atom to atom by contact), convection (moving air, etc), and radiation (think light). Keeping air from moving prevents convection. Motionless air is a good insulator (preventer of conduction), so trapped air reduces both convection and conduction (think wool or fleece). Most insulating materials trap air (or even better gasses) within a foam. Radiation operates mostly at surfaces, and is the reason you want to keep your cooler out of the sun. Materials that reflect light (think shiny metals) are usually good reflectors/poor emitters of radiation in general. For a given insulating material, the rate at which heat is conducted in or out depends mainly on three things: the thickness of the material (thicker is better), the surface area of the cooler (smaller is better), and the temperature difference between inside and outside (less is better). (My long, skinny locker has the disadvantage of a lot of surface area without so much useable volume. On the other hand, gallon blocks of ice should melt slowly, keeping the cooler from getting too cold.) The math looks like this:
Rate of heat transfer=(kAΔT)/D
Where k is conductivity of the material, A is the area, ΔT is the temperature difference, and D is the thickness.
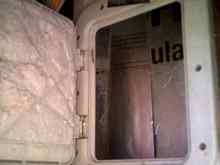
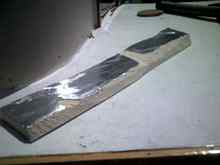
Lowes provided a sheet of one-inch Dow TUFF-R with an R-value (measure of insulating ability) of 6.5. I decided I'd stick it in place with PL Premium, chiefly because I needed the stuff for boat-building anyway. Remaining gaps would be filled with expanding foam.
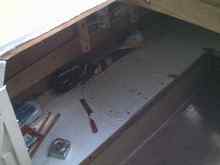
That was the plan, anyway. The locker - under a side bench seat - is about seven feet long, but eighteen inches wide and less than a foot deep at the big end, narrowing to less than eight inches wide and deep at the forward end. Hmm... It is nowhere square, and the bottom and one side aren't even flat, since both deadrise and flare increase forward. The locker is framed under the seat with 1X2, and has reinforcing blocks at intervals to support a raised floorboard berth. Hmm... The hatch is about thirteen inches long and eight-and-a-half wide, and is placed about two feet from the aft, large end. I can get my head into it, or one arm, but not usefully both. At least two feet of locker is out of reach. No long foam panel over eight-and-a-half inches wide will fit through that hatch. No panel much over two feet long will get all the way in. Hmm...Hmm...
|
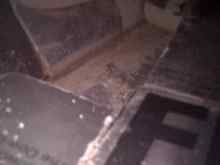
Forward end of cooler - can you tell I can't reach a lot of it? |
I decided not to waste time on an elaborate plan, since I was pretty confident I would run into plenty of unforeseen issues. My general strategy was to fit each panel by trial-and-error, gluing panels in place with PL, but only tacking down with PL those panels that would be against the hull. I wanted to be able to pull out at least these panels after a couple of years. (I worry about moisture. My lockers are only clear-coated inside, so I can see the condition of the ply.) The aluminum side of the foam is meant not to be in contact with anything (reflects radiation well, but conducts heat well), so roof panels were installed aluminum down, while floor and wall panels were installed aluminum out, guessing there would be air gaps and PL beads keeping most aluminum from contacting the wood.
| How to insulate the hatch? Let's try spray foam, just for fun |
|
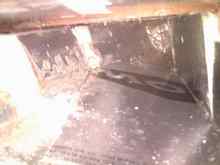
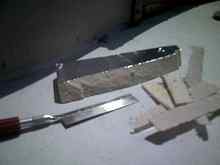
My procedure: get rough measurements for a piece from wherever I can reach - inside or outside the locker. Measure, and rough-cut a little oversize. Repeatedly try to fit the piece in its place, cutting off bits and pieces as I figure out where it's bumping. When satisfied (sooner and sooner with time), vacuum out the locker, butter the piece with PL, maneuver into the locker getting goo EVERYWHERE, and finally fit it into place. Shove something in that will hold the piece in place until the glue dries. Return later to discover the piece shifted AND isn't laying flat anyway. Sigh. Try to get the worst of the PL stalagmites and stalactites off. Sigh again. Elapsed time: 30-45 minutes. Go on to the next piece.
Here, then, is the (slightly modified) brief: cooler in port forward locker must insulate better than naked quarter-inch ply. Complete it in less than 40 hours, applying at least as much adhesive to the project as to yourself, your clothing, and the rest of the boat. Use no more than one sheet of insulation, two cans of foam, and two giant cartridges of PL Premium. Leave no gaps larger than a Kennedy half-dollar (that's width, not thickness). Stay within budget by declaring ruined clothing a result of "normal wear and tear." I say: aim low!
|
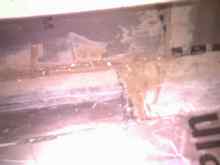
Stupid, stupid, stupid! Why didn't I deal with this before the PL dried? |
| The piece cut to fit this mess |
|
What did I learn from this experience? Many are the lessons, some bear repeating.
1. There are no "little" projects.
2. Dow TUFF-R is pretty tough and even more rigid, breaking rather than bending: it's shot-through with what seems like fiberglass filaments.
3. As you trim little fragments of foam, they easily become airborne. Together with their fiberglass. And get all over everywhere. Including in your tender skin.
4. PL Premium makes as big a mess as epoxy and is almost as easy to clean up, but is a lot cheaper.
5. If, in maneuvering a buttered panel through the hatch, you should happen to get PL all over the hatch frame, and you then unthinkingly stick your head through that same hatch, you will have PL Premium in your hair and eyebrows, on your hands, and in every place you scratch with those hands.
6. And it will happen the same way the next time.
7. PL Premium applied to strategically to garments would make way cool body armor.
8. My level of craftsmanship is pretty low.
9. It gets even lower when the craft is being done out of reach of my hands.
10. Even when I can both see and reach what I am working on, results are a crap shoot when I cannot do both at the same time.
11. Tying a can of foam to a stick and a string to the trigger allows you to squirt foam into places you can't reach, and some of that sticky foam might go where you want it. (See also #5.)
12. Eventually, no matter what it looks like or how well it works, a project is "done."
13. You know, the boat is pretty good just the way it is.
| The last piece, together with a little of the waste trimmed off. The little model-making saw was my most useful tool |
|
|
Where that last piece has to go. |

|