Custom Search
|
|
| sails |
| plans |
| epoxy |
| rope/line |
| hardware |
| canoe/Kayak |
| sailmaking |
| materials |
| models |
| media |
| tools |
| gear |
 |
 |
| join |
| home |
| indexes |
| classifieds |
| calendar |
| archives |
| about |
| links |
| Join Duckworks Get free newsletter Comment on articles CLICK HERE |
|
|
| April Treasure Chest |
Send
items to chuck.leinweber@gmail.com for inclusion here next month. |
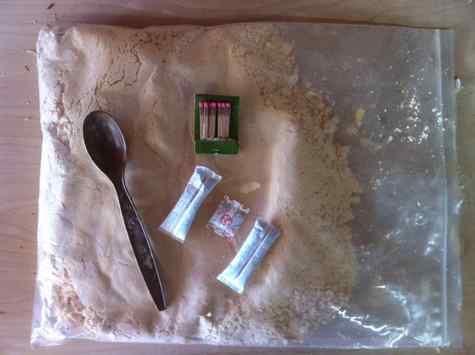
Wood Flour
With the cold rain and hot weather all in the same week, I was concerned my wood flour would collect moisture and create a bad batch of epoxy. To help keep the moisture out, I collected a few small packages of Calcium Chloride or Iron that comes inside food and computer packages. It seems to help keep the flour fluffy and it keeps the matches for my small heater dry enough to light every time. John
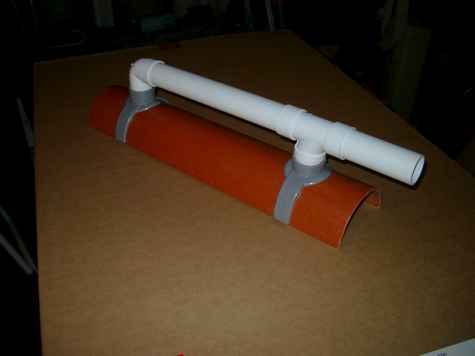
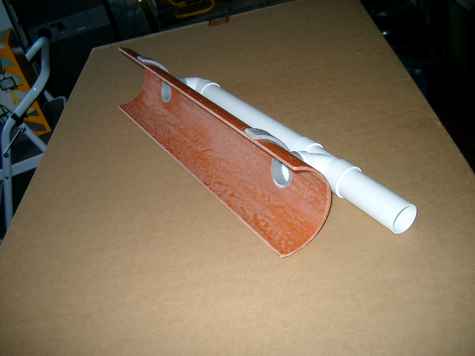
Mast Sanding ToolI've just started building a Wharram Hitia 17 catamaran - in my lounge, as any single 72-year-old would! - and logistics seemed to dictate that the mast should be the first item to build. I saw your article on the birdsmouth technique and it struck me as being a simpler method than the one shown on the plans and should produce a lighter mast. Having had it OK'd by the designer I'm now ready to start.
I thought your sanding tool made from a piece of sewer pipe might be improved upon as shown in the photos. I intend to connect the 'tail' end direct to my vacuum cleaner to keep the dust down as I go along. The 'sandpaper' will be applied in pieces, leaving channels to the openings. Roger Cornwall, England Vireo Build UpdateHit a small snag trying to put the gunwales on as the whole craft was getting knocked out of kilter due to the pressure of the cold bent wood on the hull and forms. I put together a ladder form and screwed the stem, transom and forms in place then bent the gunwales on. Yes, I know I should have done this in the first place. photos at https://jostboats.blogspot.com/2012/02/putting-on-gunwales.html David Tiller Forming
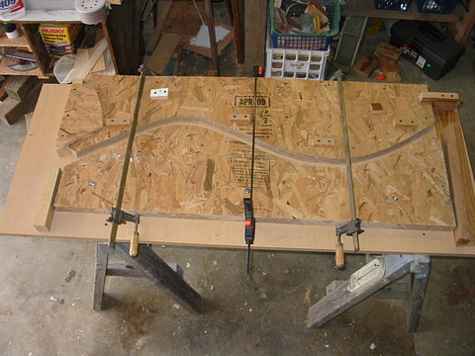
Probably quite a few of you astute woodworkers already know of this method. But, I have had to make several tillers and always wrestled with a board with lots of pegs screwed to it so as to be able to do a lot of clamps and when it came time to glue, seems like it took about four hands to "get 'er dun". This method worked fine for gentle curves and is altogether a quicker method. But for this "S" shaped tiller that a Balboa 26 requires, a carpenter/sailor friend of mine suggested trying a mold form. It took an afternoon to build but seems to be a good method for radical bends after steaming the ash slats for close to an hour. Definitely the way I would go if I were going to build a couple or more tillers for same boat. It's the last picture in my "Houdini George C." folder. Here is the link. George Cunningham A Traditional Method Going High Tech
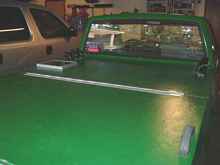
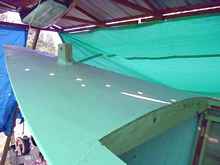
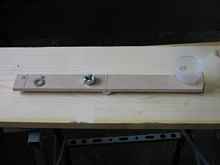
Covering small boats with canvas and paint has been a traditional way to make them waterproof. It still provides a nice alternative to epoxy (expensive and can be damaged by the sun) and fiberglass However, we are now in a high tech world where new products can make this task much easier (and in my case better looking!). Specifically I am talking about Titebond III, the completely waterproof, water-based glue and Monel or Stainless staples. Below I describe the approach I have used with great success on several projects. My first was covering the plywood top on my small pick-up (tonneau cover in truck jargon), and now more recently on the deck of the 26' St. Pierre Dory I am building. The truck cover has now lasted two years and looks almost the same as the day I finished it. 1. I dilute the Titebond III about 15% with water so I can brush it on. I generally add water until I get the consistency of exterior latex paint. I do this by trial and error every time so I don't have recipe. 2. I paint a first coat of glue on the plywood. 3. I take my canvas and wash out the sizing (starch) that is usually in fresh canvas. I do not wring the canvas because it creates too many creases. I just hang it up and let most of the water drip out. HOWEVER, do not let the canvas dry. The big advantage of this method is that the canvas shrinks as it dries and thus creates a tight finish. NOTE: I like to use a canvas with a fairly coarse weave so the glue can penetrate easily. I find the inexpensive canvas often sold as a dropcloth for painting works well. 4. Put the damp canvas on the plywood before the first coat of glue dries. This will allow the bottom layer of glue to bond to the cloth. 5. Attach the canvas with staples. I use a rechargeable 18 volt electric stapler so I don't need a compressor or long extension cord. Using the stapler also leaves me with one hand free to pull the cloth tight and get rid of wrinkles. 6. Before the canvas dries, apply another coat of glue to the surface. Because the glue is water-based it will wick into the damp cloth. When it dries however, it will become waterproof. 7. Let the glue on the coated canvas dry completely, and paint on a second coat. Now that you have done all this the clean-up is easy. Everything up to now is water-based. And, if my stapler gets covered in glue, all I need is a damp cloth. 8. Once the glue dry you can paint the canvas with your favorite paint. I like to use a polyurethane oil-based paint. Marine paints work well but are expensive. I find that an oil-based polyurethane porch paint works just as well and it a lot cheaper. A gallon of porch paint is less expensive than a quart of marine paint! One of the benefits of using canvas as a covering on plywood is that it keeps the plywood from checking when exposed to the sun. I have found that painted plywoods, even the expensive ones, will tend to check on the surface even with the best quality paints. The other benefit of canvas is that the paint will almost never peel. The small depressions in the canvas hold the paint and don't allow bubbles to form that cause flaking. I have had my truck cover exposed now for two years and it is still as solid as ever and the paint is stable. P. S. I also use Titebond III as a waterproof sealer when I don't need the gap filling properties of epoxy. Tom Hruby Epoxy ScaleI had been thinking of getting an electronic scale for measuring epoxy, mostly because of the waste when using the pumps for small jobs. Then I saw Joe's article on his balance beam epoxy scale and I thought I would give his idea a try. I'm glad I did.
The beam is made from a piece of 3/8 particle board I had laying around and the balance point is made from a piece of triangle trim I found at the lumber store. I found the large washer in a junk box. The washer allows me to measure 1/4 oz. in volume, perfect for small jobs. Total cost, less then a $1. The scale is set for a ratio of 5 : 1. It's VERY sensitive. If I'm careful putting in the resin or hardener in I can get it to balance with both ends off the table. Ralph Steering
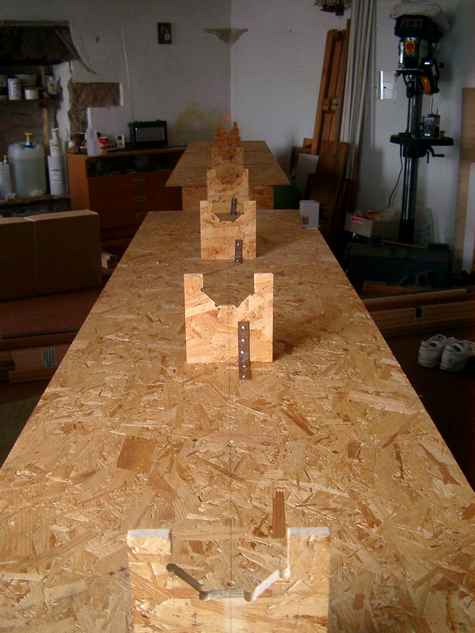
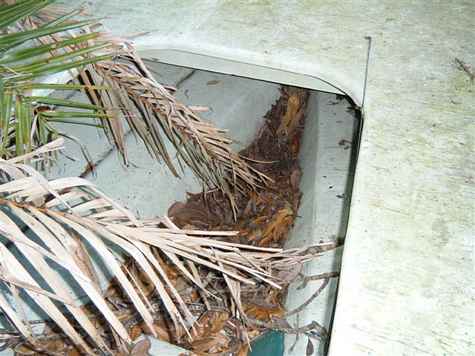
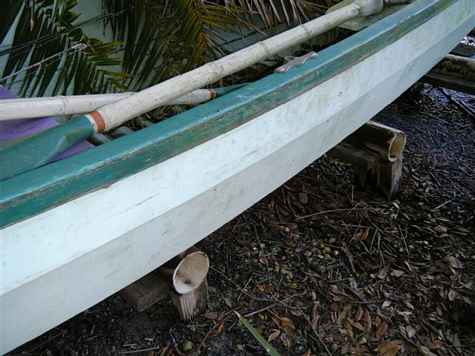
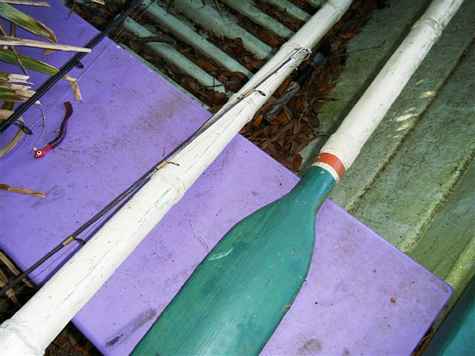
I did something I have never done in boat building before. Jim Michalak tells me Payson used to do this. I took two pieces of ply and joined them end to end to make a 4x16 piece. while it was still wet I joined another two pieces directly on top, separated by wax paper and perfectly aligned with the ply pieces underneath. The ply on top has the sides and bilges drawn on them. Then I put down a plank of wood and cinder blocks. The ply is also screwed down to by floor which is wood. Then I hot boxed the whole thing since it is cold here in the north, although not as cold as it should be. Now I plan on uncovering it all and cutting it all out at once as it is on the floor - both sides and bilges. I made sure to put the ply good face to good face so that I will have the good faces both facing the outsides when put on the boat. Paul https://paulsboats.wordpress.com House PaintAcrylic paint (house paint ); I never give advice about paint or varnish because it's usually wrong. I will send some observations and a link to a guy with more. Most of us here at the shop have been using house paint on our boats for the last ten years or more and are very happy with the results as long as you give it time to cure. I know what you're thinking, "You can't use water paint below the water line, it'll melt or it's not shiny enough or it's not permanent enough." Well how long has the paint been on your house? This boat sitting on the rails here on the river is a fiber glass hull of a Drascomb looking boat that was a planter in someone's yard. We got it about twelve years age, dug all the dirt out, pulled out the seats and centerboard trunk and made a motor boat out of it. I just hosed out the inside and slapped on a single coat of some acrylic latex house paint we had sitting around. Painted the inside and out. It's never been repainted, it's been slammed up against docks and pilings and has always had a pile of old wet oak leaves plugging up the drain hole in the back, this is the worse possible condition for any finish. This area has been wet for over twelve years and the paint is still hard as a rock. I made the oars sixteen years ago out of pressure treated two by fours because all of the "real" paddles either rotted or the kid broke them. These oars have been out in the weather the entire time, in this boat and it's predecessor; never repainted. The dark blue paint I'm putting on Helen Marie's hull is Sherman William's and it's super glossy.
See what this guy has to say: https://www.simplicityboats.com/latexcarnel.html Dave Lucas |