Custom Search
|
|
| sails |
| plans |
| epoxy |
| rope/line |
| hardware |
| canoe/Kayak |
| sailmaking |
| materials |
| models |
| media |
| tools |
| gear |
 |
 |
| join |
| home |
| indexes |
| classifieds |
| calendar |
| archives |
| about |
| links |
| Join Duckworks Get free newsletter Comment on articles CLICK HERE |
|
|
| March Treasure Chest |
Send
items to chuck.leinweber@gmail.com for inclusion here next month. |
Oar Tips
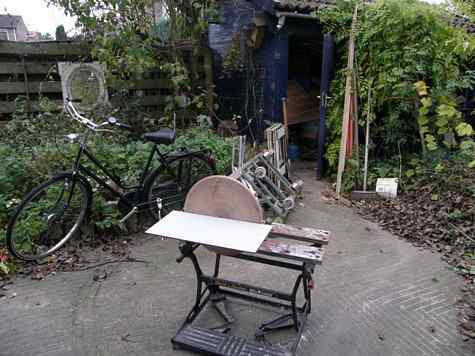
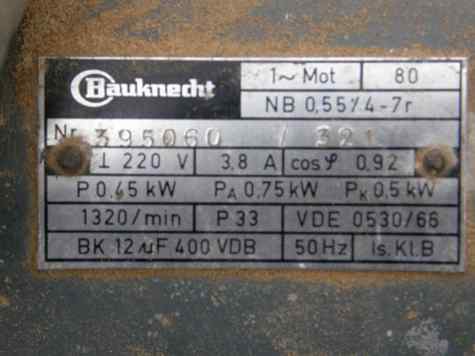
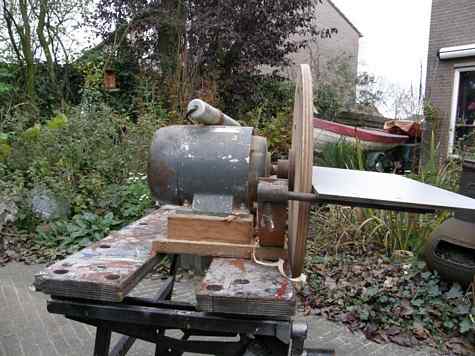
Brad Horatio HornblowerI just finished devouring Mr. Midshipman Hornblower (C. S. Forester), which I got for free at https://goo.gl/aj1OF The other nine books in the series are also there and I'll be starting in on them, shortly. Charles SanderA couple of months ago someone asked how you could put a belt sander vertical so he could use it as an shaper. This is what I did to get a machine to do just that. I hope the photos speak for themselves. Otherwise I will watch dwforum for questions.
The sandpaper is from a floor sander/cleaner.
The motor is from a concrete mill.
The table is made from rockpanel/trespa.
A minor problem could be you can only use a quarter of the circle.
As you can see the motor does not have to be strong.
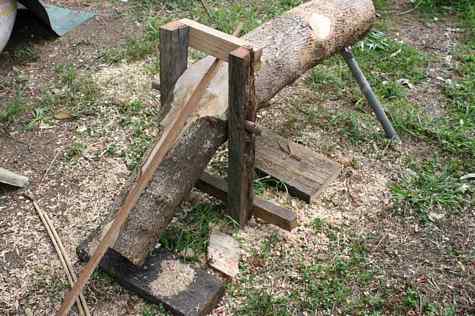
I made it take apart to put against the wall when not using it. Hilbert Draw Knife HorseMaking a draw knife horse is simple and easy as you see in the photo. It is a composite with steel legs that were cut from some scrap given to me. To make them just use what wood or steel you have at hand. I had this Branch cut from a Jacaranda tree. Then drill holes 32mm into the log to drive the legs into. Then the pivot is made from a broom handle stolen from the next door neighbour, Just kidding. A draw knife is a knife with handles at both ends and are extremely sharp. See photo below. These knives can be made from power hacksaw blades, with steel, silver soldered to both ends to attach the wooden handles too. If worst comes to worst then the kitchen carving knife will do. Just don't let her from inside know as mine just has.
The second photo shows the modification to my knife this was a bolt was silver soldered to attach the handle.
Stewart Butt Joint
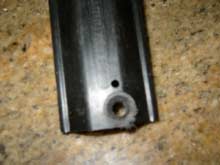
I made a gluing jig out of a 10? wide piece of MDF. I attached the MDF to two 2X4's narrowed to make the height 3 ½ inches. Now my butt joint was done on wax paper placed on the mdf, and the extended panels were supported by 2X4's. On the wax paper I drew a line, and laid 3" tape down impregnated with epoxy. The panels I pre-coated 1 ½ inches and laid over the tape. I then put another coating on the top of the panels, followed by tape, which I made sure was saturated, wax paper, another flat piece of MDF. To hold the joints together I used nails just at the outer edges of the joints, temporarily through the plywood into the MDF. Then I pled about 200 pounds of bricks across the joint. . I can say it squeezed out the epoxy and left a very fair joint. Where the epoxy squeezed out I had some uneven pure epoxy, but that sands off quick with a power sander. The reason for all that caution to get a nice smooth joint is apparent when you go to fair it. Because the joint itself is smooth, a drywall taping knife and one pass with fairing compound and you have a really nice joint that needs to be sanded with a flexible long board, and then touched up once more and you are good. I just added a group of pictures which shows this method. A vague version of this was in the B & B instructions. Steve Foot BracesIf you build your kayaks like me and the boat is advertised to come in at 42 lbs, but like me, you bring it in at 48 lbs, you may encounter the problem that I had with the really nice Duckworks foot braces. I tend to use a little more glass, and a little more epoxy putty, because I want my boats to really stay together. In this case it's the really nice stainless foot brace studs that get epoxied to the hull (leaving a clean exterior on the hull - no screws on the out side of the hull). I covered my stud flanges with 6 layers of glass and a little mountain of putty. See the photo below. Well, that mountain of putty and glass shortened the length of my mounting stud by 1/4". To my regret it left the studs too short for the Duckworks foot brace rails to be mounted. I thought there was no solution but to buy another manufacturer's foot braces. In my attempt to solve the problem I first removed the tiny 1/8" flange cast into the brace rail. It was not enough. Oh well I thought, buy another type of brace. The next day it came to me. I have what looks like a little mountain peak shaped like a volcano of putty eating up that precious 1/4" of stud. There is a solution - countersink the holes for the mounting studs on the back of the brace. See the photo below. So if your tend to work like me there is a solution OR ... just don't go nuts with all that epoxy putty. Its not really necessary.
Charles |