Custom Search
|
|
| sails |
| plans |
| epoxy |
| rope/line |
| hardware |
| canoe/Kayak |
| sailmaking |
| materials |
| models |
| media |
| tools |
| gear |
 |
 |
| join |
| home |
| indexes |
| classifieds |
| calendar |
| archives |
| about |
| links |
| Join Duckworks Get free newsletter Comment on articles CLICK HERE |
|
|
| Make and Make Do |
By Rob
Rohde-Szudy - Mazomanie, Wisconsin - USA Racing with Rot |
 click for bio |
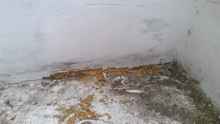
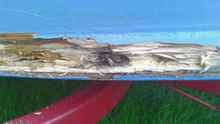
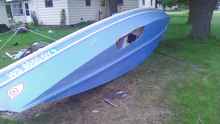
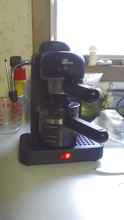
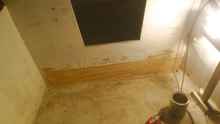
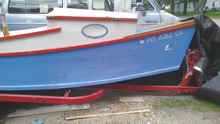
One of the benefits of my new job is that I can finally go to the Rend Lake messabout again. This is a long-awaited treat! However, life being what it is, I didn’t make much boat time prior to Rend Lake. Slated to leave on Thursday, June 7th, I thought it might be a good idea if we see how the new dog handles boating. We finally got around to this on Sunday, June 3rd! Time to go get the motorboat ready! I had every reason to expect the best, since I finally did it “right” and covered it with a real nylon boat cover. Alas, all was not well. The bottom of the bulkhead separating the cabin and cockpit was very soft.
OK, it’s just a bulkhead…but better check the chines. Sure enough, on the “low” side (the one with the hull drains) there was a soft spot.
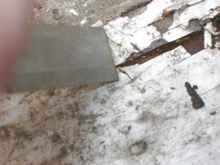
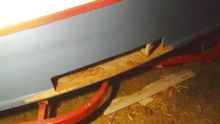
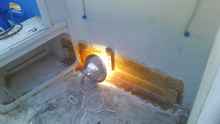
Well, how bad can it be? Here’s the initial poking with the pocketknife…
…and a bit more prodding with a chisel.
The root of the evil is deck screws making the chine nailsick.
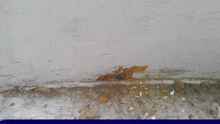
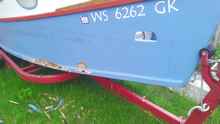
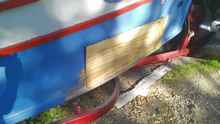
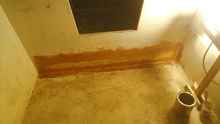
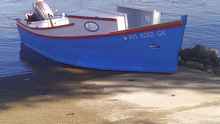
Well, OK, let’s take the sailboat. I worked on that to redo the stern, and I’m pretty sure I checked the bottom. We put it in the water, the old 5.5 horse Johnson sputtered along as it always does, and the dog was mostly OK with boating. When we got back I noticed a spot along the chine that looked wetter than it should. Time to see what my knife finds.
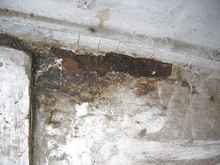
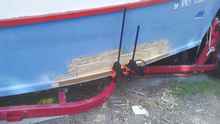
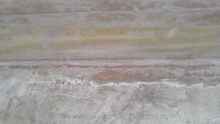
Not encouraging. But at least it just floated! Can’t be that bad, right? Here’s a look at pushing on the doow with a dull chisel. See the dirty water getting pressed out of the wood? Not a good sign.
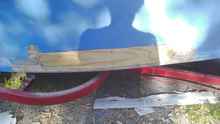
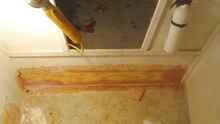
A bit of chiseling showed that half the butt strap was soft, as was much of the bottom along the chine. It appears the PL Concrete and Masonry Sealant I used was flexible enough to let water under it, but rubbery enough to keep it there. Note to self – don’t use that again! Oddly the chine itself was OK, perhaps because it could try out through its top surface. When the chisel finished, I had this. Again, the chisel went through in a couple spots, this time the bottom rather than the side panel.
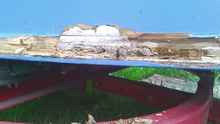
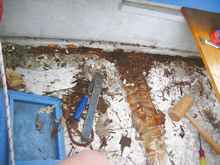
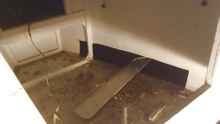
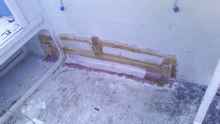
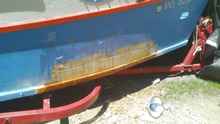
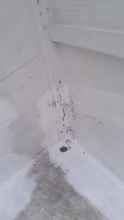
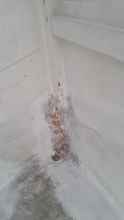
So I pulled it off the trailer and cut the bad plywood out of the bottom.
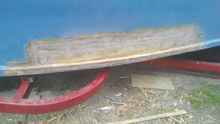
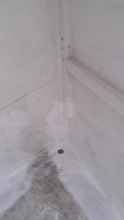
The plywood under the chine was very rotted. I suspect the twisting forces of sailing would have sprung that entire chine. Not good at all! Time to talk to the boss. I felt the motorboat would be faster to repair, since I had everything needed on hand. For the schooner, I would need to make a trip to buy half-inch plywood. Another benefit of the motorboat is that we suspected the hull drain might be involved in the rot in the sailboat. Redoing the drain would certainly take a bit more time. We both knew we weren’t going to Rend Lake without a boat, so there wasn’t a moment to lose! Off to the races! Monday Morning I had about two hours before I had to head to bed, so I started cutting. By the time I was done I had cut out the bad side panel, shaped the chines for scarphing, chopped off the remaining adhesive on the cabin sole, and cut out the bad part of the bulkhead.
It was getting late and it started to rain. Tarp, shower, bed. And making a list of what needed doing, and in what order! The next morning I rose early so I would have hours before work. Tool #1…
After caffeinating, I pressed a couple scraps of 1x lumber into service to hold the fore and aft ends of the plywood patch flush with the existing sides. I also put one in the middle of the bend to keep it faired with the side.
Then I marked where it needed cutting and made the cuts in a couple steps. It was important to do this in several steps as there was no time for rework.
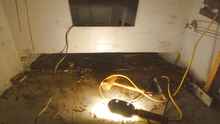
Here is the interior with fiberglass cut to fit…
…and fastened with polyester resin. I painted the wood first with acetone-thinned resin, and attached the glass with generously catalyzed undiluted resin. Polyester is a real lifesaver in a project like this. If I had to do this many steps waiting for epoxy to cure it would take about a week and a half! It was relatively warm out, so I didn’t really need to use a lamp to cure the polyester. But it still sped things up.
As that was curing I cut the new piece of chine to fit and dry fit it with stainless steel screws. I had to clamp it to get it to follow the contour of the bottom – the screws alone wouldn’t pull it into line.
Here it is with the glass and epoxy taped into place. This is another area where polyester is easier, actually. Polyester cures quickly enough that you can hang around and worry it into place. In fact, it seldom has time to droop. Epoxy has plenty of time to droop and it absolutely will the moment you look away. Hence the tape – I had to go to work!
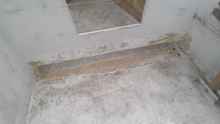
Fortunately I was working from home, so nobody could see how filthy I was. Monday Evening After work I had more time, and I made it to the hardware store for more sanding discs. First the bulkhead problem. I removed the screw points coming through the bottom with an angle grinder, since I was switching to taped seam anyway. This would eliminate the need to do any refinishing on the bottom except at the one chine – a significant time savings since this also avoids the need to remove the motor or un-trailer the boat! Then I chiseled out the old adhesive and sanded to bare wood surrounding the bulkhead. Actually the angle grinder was a lot more effective than the disc sander. I guess the higher RPM with a thin cutoff wheel does a better job of flinging the sticky stuff, rather than heating it up into goo.
Here I realized I needed more polyester catalyst, and also realized that my local hardware store played a dirty trick on me and changed their hours! I had to make a trip to Farm & Fleet, losing an hour and a half. Still, by midnight I had all the glass on, albeit with fewer pictures taken than I had hoped. First I cut the plywood for the bulkhead, since I had to do the noisy jobs first.
With it glassed on one side, I could take off the scrap wood braces and work on the cabin side.
I also finished up the inside of the chine joint. Then shower and bed, since the resin had to cure anyway. I didn’t add any heat this time because five or six hours is plenty without it. Tuesday Morning Again I had to get up early, because the goal is to have primer on before I go to work. You all know this drill…first everything gets sanded. I forgot to mention, my belt sander is out of commission, so I had to carefully do this with a disc sander. Then again, I was prepared to ignore some blemishes. I started with the exterior because I wanted to make sure that paint stuck the first time. If it really came down to it, I could postpone painting the interior until after the trip.
My approach on the interior was to first take off any sharp points on everything, as that is the bare minimum that would work for the trip. Then I went back and smoothed off gross unevenness – like drips and the edges of the glass. Then I went as far as a could with feathering edges in the hour and a half I could devote to sanding.
Primer time! The exterior took primer just fine, but on the interior I predictably had some areas where it didn’t stick.
At this point it occurred to me that I might have gotten that primer to stick by washing off the wax that rises to the surface. Perhaps a brief scrub with a toothbrush and naphtha, and wipe off with a paper towel? I know a detergent would work, but I fear anything water-based would have taken too long to dry. Well, this is fast-drying primer, so let’s try it. Over lunch I took an old toothbrush and some non-chlorinated brake cleaner to the area we just looked at, then wiped with a paper towel.
Now the primer sticks!
Over lunch I also added the exterior paint, and I added interior paint after work.
Seamless? No. But it’ll work. And just in time! This allowed the paint to dry for 24 hours before a brief test.
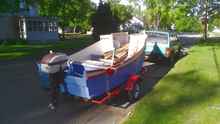
All is well! Then we had to start putting camping gear in.
I still had to be careful of the soft new paint, but we made it! So what did we learn?
|