Day One
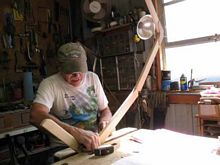
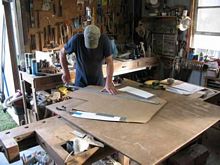
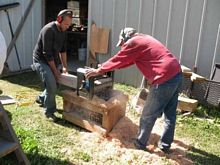
I finally got started on the new MiniPaw dinghy. I've had the stuff for for almost a year now. I've been working afternoons on it.
|
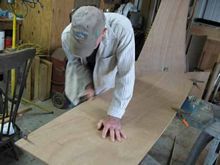
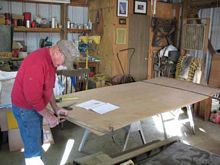
Starts with a stack of plywood. Both sides and both halves of the bottom get cut together, so they are exact duplicates. |
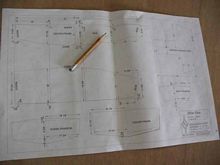 |
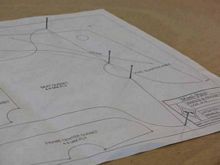
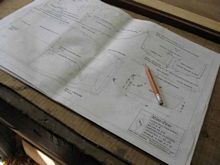
And of course, a set of plans. |
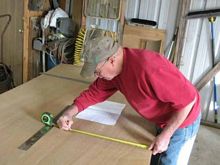 |
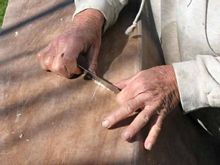
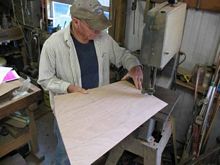
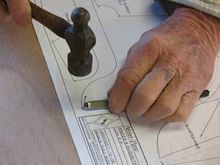
You do some measuring |
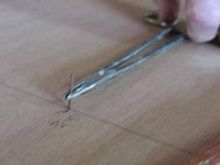 |
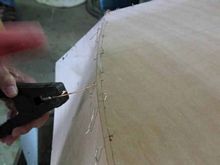
set some nails at certain points |
 |
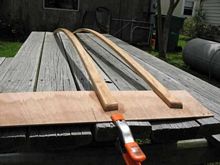
spring a batten on the curve |
 |
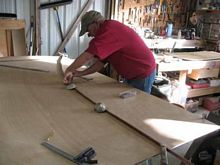
cut out the panels |
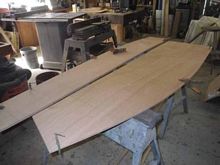 |
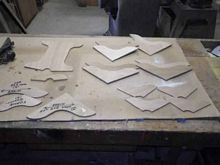
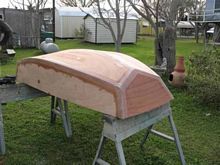
and here's the finished sides and bottoms, rough cut. |
Day 2
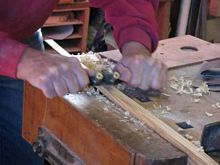
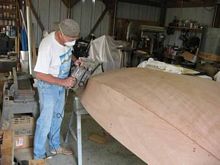
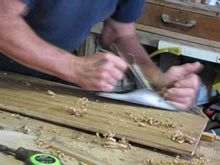
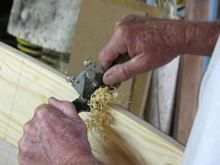
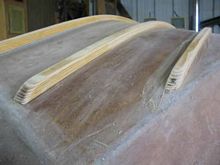
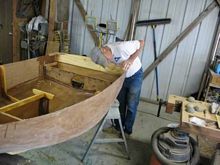
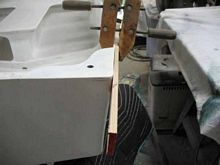
Yesterday we left with rough cut panels. Now we need to smooth the edges to the exact lines, which is best done with a hand plane.
 |
Isn't this fun? My shoulder is yelling at me. |
 |
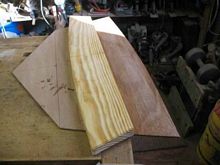
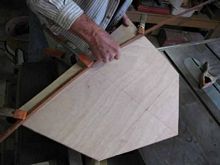
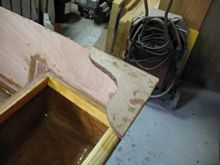
Layout and cut out the bow and stern transoms. |
 |
Again, spring battens for curves. |
 |
Some more nails on points to transfer patterns. |
 |
Transferring a pattern. |
 |
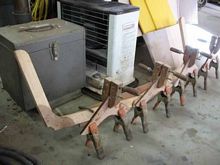
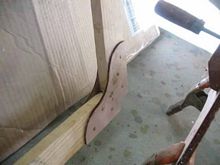
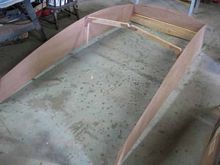
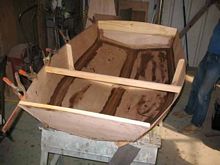
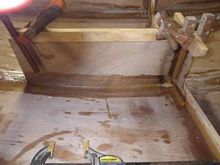
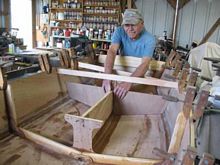
And all the knees and gussets are done. |
Day Three
... in just as few minutes.
 |
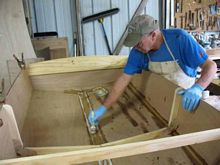
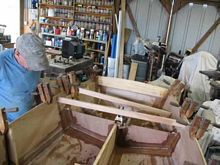
The boat gets a center frame of solid wood, with corner gussets and all those knees get glued together. |
 |
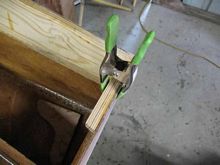
Gusset's are epoxied and nailed with bronze boat nails. |
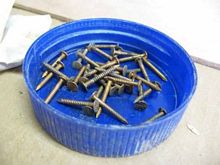 |
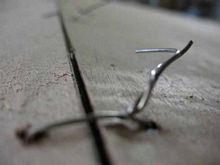
Boat nails are ring shanked - once in, they aren't coming out! |
 |
Transoms get reinforcing pieces of solid wood across the tops. |
 |
All epoxied |
 |
And nailed |
Day Four
... in a few minutes
 |
Remember that center frame? Well, it all needed rounding and smoothing before going into the boat. |
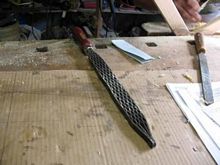 |
And the tools of choice. A Shinto Rasp, a bastard file, and sand paper. |
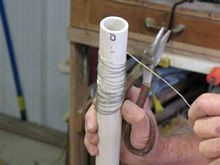 |
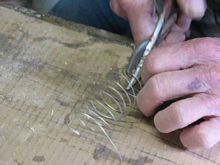
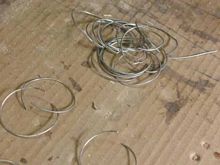
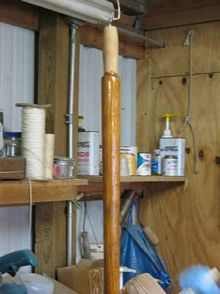
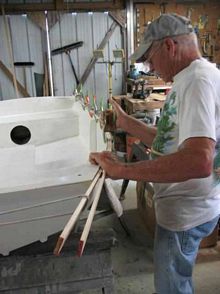
We're gonna wire the boat together, so we need many short pieces of wire. The simplest way to get them is to wrap them around a 1" rod many times, slide the coil off, cut along one side, and end up with a bunch of rings. |
 |
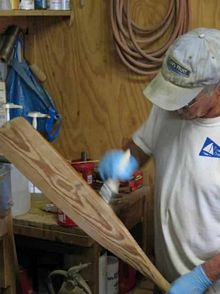
And those doublers on the bow and stern transoms need to be worked down to the correct size. More hand plane work. |
 |
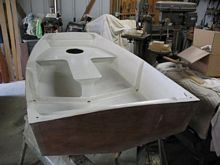
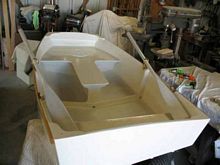
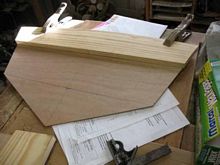
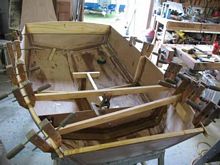
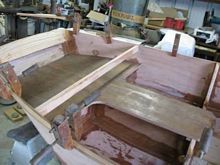
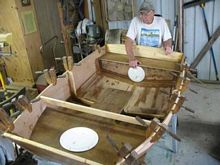
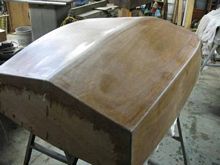
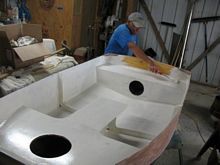
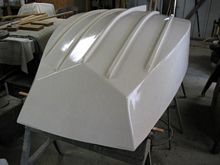
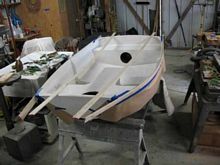
And now, finally, we begin to actually build the boat.
Here's the beginning of what we call "going 3D". |
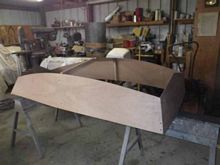 |
Transoms are in. |
 |
Side view with bottom installed. |
 |
All 3D |
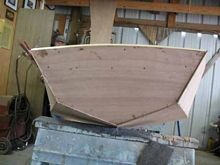 |
Here's the up front end. Ya gotta be careful now, or you'll look like you were in a cat fight from all the wires. |
Getting tired of looking? Well day five is coming right up.
Day Five
I've been working on this half days, attending to other chores mornings, so this is really 2-1/2 full days.
 |
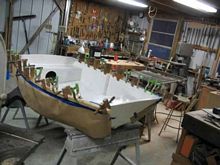
I needed to install a spreader up forward to hold the hull at proper spacing. You then spend a good while tightening wires and leveling the boat so it would not be twisted. I measured diagonals corner to corner, and used a level across at the bow and stern. Here's the spreader going in. |
 |
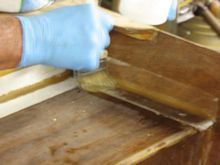
Then we get to play with the epoxy. Filleting and taping the interior seams. |
 |
And the boat all taped inside. |
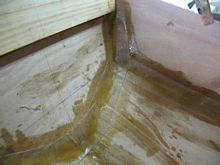 |
And here's a close up of the tape at the bow. |
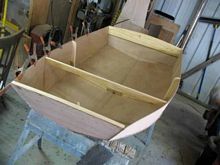
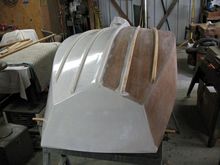
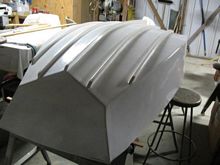
Next, the boat gets flipped, all the wires are pulled and the chines get rounded and taped. Probably a short day.
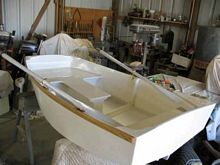
The boat is a 6 foot 6 inch MiniPaw dinghy from B and B Yacht designs. The 7th boat I've built from his designs.
Day Six
The first chore today was to remove the center frame, apply glue and reinstall. It had been put in dry to allow for possible alignment needs.
 |
The boat was turned over and there were many twisted wires to be removed. |
 |
The quickest way I've found to do that is to heat the wires which melts the epoxy around them, allowing them to be easily pulled. I use a Jump-it with some heavy copper wires in the clamps. |
 |
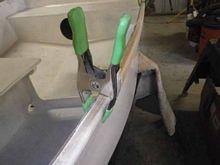
After you clip the wire on one side, then touch one lead to one side. |
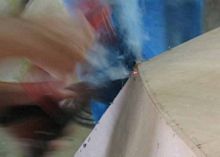 |
And "POP" the other side. All it takes is making a spark. Too long and the wire goes red hot, and scorches the wood. Not a problem if the boat is to be painted.
Catching that tiny spark was NOT easy. |
 |
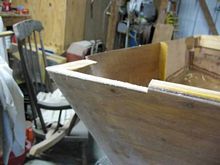
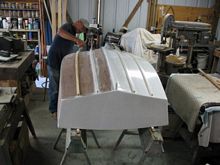
The bottom ply is sized to over hang the sides slightly, which allows for some adjustment. But you need to transfer the location of the side, onto the bottom, so you know where it is. This simple little jig does the trick. |
 |
Then you can take down the edge to the side, first by sanding. |
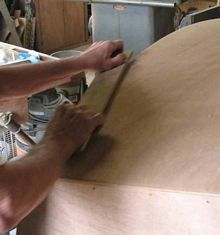 |
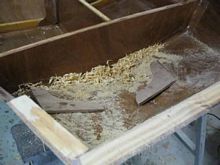
And then using the block planes, and ending up with a long board. We also call that a "Torture Board". This one is sized for an opened out 3 x 21 sanding belt. Takes out any highs down to the lows. |
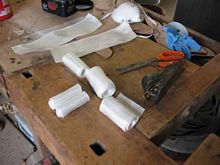 |
Then you pre-cut the fiberglass tape, roll it up and lay it out in roughly the orientation. It'll go in, so can be just grabbed as needed. |
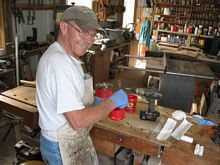 |
Then we have some more fun, mixing epoxy. Hard part is pretty much over. |
 |
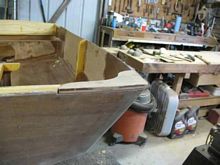
Pre-wet the areas that'll be taped. Note the keel was done first so there's no need to lean across wet epoxy. Obvious huh? See the apron? |
 |
And put the tape in place - just enough to get it wet, with no puddles. It should leave a matte look. |
 |
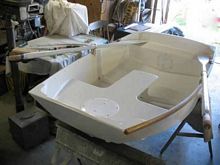
And it's all done, waiting to cure. |
Day Seven
...work begins in a bit.
Not a tremendous lot of progress today. Had some company - friends I'd stop working to visit any day.
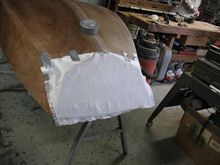
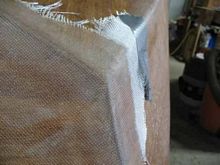
But, the first order of business was to grind the fiberglass tape edges smooth. Nasty, dusty job, so no pictures during the process.
 |
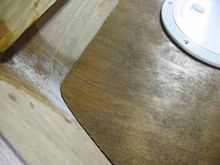
Here's what it looked like after grinding though. |
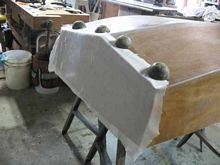
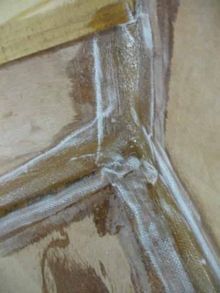 |
Here's a closer look. This is in the corner of the stern transom. |
 |
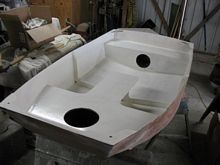
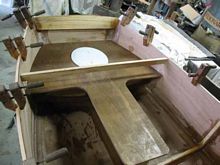
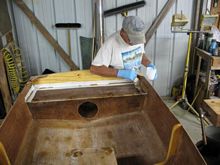
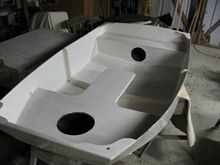
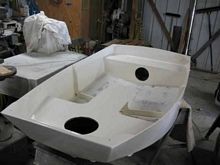
And then back to the plans - next step is getting the parts under the seat set up and fitted. I'm making some minor modifications so this takes a bit longer. |
 |
Center line bulkhead, seat support being fitted. |
 |
All parts fitted and clamped into place. |
 |
And everything filleted and taped. |
 |
Here I'm using up some excess filleting material on transom corners. I always leave a few small jobs so I can use up excess, or try to anyway. |
The next goal is to finish the framing for under the rowing seat, layout the seats, and glass the bottom of the after section. Hopefully.
Day Eight
and I'm really done counting days.
Really, I didn't make a whole bunch of progress this day. I had some other things to do, and the dinghy work was kinda fiddley. But here ya go:
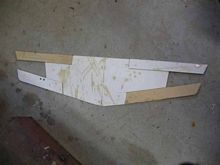 |
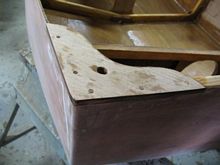
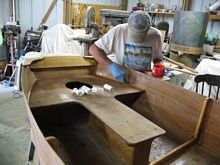
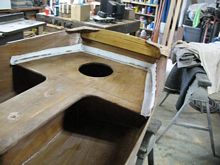
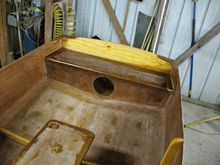
I'm building a storage compartment in bow of dinghy, which isn't on plans, so every thing has to be built "in place". After much measuring, re-leveling, re squaring, etc, a pattern was made from heavy cardboard for the cross ways (thwartships) bulkhead. |
 |
The pattern was then transferred to the plywood. |
 |
And cut out and fitted into place. |
 |
Then filleted and taped. |
 |
Sometimes it takes a LOT of clamps to make sure every thing stays put, where it should, because once the epoxy kicks, it's set in stone so to speak. |
 |
And a final shot, just because it was a neat shot and I liked it. |
I quit early today - this older guy was tired.
I took a few days off and played. Beach party on Saturday night, and staying aboard a friends boat was a great weekend. But here's a few pics of what has happened lately.
 |
Fitting the stern thwart. |
 |
Planing to fit along the rear edge. |
 |
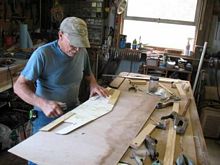
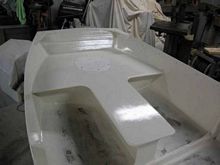
Making the pattern for the forward rowing thwart. This is a modification I made, as it goes all the way forward creating a dry stowage area. |
 |
Rough fitting the thwart. Original plans had the seat ending at the heavy black line. I'm building in dry stowage there, and under stern thwart. |
 |
Showing the fit at the forward corner. |
 |
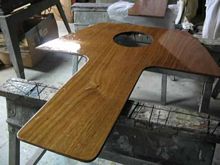
Here's the front thwart in place, with the deck plate laying in it's spot. |
 |
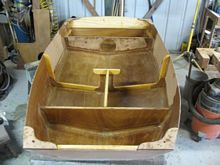
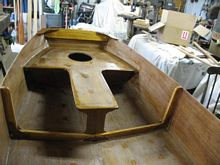
And an overall view of the thwarts. They can't be permanently installed until the keel and bilge runners are installed. |
 |
Rounding fore and aft transoms works well with a spoke shave. |
 |
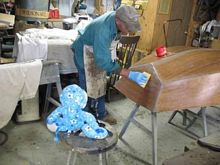
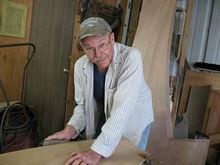
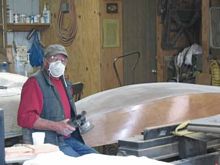
And a final shot of yours truly clowning a bit. |
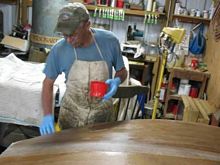
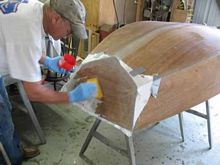
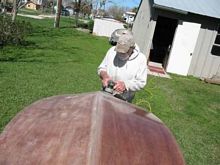
I had to face the "grind". Grinding glass that is.
 |
I brought the dinghy outdoors so the fiberglass dust wouldn't foul the shop. |
 |
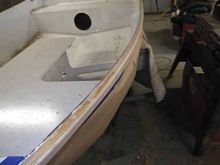
A view from the bow, before grinding. |
 |
After grinding the tape edges, I used a random orbit sander to feather it all. Isn't this what every 72 year old guy does on his birthday? |
 |
And then, after dusting it all off, I went back into the shop while waiting for fiber glass cloth and epoxy resin to arrive. |
Next step - sheathing the exterior with fiberglass cloth.
The dinghy was begun 15 days ago on Weds the 23rd. I was pretty much out of epoxy, and needed the fiberglass too, so it's been a wait kinda time. I did use up the very last of the epoxy to coat the forward thwart.
 |
It needs sanding, but then it will be ready to paint. |
 |
So what does a boat builder do while waiting materials? They sit on the deck, in the sun, sipping iced tea, and waiting. |
 |
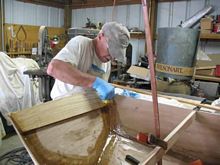
Materials arrived late yesterday, so today I got cranked up again.
First thing is to check how the glass will fit best. |
 |
I begin laying it out on one side of the boat. It'll be continuous from keel line to gunnel. The round objects are lead weights I cast long ago to do things like this - keeps the cloth from sliding around. |
 |
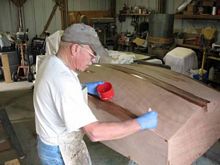
And then you wet it all out with neat epoxy. I almost always use a squeegee, with a brush used around the edges. |
 |
After the first half had hardened a bit, I laid out the glass on the other side, and wet it out. |
 |
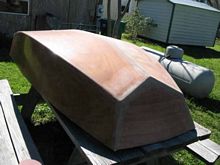
And here it is with hull bottom and sides glassed. Transoms get done tomorrow, after some sanding around the edges - feathering down raw glass edges. |
Next after that is filling the weave, and making the keel and runners and installing those. Then I can finish out the inside.
The epoxy was still pretty soft from yesterday, but I did get the bow and stern transoms glassed.
 |
I laid out the glass for the bow, and stern, after feathering the edges of the glass on the bottom and sides. |
 |
I wet out the glass using the plastic squeegee. |
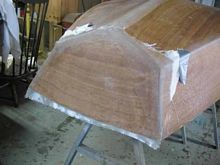 |
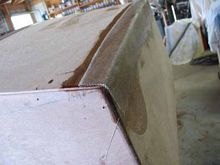
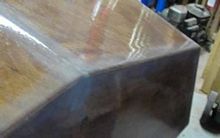
And the finished glassing looks like this. |
See how the glass lays around the corner? That's because in this instance, it's "on the bias" so it will stretch smoothly. It won't always do this, but often will, particularly on a "soft" corner.
 |
If it won't lay nicely, I just do as best I can, then sand it smooth and lay a circle of cloth over the corner, laying it "on the bias". Does the same thing. Inside corners work pretty much the same way. |
Calendar wise, it's been 24 days since the first line was drawn.
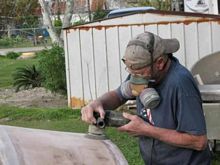
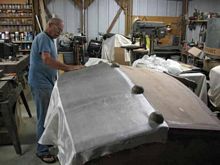
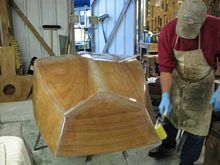
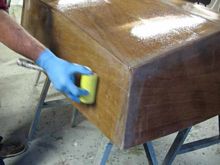
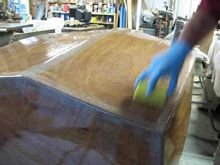
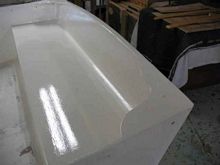
The last pic showed the last of the glassing being done. Once that cured, of course it had to be sanded, and filled. Then sanded again.
 |
A sander is probably the MOST used tool in boat building. |
 |
It does get a bit dusty. |
 |
Once all sanded, then it gets a final coat of epoxy, rolled on. |
 |
The bubbles that result get tipped off. The simplest way to tip off epoxy is to just grab the roller, and drag it lightly across the surface. |
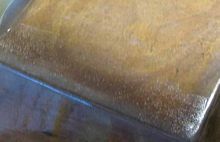 |
Here's a section I rolled just to show the bubbles. |
 |
That section being tipped off |
 |
A final shot with no bubbles left - makes final sanding a lot easier. |
 |
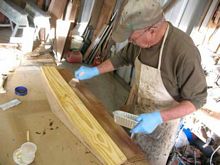
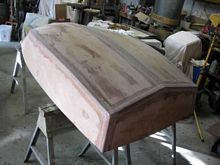
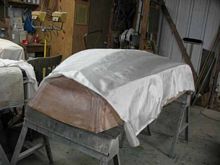
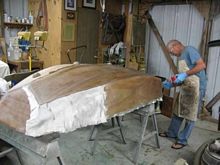
Some of the following will not be in exact order, but were set to show a sequence of events. The rolled on coat of epoxy from the last step took some time curing, since it was pretty cool, so the dinghy got carried outside to bask in the sun for two days.
Once it had cured enough to work, if first had high spots taken off with a cabinet scraper. |
 |
Then, of course, the sanding began again. This being the final sanding before painting. |
 |
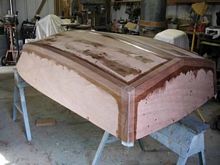
The sanded hull. |
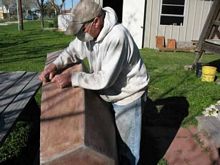
During this time also, I helped my friend James from the Westsail 32 "Mona" (The Peanut Butter Diet)
put together a block to go under the foredeck, for his anchor windlass to bolt through. He and his partner Rachel are living aboard, and currently are redecking the boat - MASSIVE messy job.
We glued together two big blocks of white oak, cut the result into a block 22 inches by 10-1/2 inches and 3-1/2 inches thick.
 |
Then we planed the result down to 2-1/4 inches, resulting in a PILE of shavings. |
 |
The final block got a rabbet across it to allow it to lay across a deck beam. Here's the final block - it still weighed about 30 pounds. |
Also during this time, there was a yard needed mowing, and a bit of varnishing to be done on Necessity, so the work on the dinghy has not been as continuous as I'd like. But it's progressing.
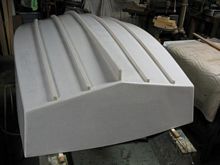
 |
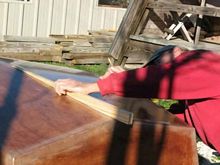
While the dinghy was laying out getting some sun, I started cutting the wood for the keel and bilge runners, 3/4 by 3/4 keel, and four shorter 3/4 square bilge runners to protect that 4 MM ply hull when it gets dragged over rough beaches-and it will. |
 |
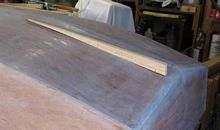
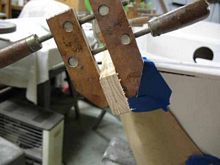
The keelson (or deadwood) gets shaped to the curve of the hull, but wants to be straight on the other side. Best tool for the job, once the curve is roughed out on the band saw, is a spokeshave. |
 |
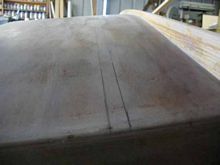
Then the keelson gets it's final fitting to the hull. |
 |
The fitted piece marked for where the fasteners will hit. |
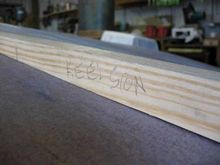 |
Of course, it gets labeled to keep it from being mixed with scrap wood and lost. And yes, that has happened, sadly. |
It was Dinghy time again after a break.
When we left off, the bottom was ready for stringers. These serve a multiple purpose. They stiffen the 4 MM ply and serve to protect the hull bottom from shells or what not when the boat is dragged up onto a beach. Dinghies tend to live a hard life.
This dink gets four stringers running parallel to the keel and skeg.
 |
The first two screwed in place at forward end, to hold them there while holes were drilled. |
 |
Marked for where to drill holes. |
 |
Holes being drilled for the screws (to be driven from inside). |
 |
Epoxy being brushed on. |
 |
Stringers installed (a bit over long, but that gives you bending leverage). |
 |
And trimmed to the correct length at the stern. |
 |
And the bow. |
Except for a coat of epoxy on the stringers, the hull bottom is done. And yeah, it takes two people to install the stringers, unless you have REALLY long arms.
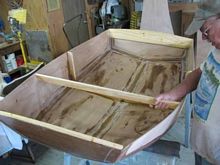
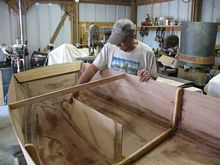
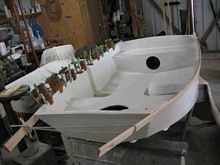
Now the boat is right side up, and the last interior work has begun.
 |
Fitting gussets (or Knees) in the four corners, to keep the boat from spreading. These are made from two layers of 4 MM epoxied together. They'll be inlet into the stern transom and the cleats, flush with the hull edge. |
 |
And cleating for those knees to ride on. |
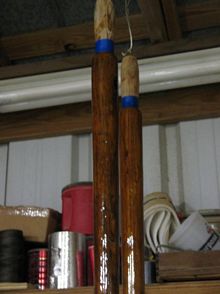
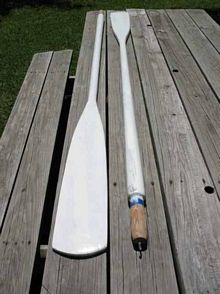
And while that epoxy cures, the oars get some attention. These are a pair I had forgotten about up in the shop rafters. Turns out they are a perfect size. All sanded and epoxy coated. Then they'll be painted white.
 |
Why not varnished? Ever lose an oar at night and try to find it again? Varnished? White is much easier to see. |
The dinghy is getting close to "ready for paint" so hopefully I'll manage a bit of time this week to work on it too. We'll see.
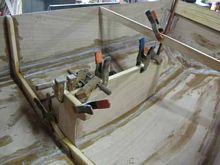
I managed to sneak in an hour today to work on the dinghy. Not a whole lot to report, but did get a couple of knees fitted in the bow.
 |
Checking to see what has to go away at the stern. |
 |
Notched for the knee to sit, bow. |
 |
Lots of shavings left after fitting. |
 |
And the knee, ready to glue and boat nail. |
Next is the stern knees and then sand and install seats.
I finally jumped back into it, and it's getting close.
 |
One morning last week I managed to get the knees installed - Bow and stern. |
 |
Yesterday I got the final epoxy work done. |
 |
Here it is, ready for the seats (this was actually before the previous pic).
You can see the bow seat in the left background is ready to go. |
 |
The seat tops getting fillets, ready for fiberglass tape. The holes are where it's screwed and glued to the frames. |
 |
Bow tape laid out, ready for wet out. |
 |
Taping and wetting out stern seat. |
 |
Stern all taped and wet out. |
 |
Bow all taped. |
 |
The knees got a final epoxy coating. |
Next, the final sanding inside to feather edge the tape, a final coat of epoxy over the tape edges, sand that, and the boat will be ready for paint.
Yes, it's FINALLY painting time.
The paint is some Pettit's EasyPoxy, and is left over (unopened cans) from when I built my trimaran. Probably got the stuff in 1979. I opened the cans, stirred it up (hard work that) and tested it. It dried like a rock, and with good gloss. So it's getting used.
Rolling it onto the stern seat.
 |
Seats and floor will get painted with Interlux Interdeck as a second coat. All else gets a second coat of EasyPoxy. Hoping to be finished painting by the end of this coming weekend. |
After painting, only adding access covers, rub rails and row locks will be left to do.
Oh, and splash testing of course
Just a few pics showing the outside being painted. First coat now on, in and out. One more coat and it's rub rail time.
 |
Half done. |
 |
Brushing edges of runners. Rest gets rolled. |
 |
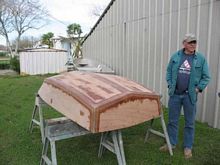
And a white boat. |
 |
Second and last coat of paint on outside, It doesn't look a lot different, just glossier. |
 |
Turned over again, ready for final paint inside, later today. |
 |
Oars epoxy coated, ready for sanding and painting- |
Getting closer all the time.
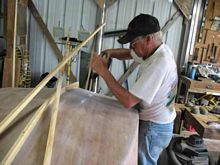
I decided that it made more sense to work on the rub rails, prior to painting the inside, since then I could work on them off the boat, and be free to paint.
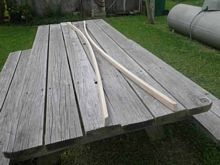
I had an 8 foot piece of fairly clear Ash in the shop, left from another job, so decided Ash rub rails would be really nice. The board was just over 3 inches wide, x 3/4 thick, so gave me a pair of 1-1/2 wide rails. I resawed them to just under 3/8 inch, giving me two layers. I figured those would be much easier to bend around the thin ply hull sides than a 3/4 thick one piece rail.
 |
First I screwed the first layer on each side from the inside And using a cut off wheel in a Dremel, cut the screw points flush. No glue used, so this would be removable later. When they are finally installed, the same holes will be used for the final screws. The cut off screws will be discarded. |
 |
Here's a pic of the end of one of them installed. |
 |
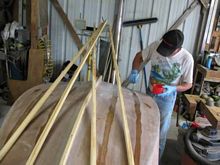
Then laid out the second layer, ready to be clamped in place. |
 |
Fitted it all in place. |
 |
And glued it up. The hull was masked off to prevent epoxy drips on the paint. |
 |
A pic of the ends after gluing, and a rough trim. |
 |
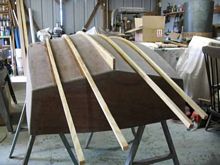
After the epoxy had cured, the clamps were removed and the to edges were planed down level with the hull sides. |
 |
Any of the top round over that had been removed in planing was re-cut. |
 |
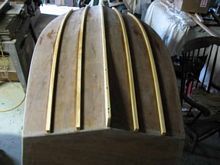
The rails were then unscrewed, sanded, and gotten ready for varnishing. |
 |
Showing the ends after rounding, and sanding. |
 |
And the first coat of varnish laid on - it will three coats in total. For anyone curious, it's Epifanes. |
Since I've been showing the good parts of the build, it's only fair you see one of the screw ups.
I had painted the interior with a first coat, back before I painted the hull. I decided to do the rub rails next because the interior still had some soft spots - sticky places, in the paint.
Well, it was kinda bad!
When I feathered the tape edges on the seats, I brushed on a coat of epoxy to cover. Apparently, I didn't give that epoxy long enough to fully cure before I painted, hence, very sticky paint.
Epoxy requires a fairly precise mix ratio of hardener to resin or it doesn't work well. Too little hardener and it doesn't cure. Too much and it stays soft. Even mixed correctly, as this was (I use metered pumps) there is a certain period where the epoxy is releasing free amines. These are the cause of the "Amine Blush" which is easily handled by a simple plain water wash. In this case though, the epoxy had just not completed it's cure, most likely due to the cooler weather we've had here, and the coat of paint blocked the finishing of the cure.
I washed off the sticky paint with mineral spirits, and after several days, the epoxy is hard cured, and my test patches of paint are also not sticky.
But here's what the wash down left. As you can see, the paint is gone from where the fiberglass tape is around the seat edges, and also from spots where I just used up the remainder, covering screw heads, etc.
 |
In the bow |
 |
In the stern |
 |
and the old man contemplating the goof. |
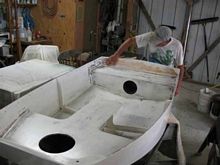
After allowing the epoxy to finish curing for several days, I repainted the interior, and today laid on the second and final coat. The hull bottom will get non skid tomorrow. It has to be taped off and I wanted to wait an extra day for the interior paint to dry.
 |
Over all view |
 |
Stern seat |
 |
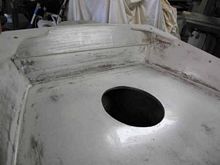
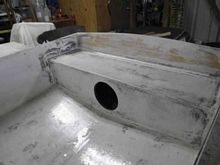
After it cured over today, I installed the deck plates in the bow |
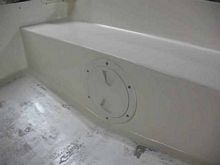 |
and stern |
 |
and got a coat of paint on the oars |
Next, second coat on the oars, install rub rails and row locks, and paint inside hull with non skid.
 |
Non skid done, rub rails on, oar locks installed (Bronze). Weather permitting, she gets wet tomorrow. I still need a towing eye up front, and the oars need one more coat of paint, but that can come next week. |
I hope everyone enjoyed this pictorial of the build.
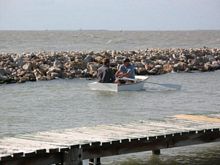
Despite the fact it was blowing over 20, and our beach was a lee shore, we found some calm water between the rock groins of the local launch ramp and splashed the dinghy.
I have videos of rowing in some heavier stuff, and a floatation test, as soon as I figure how to upload to UTube and post them, I will. I'm totally satisfied with my mods, as I shoved the boat down as hard as I could, until it refused to go further. Then got aboard with water up to the seats, and it floated with the rails out.
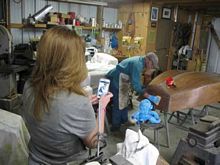
Some of the crew who assisted below. James and Rachel of the Peanut Butter Diet, who presented Invention with a palm frond dream catcher, Matt (JMF on the chats) and a few others were present.
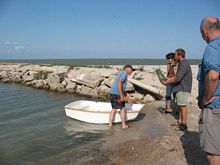 |
So the dinghy got wet on some sand next to the concrete ramp. |
 |
And here's the builder standing by at the splash, dream catcher in the bow. |
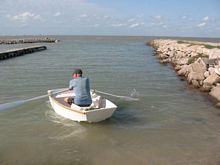 |
First row, from the bow. Note, if you look out to the end of the rocks, you can see where the calm ended. In one videos you can see the waves breaking over those rocks. |
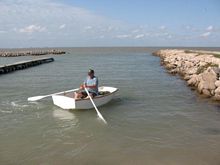 |
And from the stern. Trim looks pretty decent. |
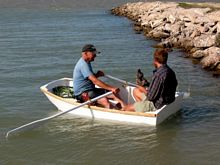 |
Then we tried with two aboard |
 |
and ventured out into the edge of the waves. |
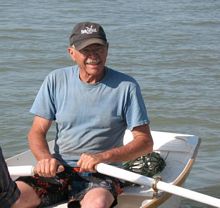 |
Here's the builder with a grin on his face that stayed most of the afternoon. |
 |
And a final shot of that happy grin on an old guy. |
Then we retired to the house, for veggies, baked chicken and many coconut rum and pineapple juice beverages.
|