
 Custom Search
|
| boat plans |
| canoe/kayak |
| electrical |
| epoxy/supplies |
| fasteners |
| gear |
| gift certificates |
| hardware |
| hatches/deckplates |
| media |
| paint/varnish |
| rope/line |
| rowing/sculling |
| sailmaking |
| sails |
| tools |

| join |
| home |
| indexes |
| classifieds |
| calendar |
| archives |
| about |
| links |
| Join Duckworks Get free newsletter CLICK HERE |
|
|
| Using Round Balls to Form Seam Fillets |
by Warren Messer - Seattle, Washington - USA |
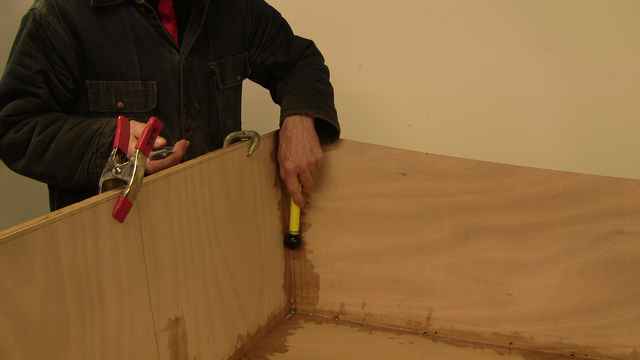
For years, I have been using what ever I could find to form the fillets in the seams of the hulls I building. I've used sections of plastic PVC and ABS pipe, metal conduit, plastic lids, and shapes cut from old credit cards and AARP cards when they used to be made from plastic. Most often I would use shapes cut from plastic squeegees that I could get at the hardware store, or from those that System Three sells online. Most of these various objects would work and with a bit of care, could get the job done with a satisfactory outcome. The only thing was, that you had to stay on top of the process, and watch that you were holding the tool at the same angle as you traveled down the seam. This was easier said than done, as the tool of choice would change angles as you stretched out your arm and pulled it towards you as you shaped the fillet; steepening the tool angle as it got closer to you. This would push the center of the radius down farther into the fillet, and thin it out a bit. Usually it was not noticeable, but would show up as you moved along the seam, and passed the tool though the fillet again as you tried to feather it into the new area you were now working on. Also with these one dimensional tools; working into and out off the corners, or at the tops (ends) of the vertical corner seams, I would sometimes lose the correct angle as I made the finish strokes. Most of the time it was something that wasn't that noticeable at the tops of the corner seams, but could be a real problem at the corners where you had three different seams coming together. Starting, stopping, and turning at and in the corners could become problematic as you turned the tool, and hoped not to apply too much pressure to the tool, and have it dig a hole in your almost finished corner. Most of the time, I would just leave any extra material that was sticking up above what I wanted the finished seam to be, and would come back after it cured to shape with a rasp, sand paper, or a rotatory tool bit on my Dremel. I knew that there must be a better way, and I remembered someone said something to me a few years back about using a "roller" to keep from squishing the fillet material when I used to apply the first layer of glass tape over the fresh fillets. I used to do this to limit the amount of epoxy I would have to use to wet out the glass tape. This would have worked, but I started letting the fillets cure first so I could do a better job of finishing the surfaces before I added the tape. So, using a round surface was in the back of my mind when I was cruising the aisles of my local Do-It-Center. I walk five miles everyday, and the store is my turn around point, and I can have a free cup of coffee, and maybe if I'm hungry enough, a free bag of popcorn too.
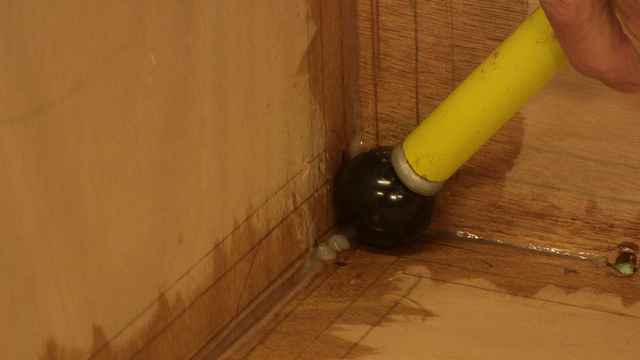
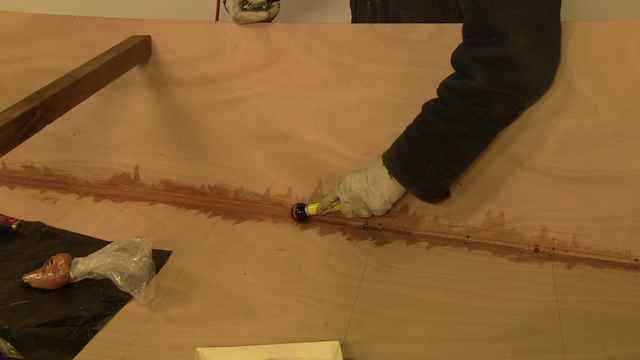
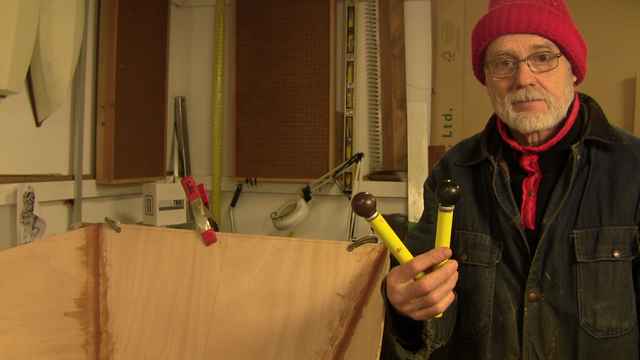
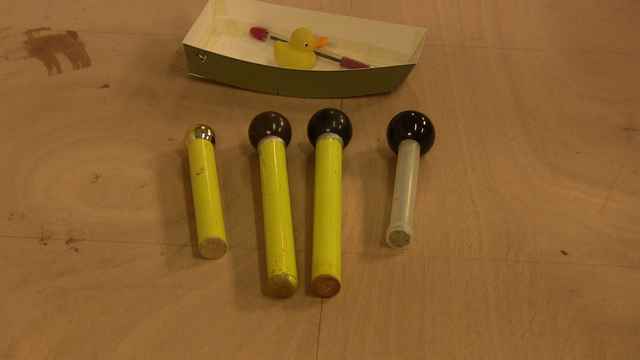
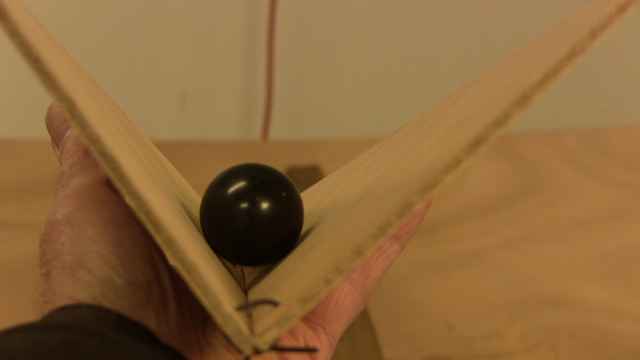
For some reason, I was walking down the aisle where they keep the door pulls, handles, hinges, and tons of other stuff, when I saw a box with a sign. $1.00 for marble door pulls. Hummmm? I move the sign off the top of the pulls, and saw a box of brown and black marble balls, of an interesting size. The old "I wonder if" light went on in my head, as I picked one up to roll it around in my hand. Looked to be about the right size, and had a very smooth surface. It also had a threaded insert in the ball so it could be attached to a stick somehow. I folded over the lid on the box to form what I thought was the angle of two of the sides on the Nymph, and put the ball in the bottom of the angle. Looking at the light coming between the cardboard, and the bottom radius of the ball; I could see that I would have a nice fillet with just the right amount of thickness in the deepest part. So I bought two, and picked up two ½ machine screw thread, and ½ wood screw thread studs. When I got home, I tapped the metric threads over to 8/32 SAE, and cut and drilled some broom handle I had laying around. When it was time to apply the EZ-Fillet to the seams of the Nymph, I mixed up the material and used the bagging technique that I've been using for several years now to fillet several hulls. The bags are easy to use, and you put the fillet material where it needs to be and not everywhere else. You just have to cut the end of the bag for how much fillet material you want to use for that part of the job. Small hole, less fillet; bigger hole, and probably too much to deal with, so think ahead. It was cold in my shop, and I had the EZ-Fillet parts A&B buckets sitting in front of my little electric space heater to warm up some, so I could work it into the correct mix. As I noted in the video, the first bag was still too cold, and was not "slumping enough" to work into the seams with the ball at first. I was also using too much material at once, and it was piling up on the sides creating a mess, and big windrows that had to be scrapped away. After a few feet, I became aware of what I was doing wrong, and cut back on squeezing so much material out of the bag. Later, when I had started using the second bag, the temperature of the material was higher, and was flowing out of the bag, and under the ball much better. That along with using less material greatly improved the process and appearance of the fillets. Going into and out of the corners with the warmer mix was also much better in application and look of the finished fillets. Make sure to keep the ball clean by wiping it off with a shop cloth when it starts getting too much material on the outer surface edges not actually making the fillets. As I noted in the video, the handle of the ball could be held at any angle; inline with the pull, or even off to either side. So if you have "things in the way", using the ball on a stick, will let you move around any object, and still have a consistent radius to the fillets. I really liked that I could push, pull, or move to the side in the corners to keep from having a ridge along the change in direction. I think that in the next hull, I will hold the bag in one hand and "push the ball" with the other. Before I always had to put the fillet bag down to pick up the tool and use with my good hand to keep the angle consistent as I worked the material. Using two hands would make it even faster to do the fillets. I don't know if it would ever be as fast as when I use GelMagic in the uTAH tube to do the jump stitching, but pretty close. Since I made the fillet video, I was able to pick up two hard and smooth plastic balls, with 3/8" threads. They are bigger than the larger marble ball I used, and would have worked much better on the bow to side panel seams on the Nymph. I will use them on the next hull I build, and I will know if the plastic surface is going to work better than the marble surface. At least I don't have to wax the plastic ones. I found some 1" diameter brass balls in a junk box, and I've added handles to them as well. I'm also going to be looking for larger diameter balls in the future for doing other hulls that need a larger radius for panels with angles in the 120 to 140 degree range. Normally I would just use a 1&1/2" putty knife centered on the seam, and have a flat surface for the glass tape. On some hulls, the panel angles near the bow are pretty flat, so you don't get much fillet material on them, but it does help to cover the jump stitches and have a fairly flat surface to apply the glass tape to. I guess I could use my old bowling ball, as I don't use it anymore, and it has a grip already built in. I hoped you enjoyed this story on using "round balls" to shape and smooth fillet material into the hull seams. They will work in other areas of the hull too, where you have to apply fillets to interior parts of the seats, bulkheads, and other joints, but with possibly small diameters. So be on the look out for anything that might work to add to your arsenal of tools. Even the kids toy box. Warren Messer Red Barn Boats 21st Century Stitch & Glue |
To comment on Duckworks articles, please visit one of the following:
|


 |