
 Custom Search
|
| boat plans |
| canoe/kayak |
| electrical |
| epoxy/supplies |
| fasteners |
| gear |
| gift certificates |
| hardware |
| hatches/deckplates |
| media |
| paint/varnish |
| rope/line |
| rowing/sculling |
| sailmaking |
| sails |
| tools |
| join |
| home |
| indexes |
| classifieds |
| calendar |
| archives |
| about |
| links |
| Join Duckworks Get free newsletter CLICK HERE |
|
|
| February Treasure Chest |
Kano Yak
This guy has an interesting idea - he sells a frame kit to which you add plywood. His instructional videos are really detailed. Take a look. Chuck Coopers Mast and Spar ConstructionJust a couple of comments about my experiences making three of these spars, (see the article by Ed Davis at for an excellent description of these). What width staves? Depends on the finished size you want for your spar. Roughly speaking, for an octagonal spar, multiply the stave width (the larger edge) by 8 and divide the answer by 3 to give you the distance across the corners for your finished spar. Alternatively, multiply your desired spar size across the corners by 3 and divide the answer by 8 to find the stave width. The size of the centre hole depends upon the thickness of the plank from which you cut your staves together with the outside diameter of the spar. Commonly, in useful widths, hardware stores in Australia stock dressed pine 19mm thick. I found a local timber merchant who was prepared to dress my planks down to 15 mm to give me a lighter mast that I feel will still be strong enough. Cutting the staves was not really difficult after mastering a few little tricks. Not having a table or band saw, I had the choice of jig saw or circular saw to cut the staves. I chose the circular saw. Lucky I did some practice bits... The angle gauge on the saw is quite inaccurate, so I set the angle using a cheap folding rule (from a supermarket) and a school protractor. This angle is really important as, for an octagon, the face of each stave is angled at 45 degrees to its neighbour. As this 45 degrees is shared between neighbouring staves, you have to cut the sides of each stave to 22.5 degrees. Cut the angle - too small and you’ll have gaps in the outside of the finished spar. Too large an angle and the gaps are on the inside of the spar (or perhaps you end up with a septagon spar!)
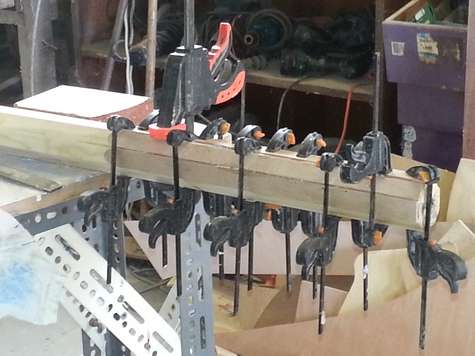
Then I found that the little vee notch guide in the foot plate of the saw no longer guided me along the marked line. It guided me to cut a stave 3mm narrower than marked, clearly due to the angled blade and probably a common thing for all similar saws. I also found it necessary to support the weight of the saw motor with my left hand as I guided the saw with my right. Otherwise the saw foot didn’t stay always flat on the plank as I cut the stave, making an uneven width cut on the narrow (inside the spar) edge of the stave. I recommend painting or varnishing the narrow edge of your staves before gluing. I didn’t and now have to consider how to paint the inside of a 10 ft tube! I used an expanding foam glue to glue the staves together to take up any inconsistencies in cutting the strips. The glue bottle says to assemble the joint within 15 minutes. That’s really pushing the envelope as you have to apply glue to 8 staves however long. And by the time you get to the end of the last stave, the glue is dripping of the first few. I did mine during a cool part of the day to (hopefully) extend the time to do the assembly. It took me about 20 minutes from start to finish and the glue joints appear to be ok (so far anyway!). So have everything ready before you start. I used 2 pieces of scrap wood each with a ½ circle cut out of it to support the staves as they were assembled and lots of old newspaper on the bench and on the floor to catch the drips. When I assembled the spar, I found a jubilee clamp was very useful in assembling the octagon (adjust to size before you start gluing!). In fact, I used several down the length of the spar, replacing them with duct tape after having added several other duct tape ‘clamps’ in between the screw clamps. Only issue was cleaning the glue out of the clamp after removal and before the glue set. I created 3 spars using this technique, a yard arm, a boom and a mast, in that order and from smallest diameter to largest. Lucky. Well, not really. I did it in this order as I felt that this was the order of least to most critical, and I wanted to make my mistakes on the least critical parts. The yard arm finished up with a slight curve in it and when I did the boom I found out why. When the glue is wet, the staves will move a little and it is easy to set and unset any curves at this time. So, after gluing and before I put the spar down on the flat (newspaper covered!) floor to cure, I checked and corrected any visible curves. I have glued a thin piece of ply across the top of the mast but will leave the bottom open for drainage. Then its just a case of sanding off the excess glue and obtaining a nice finish. Martin Pearce from Frankston, Victoria, Australia Martin is moderator of the Flapdoodle Forum. Rescue Me Balloon
Our product is called Rescue Me Balloon, a compact, easy-to-carry emergency apparatus that places an SOS balloon 150 feet above a person in distress and illuminates an SOS signal using an LED light. Shon Pirate Chest Beer Cooler and Dents in Wood
Would work on plywood I should think. Found on Instructables.
Both Found on Instructables. Mike John Blade Molds
I thought I would send a photo of a project: Molds for fiberglass or carbon oar blades. I have some 1-1/2 inch dense foam (8+ lbs. I think), and cut it with a saw, shape with a surf-form tool or rasp and sandpaper to your dimensions, then glue to heavy cardboard or light ply. Curved blades are easy. Cover with plastic wrap (or fair with Bondo, and coat with PVA mold release), then lay your fabric on top and pour on the resin. Edges are cleaned up after the resin sets up. Dana Testing SeatingMy Duck, Pi-rate, #486, is a 16"-er with a curved sheer down to 14" amidships. I can sit on the side decks (air tanks) all day without discomfort. My Duck-Duck-Goose is a 18"-er with no curve. My butt hurts after an hour or so. Just my particular anatomy interacting with the boat's bottom to seat height. If you've not started cutting yet, block up a plank in your living room to 18", turn on the TV, put in a movie and sit down. If you can sit there for the entire movie without extreme discomfort... because of course you're not going to be as comfortable as sitting on the couch... If you can't make it, have bad pressure points or your feet fall asleep or something, try a different height. IMO, valuable research for a boat you intend to sit in for 200 miles in the blazing sun. You also might try tilting the seat either toward or away from your feet. Seth How to Make a Wall-Mounted Workbench
Found on Instructables. Kiln Dry Lumber At Home
Found on Instructables. Mike John Battery Light
I happened across this item on Amazon, bought it on a whim (it was on sale, after all) and have been patting myself on the back ever since. My shop is not well lit to begin with and as you all know, boats have lots of small nooks and crannies that really can benefit from a good light. This little jewel, while not cheap (even on sale) is a lifesaver at times. The 10 LED watts really light up a work area and the battery reportedly lasts for 4 hours. I have not been able to test that yet as I seem to run out of steam before the light does. Chuck |

To comment on Duckworks articles, please visit one of the following:
|


 |