Cruising in a small boat with your family can provide some memorable experiences for all. Our family started cruising in Puget Sound when our two girls were three and seven. Now seventeen years later they still demand family vacations on "daddy's" boat. My younger daughter named the first dory "Daddy's" when she was less than two years old, the second dory became Daddy's Too, and the third dory is now called Daddy's Third.
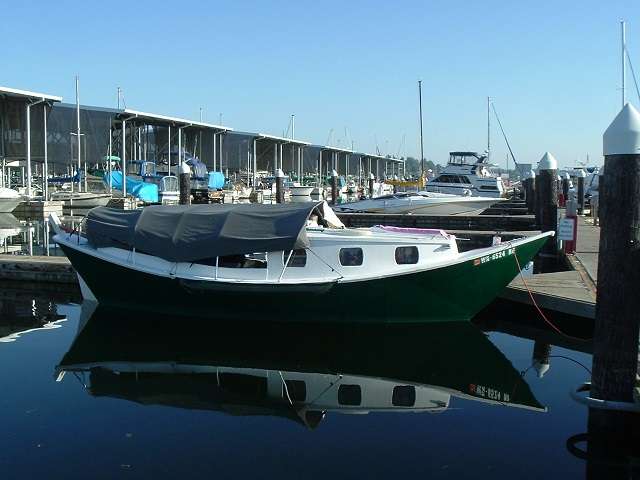
Camping on a small (26 ft) dory however does create some problems when the cabin can only hold two. Mom and Dad have to sleep in the cockpit, and given that we live in the Pacific Northwest, it is not often wise to sleep under the stars. In the first ten years of our cruising I tried a variety of tarps and tents over the cockpit to provide protection as well as privacy. Nothing seemed to work well. Either they leaked or they took forever to put up and take down, and we could not stand up in the cockpit. The first picture (Fig. 1) shows the best design I could build. It worked somewhat but was not optimal. It kept the rain out but didn't let us stand up.

Fig. 1 |
Finally, I decided to bite the proverbial bullet and spent the money to buy a bimini top as the starting point for a full canopy. The advantages of starting with a manufactured top are many: 1) the top is waterproof (vinyl) or can be made waterproof (Sunbrella or similar fabric); 2) the aluminum poles are sturdy and can withstand a blow, 3) the framework can be bought so it is high enough so one can stand in the cockpit, and finally 4) the top fold down nicely into a small package that can be enclosed in a cover that usually comes with the purchase.
A bimini top alone however, does not provide any privacy, nor does it keep the rain from coming in the sides. The obvious solution is to attach sides to the bimini to cover the exposed areas. In looking around the marinas, this is what I found on the larger power boats with flying bridges. Most boats had clear vinyl for sides, but this really would not work for us because we needed privacy when we slept in the cockpit. So, I purchased some marine polyester fabric and sewed sections to fit between the bimini top and the sides of the boat.
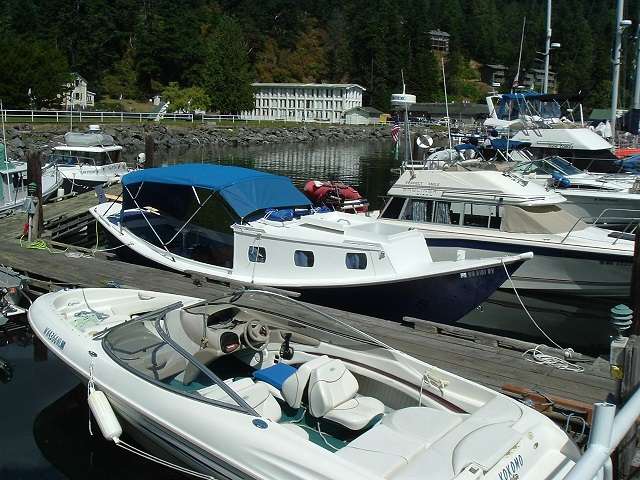
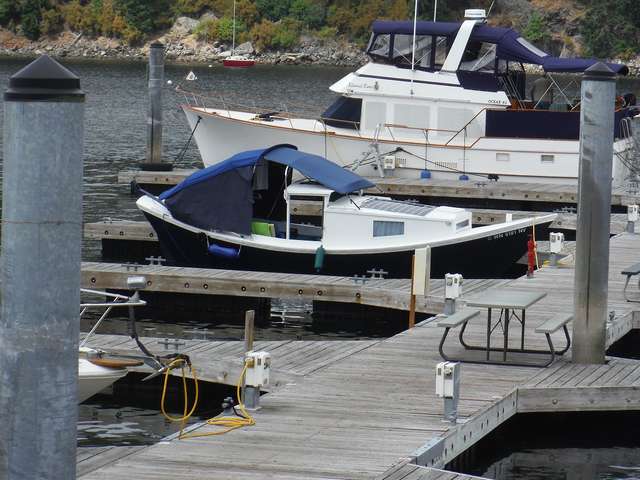
Given that we were adding fabric we did not have to ensure that the bimini top was horizontal. We could angle the top by adjusting the webbing straps. This gave us more headroom in the center of the cockpit and less at the aft end where we did not need it (compare Figure 2 and Figure 3).
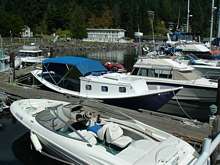
Fig. 2 |

Fig. 3 |
In looking around the marinas I saw that many bimini sides were attached with snaps. So I tried to put snaps to attach the sides to the top (figure 2). Well. That turned out to be a hassle and did not prove very effective. For some reason I could not get the snaps to seat properly in the fabric, not could I line them up exactly between the top and the bottom. The problem was that the side pieces had funny shapes with several angles in them. It was almost impossible to line up the snaps so there would be no gaps or "bubbles" along the joint.
The obvious solution was to use zippers, but my local sewing supply stores did not have any zippers of the necessary size and length. After some searching I found a web site with large (#10) nylon zippers that could be bought in lengths as long as 10 ft. Not only were these long enough, but a 10 ft zipper was less than $10. The store is called Rochford Supply and they also have all types of marine grade fabrics at reasonable prices. I sewed one side of the zipper to the Bimini top and the other to the piece of fabric that forms a side.
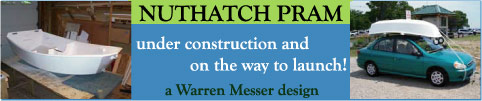
A word of caution for those who wish to do something similar. Don't expect to be able to measure the different angles and lengths for the side pieces directly. I have learned from experience that it is better to cut each piece to an approximate size that is 3-4 inches larger in all dimensions. Then I fold and pin what I think the dimensions and angles should be and pin it temporarily to the bimini top. Any adjustments can then be made by refolding the edges. This all has to be done with the bimini top in the position you wish it to be. The folded edges then become the hem. A soldering iron run along the edges will seal the polyester and keep it from unravelling so folding a second edge under is not necessary. A few grommets along the bottom edges to attach a hold-down, and voila one has a large tent over cockpit that extend the cabin. So after 15 years of experimenting I have come up with a solution that works for us. Each of the side panels is on a separate zipper and can be taken down if we want to allow the air to circulate during the day (Figure 4). In the latest version of my dory I have added a covered central steering station so I have extended the canopy over it as seen in Figure 4. The options for customizing a bimini top are many, so you can decide what you need and the shape of your extended cabin.
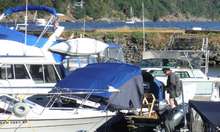
Fig. 4 |
A final note about sewing. The side panels are made of fabric that is similar to that used in the bimini top. The fabric is fairly heavy and your standard sewing machine may not be up to the task. You will need a #18 or #20 sewing needle and a strong electric motor. The other option is to go "retro" and use a treadle machine. These are still available in antique shops and on the web. They have the benefit of having a direct mechanical drive rather than a rubber belt. So as long as you have the strength to turn the side wheel by hand you can punch through almost any material.
I have a 1929 Singer treadle machine that I bought for making my first sails over 35 years ago. It will punch through eight layers of Dacron sailcloth or 4-5 layers of bimini fabric with no trouble at all. And, just a few months ago I found that Singer made an adapter that fits on the foot that lets me sew a zig-zag pattern, just like the new machines. If you are lucky enough to have a treadle machine and want a zig-zag attachment, be sure to get the earlier version from 1930-31 (#121706). The later model #161102 from the 50's may also work but doesn't seem to handle the heavier fabrics well (according to the reviews I have read on the internet). By the way, I have two daughters and a wife who like to sew, and we have 4 sewing machines in our house, but they all want to use MY sewing machine!
|