
 Custom Search
|
| boat plans |
| canoe/kayak |
| electrical |
| epoxy/supplies |
| fasteners |
| gear |
| gift certificates |
| hardware |
| hatches/deckplates |
| media |
| paint/varnish |
| rope/line |
| rowing/sculling |
| sailmaking |
| sails |
| tools |


| join |
| home |
| indexes |
| classifieds |
| calendar |
| archives |
| about |
| links |
| Join Duckworks Get free newsletter CLICK HERE |
|
|
| Two Models |
by Marco Salden - The Netherlands |
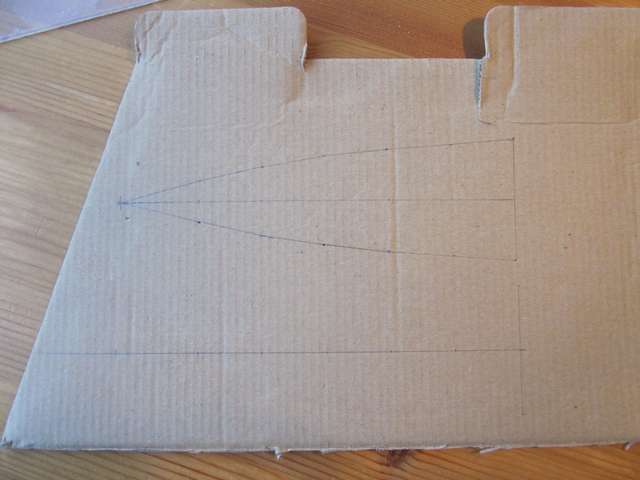
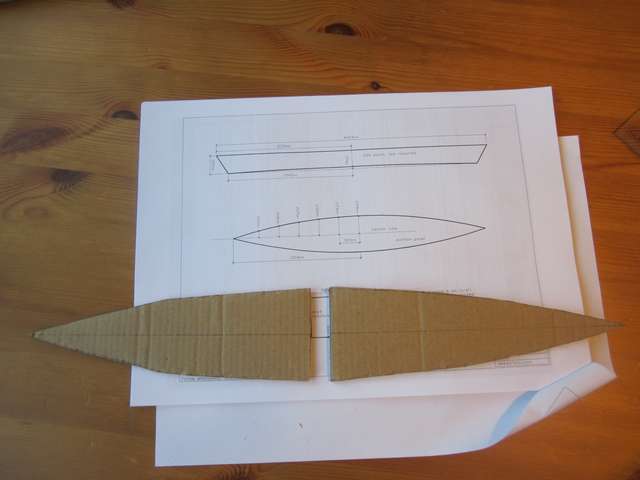
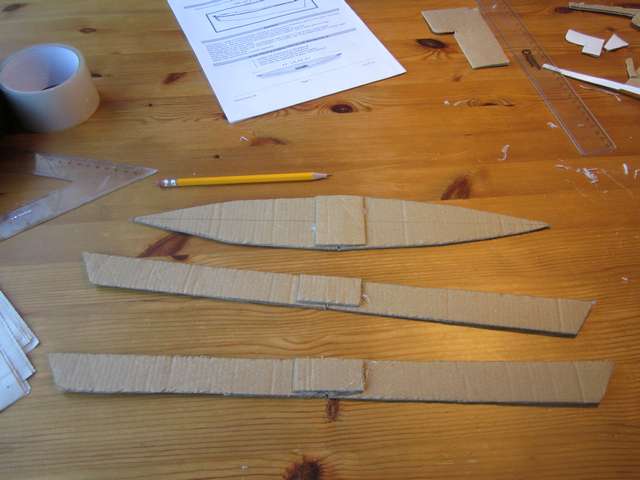
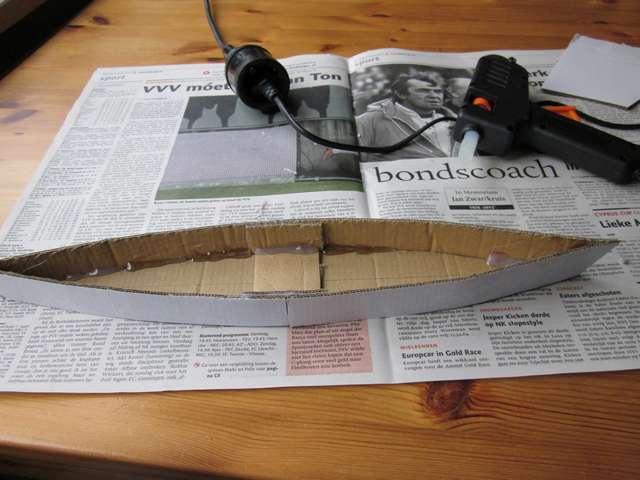
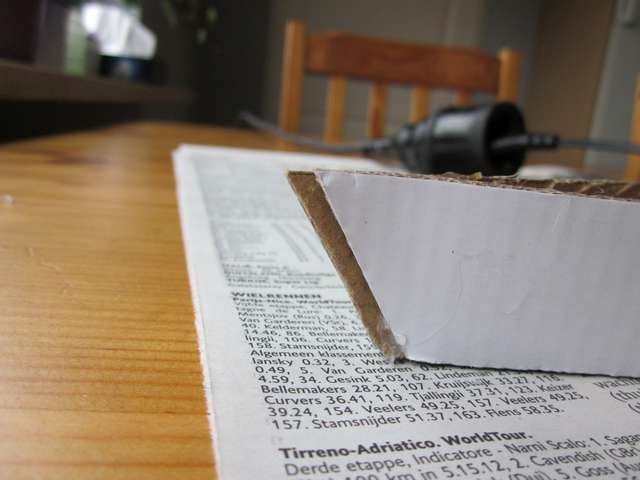
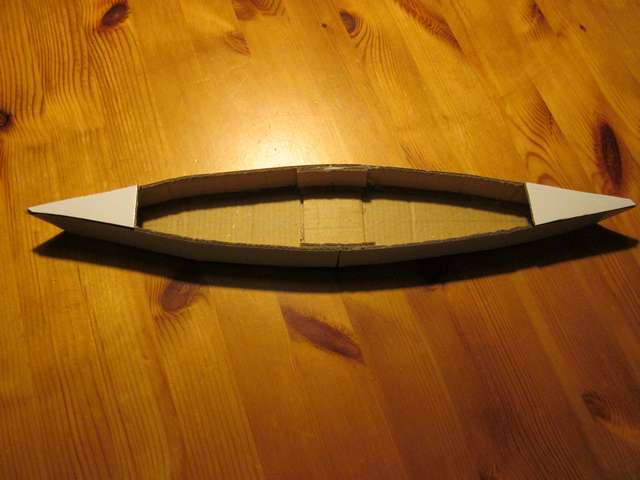
Cheap Canoeby Marco Salden - The Netherlands Looking for a simple canoe to build out of plywood, I stumbled upon the "Cheap Canoe" from www.bateau.com. To get a feeling of the building process and also it's 3D dimensions characteristics, I decided to built a model on scale (1:10) in carton board.
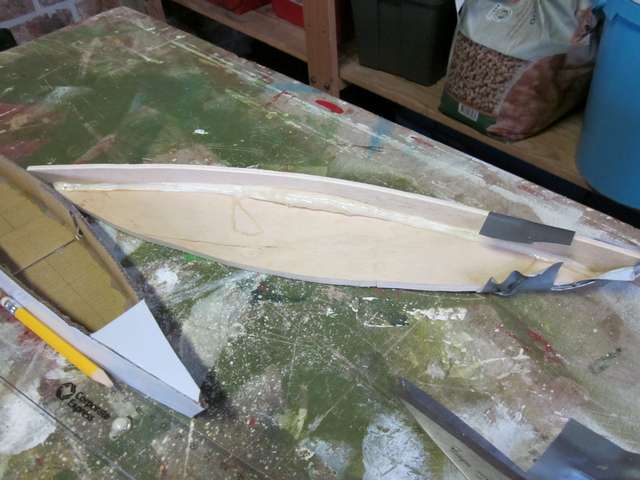
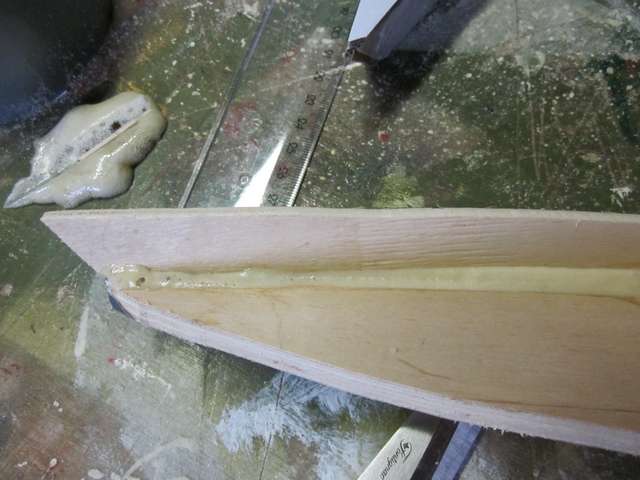
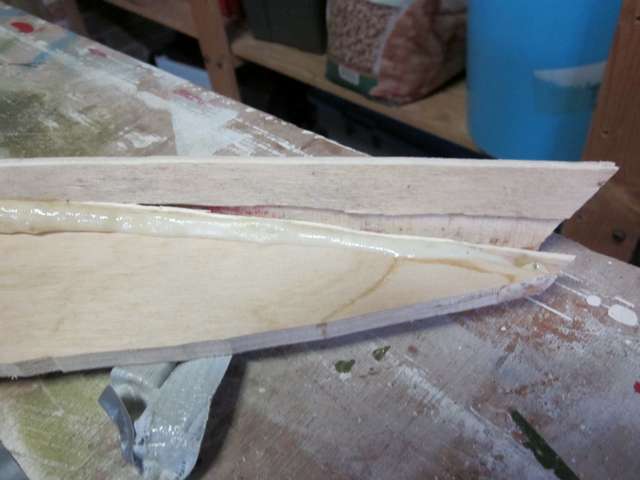
I noticed after installing these decks that there is much less torsion possible lengthwise in the canoe, so I guess adding to it's longitudinal strength. This is of course "as expected" but I was surprised to "feel" it also in this simple carton board model! So what did I learn: (a) Making a carton board model gave me insights into the building process using the plans and checking if I understood them: sort of "test-driving" the plans so to speak in just 2 hours effort; When the weather clears up here in The Netherlands (now still snowy!), I will start the actual 1:1 build and of course keep you all posted! Now I also made a wooden model of the cheap canoe. I based this on the carton board model. I only made the bottom and one side and glued them together using the duck-tape and glue method as you can see in the pictures. Instead of using epoxy glue however, I just glued the joint with polyurethane glue (brand: "Bison" as readily available here in the Netherlands, here this is known as "construction glue", especially intended for outside construction). The disadvantage of this glue is that expands (with some force) and that the taping needs to be done really good or the joint will expand. The upside of this glue (for me) is that it needs no mixing, is cheaper (I think) and does not have the toxic sensitivity issues associated with epoxy. The result is a joint that is indeed strong too. Not sure what I will use in the actual boat though. In the past I glued two pieces of waterproof 4mm plywood together with this glue and had it submerged in a tin of water for 1 week: still a very strong glue composition: no difference with before the submergence.
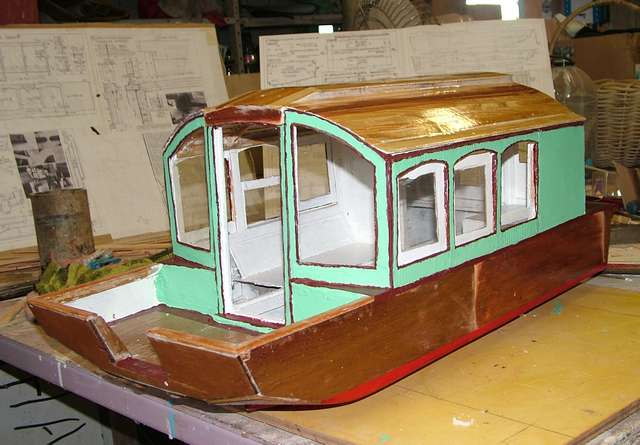
Trying to forcefully breaking the joint resulted in the 3mm side plywood to be breaking internally (unlayering), and the PU joint still in place! Plan is to make the actual boat in the summer holidays! Keep boating! Marco Salden, The Netherlands ***** Model Inspired by Dianne's Roseby Paul Rodwel - Ravenshoe, Queensland - Australiala Roy Schreyer wrote in September's Water Craft: "I loved sailing our beach cruiser, Whisper, "roughing it" in the wilds. Dianne (my wife), not so much! She encouraged me to build her a more comfortable boat, nothing tippy please!". That last phrase sums up the feeling my wife, Jane, has towards boats! What did Roy do? In beautiful pictures and persuasive words he describes the designing, building and voyaging of Dianne's Rose his "shanty boat". That's it! Would Jane like a boat like that? I left the magazine on the table and went back to work. When I returned Jane had read the article and was smitten with the idea of a not-tippy boat especially one as beautiful as Dianne's Rose. So I sent off for study plans! Almost the next week it seemed Australian Amateur Boatbuilder #87 for October arrives and there on the front cover is Dianne's Rose! Is that an omen or what?
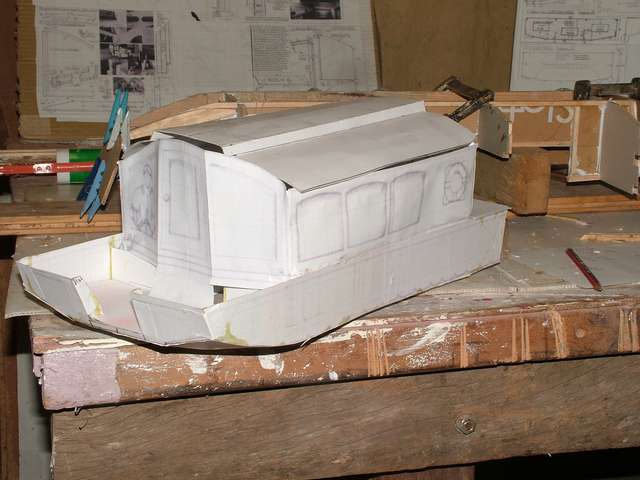
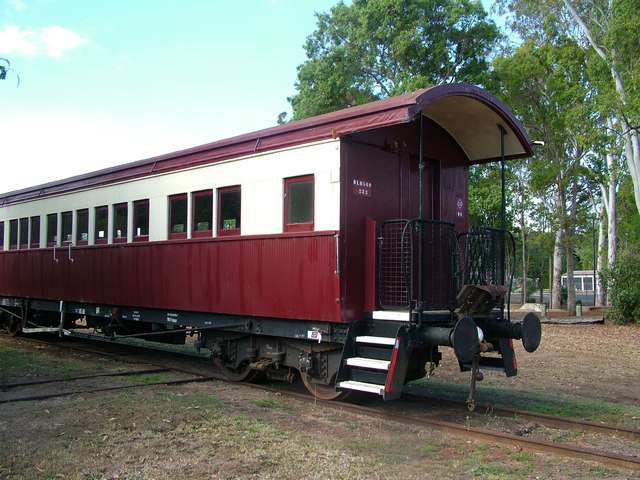
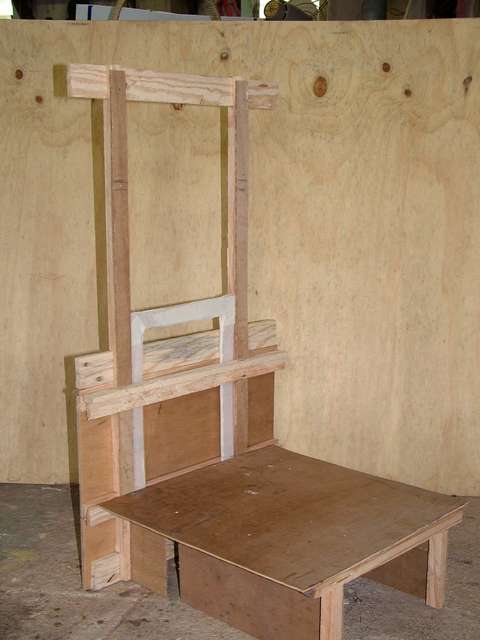
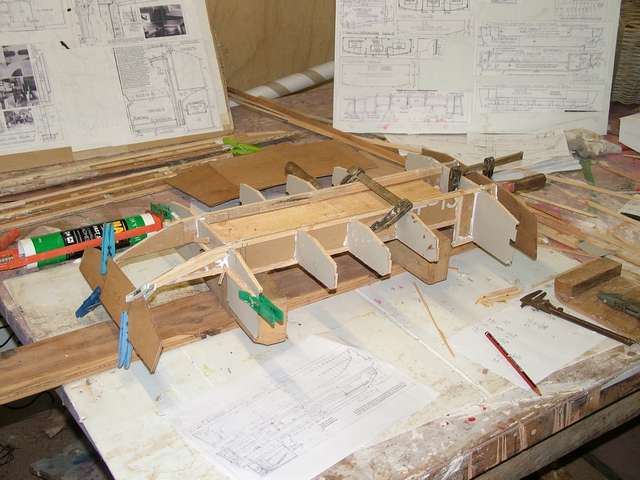
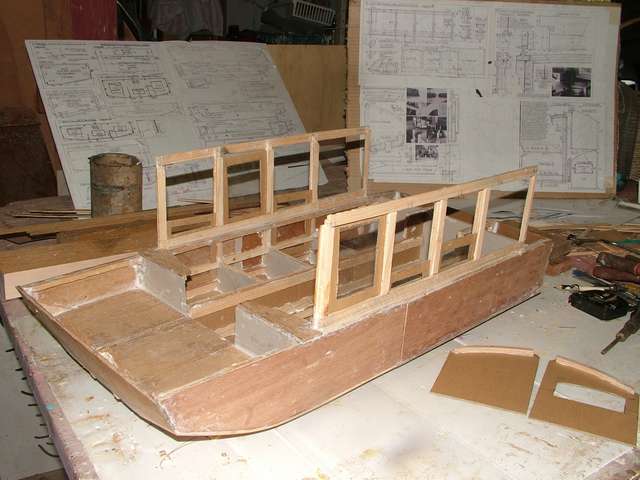
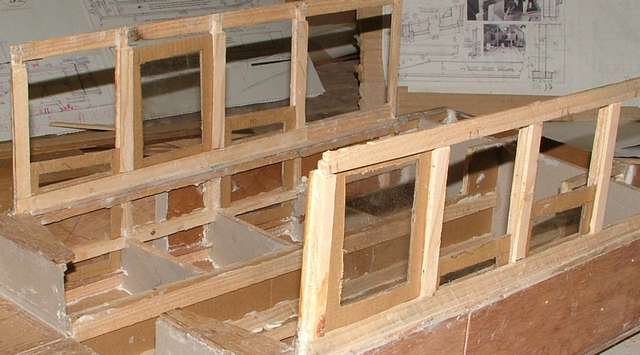
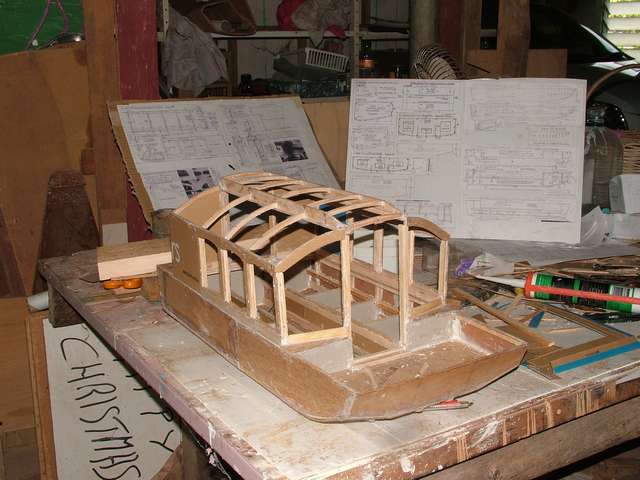
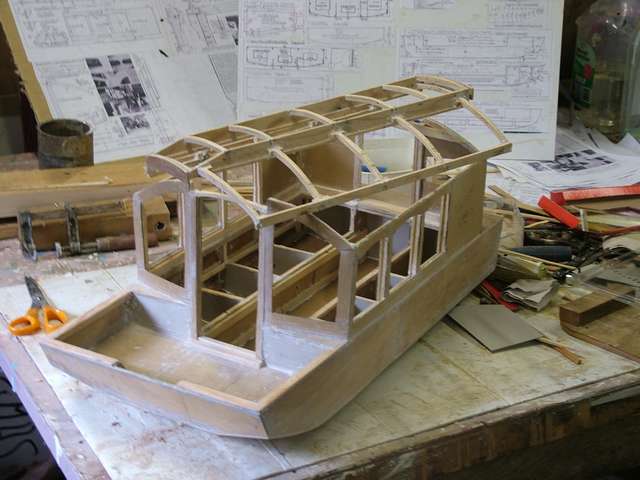
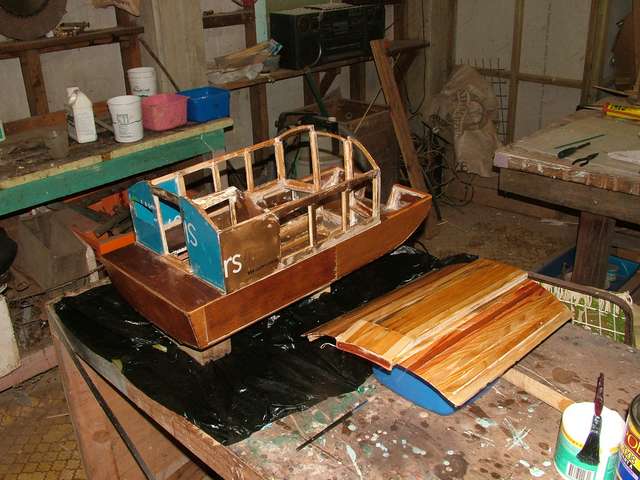
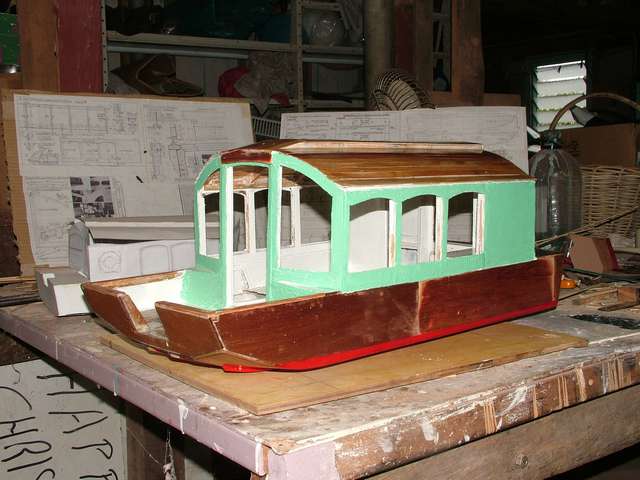
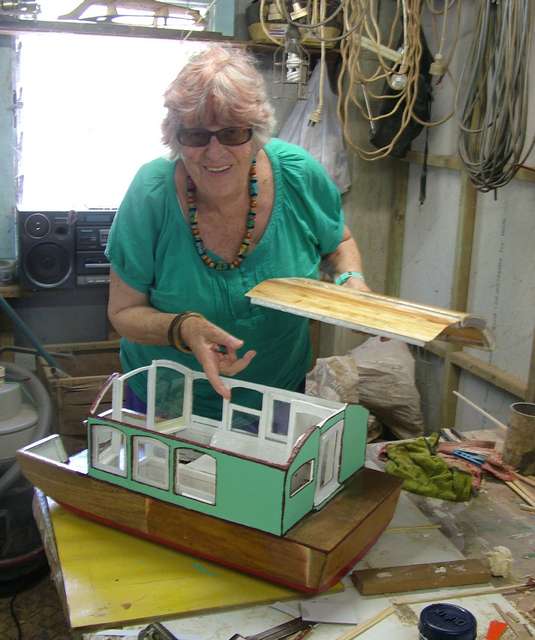
I couldn't wait for plans. There were lots of pictures and outline plans in Watercraft so I set about making a paper model to get more idea of what was involved. Finally, the study plans arrived and confirmed I needed the Full Plans! I couldn't wait for printed ones, (another three weeks plus) PDF plans were on my computer within two days and now are on my iPad too. During the paper model phase, I had started to modify Dianne's Rose to suit Jane and me; not a lot but a few things here and there. Jane is not as athletic as she used to be so easy access was important; not too much "climbing aboard". So I plan to lower the front deck to one foot above the cabin floor. Then there will be a "landing craft" style ramp in the centre of the bow. That improves access. We are in the tropics so lots of ventilation is important; I want all the side windows to open but there must be another way than Roy's design however suitable that may be in the original boat. I spent a lot of time with Ravenshoe Railway and amongst other things repairing their old wooden carriage. The oldest of these has simple sash windows that lower down into the side of the carriage. Could this be done on the shanty boat? It looks a bit like a railway carriage on a raft! I built a half scale model of the side of the boat and confirmed that if I moved the part bulkheads to be in line with the window frame uprights and changed the 1½in. sqr. stringers for two 2x ¾ pieces ¾in apart at the windows then it was possible. There is just enough room for the sashes to slot down with their top rail showing. To really be certain all would come together incorporating my ideas and to give the two dimensional plans and pictures a three dimensional reality, I set about making an eight scale model. 1/8th scale works well with Roy's feet, inches, halves, quarters, etc. I hadn't realized this before in our metric world! It was also mentally stimulating converting all the dimensions; may hold off dementia for a bit longer! During the process so far I have been in email contact with Roy and he has been so helpful and encouraging. The wonders of modern communication are useful at last! The model is now complete and everything came together as I had hoped. One thing it cannot show is the propulsion system; I intend - solar charged electric; that is why there is no outboard well on the model. Interesting that there was an article on electric propulsion in AABB too! If there is anyone out there who can give me tips on this system I would be happy to hear from you. Oh I nearly forgot - the name - Rosie Lee; chosen by Jane without realizing Roy's wife's second name is Roselee! She did know my other boat is Missee Lee so Rosie will be in the "same family". Paul Rodwell
|

To comment on Duckworks articles, please visit one of the following:
|


 |