Part 1 - One of Those
Part 2 - This Small Space
Part 3 - So Where's This Boat of Yours?
Part 4 - Planking Nightmares
Part 5 - It's All Downhill from Here
Part 6 - The Routine
The plank was cut perfectly and glue applied to the frame. I was pulling the first plank into its position near the front of the hull near the stem when I heard a small noise, did I step on something? I keep forcing it in, screw by screw the plank settles in when *SNAP* a large crack appears at the top of the plank between the stem and bulkhead No.1. I look with disbelief at the now scrap wood. Would I build a bonfire that I earlier joked about. It’s what I imagined a plank mishap would turn into anyhow. I sometimes let my imagination run away with my common sense, otherwise I wouldn’t be building a boat in a recession, talk about poking a stick in a hornets’ nest. Aw Hell, back to the boat, life is too short to worry about things out of your control.
 |
I had cut a small pile of wood strips many weeks earlier and stored them in my basement, but in the time that passed they dried out considerably and were like match sticks. These were to be my stringers/battens for the planking. After snapping two pieces trying to bend them to the frames I figured I should approach this from a different perspective. I took the best looking ones and laid them on the floor. Covered them in old shop rags and gave it all a generous slogging with buckets of water. Literally buckets of water. I let them sit there for a week. At the end of that week the rags were dry and the wood seemed so too. But once picked up I could tell they were now very flexible.
click images to enlarge |
I read somewhere that epoxy won’t stick to wood that is over a certain moisture content, so I took each stringer and basically bent and tied them to the frame members. This would let them dry to shape until I was ready to permanently glue them in place.
|
 |
 |
A week later I started and glued and screwed one strip each evening until I was complete. I alternated back and forth from one side to another to keep the boat straight during this process. |
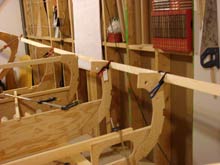
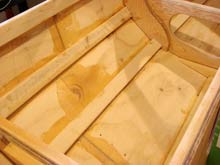
The slots cut for the stringers were the same depth for every frame. Only enough to make sure the center of the stringer was outside the frame edges or corners. They were all installed with much help from some cheap bungee cords and simple twine.
|
 |
 |
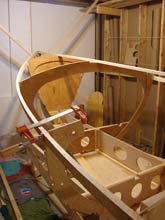
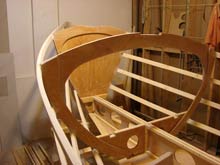
The next part was to put mildly, taxing. Each stringer including the brute of a chine stringer had to be shaped to match the frames. I used an angle grinder with a 24 grit disk for the brute work and belt sander for the rest. |
It might seem crude but if you’re used to a certain tool you can achieve good results with it.
|
 |
 |
A centerline was marked on the stringers and I kept the bevels to those lines. A straight edge was used to keep everything in the same plane as I moved along the hull. It took about two weeks of evenings to do this part. Not technically challenging, just monotonous. Advice... All I can say is that the boat won’t get built if you don’t finish this part so you may as well head down and get through it, happier times will follow I guarantee it. |
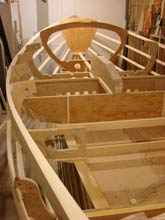
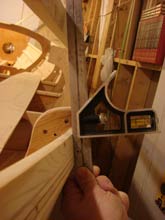
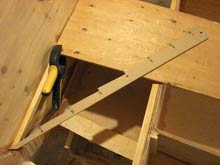
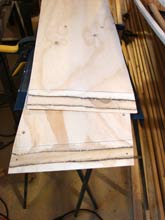
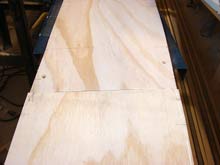
I figured that cutting and trimming all the floor panels would be easier with no planks and in Johns instructions I believe he stated this to be done before planking. It worked for my anyhow. The method I used for making my floor parts and seat tops comes from an 18th century British gizmo called a “joggle stick”. <pic8> It no doubt goes by other names but it is a cool simple tool to use. I would try to explain how it works but I’m afraid i’d only make things more complicated. Just CLICK HERE its much easier that way. |
 |
 |
In a nutshell its works very well and I made several different size ones for various jobs. In a short time I had cut all the parts and fitted them in their places. Nipping and trimming here and there so they would fit loosely. They were put aside for a more final fit later on. At that time I’ll cut the hatch holes, drains, drill all the countersink holes for mounting and such. I still haven’t decided on the hatch size or type. |
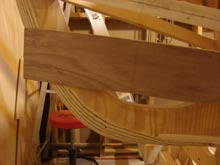
Next... Planking! I was excited and dreading this moment since I started this now all consuming project. I never attempted a lapstrake plank before and plywood seemed to make it seem more complicated. I fret too much. Of course, the first plank I need to install is the crazy one at the bottom with a reversed curve at the front. It looks very impressive on everyone else’s Pathfinder and Navigator for that matter and makes the owner appear to be a genius master builder. I hope mine could come close even if I have to make several attempts. But before I start I made one more check of the hull to make sure I was straight, plumb at the stem and true. Check. Let’s keep it that way please I tell myself. Venturing into the danger zone I went with a different method of making my plank patterns than John had described. His way was I think easier, but required the builder to move around bigger pieces of wood.
Going solo on a build certainly has its drawbacks. My method, copied from another pathfinder builder involved using dividers and a scrap of paneling the length of a plank. |
 |
 |
It works strikingly similar to the way a joggle stick is used. The pictures describe it better. The first plank was made from a template... |
... and test fitted. |
 |
 |
Close enough. |
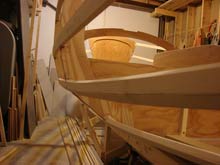
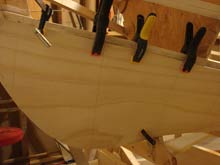
It was copied for the opposite side then glued and screwed in place. I went with scarfs instead of backing blocks on my plank joints. |
 |
 |
I had gotten used to making them by now and seemed to make sense on a curved plane like a boats hull. |
I made the adjoining plank sections and installed them as well. To clamp the scarfs tight I laid wax paper on the inside and outside face of the boat and screwed scraps of wood through the plank to each other. |
 |
 |
When the glued had cured I removed the screws, wood and wax paper and that was it. I had some small screw holes to fill but since it is to be painted later, no issue. |
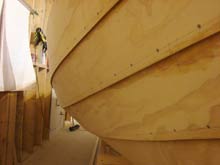
The wax paper is great for working with epoxy; I used a squeegee to spread the squeezed glue over the plank under the paper so it wasn’t just a blob on either side of the clamped scarf. First plank set installed. It looked pretty cool seeing actual planks on the hull now. It made the whole stringer episode melt away.
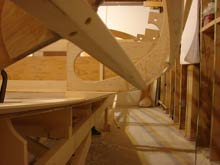
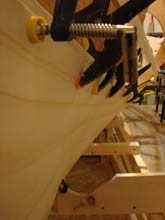
Each plank top needed to be bevelled down for the next plank but it wasn’t hard and didn’t take long. Each night a plank got made from a template, cut and matched. Each side got the identical size plank and I clamped them together to fair the lower exposed edge to a nice curve. Easier on the bench than on the hull. With plywood frame and plank there’s little worry of expansion and twist. |
 |
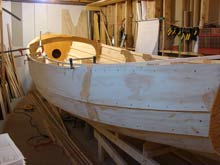 |
As long as she’s locked down it should be the same on both sides. The process was repeated time and time again and each plank got a little easier to install with less curve. With each plank installed your grin gets bigger too. By the time the planking was done I was grinning like an idiot. Needless to say I had grossly over estimated the difficulty of the planking process and cursed my timid attitude. |
I had promised myself a weekend off and a big BBQ once I finished the planking. And I did. I spammed my friends and cooked some slain meat on the grill in a -15 degree C Newfoundland heat wave. They came over and ate my fair and we gathered around a craft that could technically float now. There were a couple of “powerboater” friends there, but I made them step in a disinfectant bath before entering the sanctity of a sailboat workshop. We talked of warmer days and trips being planned, they asked where the boat was to be sailed, I responded “EVERYWHERE”.
***** |