Part 1 - One of Those
Part 2 - This Small Space
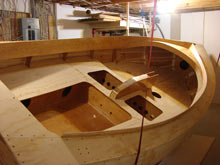
Part 3 - So Where's This Boat of Yours?
Part 4 - Planking Nightmares
Part 5 - It's All Downhill from Here
Part 6 - The Routine
I haven’t given it much thought until today. I have been building this boat for months during evenings and weekends. I finish work, have supper, and head down into the basement. The normal routine. It’s usually for an hour or two, and one full day on the weekend. One small job worked on, then starting the next. A steady flow of things to do, and if I have to wait for something to cure or dry, I take out something else to work on. It seems much less exciting in the way of I can’t believe i’m actually doing this, and more of casually thinking, yeah I’m building a boat, no big deal. I have gotten over some large hurdles to get to this point so there is much less pressure in wondering if I have the skills to do certain items. So now I go down to my boat to work on something I know is in my realm of skill and it’s much more casual, routine. I guess I can say it’s liberating. For anyone who’s considering building a wooden boat, it’s a LOT of work, but it’s not as difficult as you may have built up in your mind for it to be. So where was I?
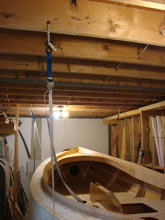 |
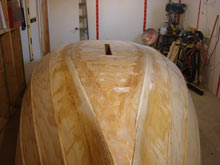
Ah, rolling over a 17ft boat in its own width. For once, building a sailboat in a basement has provided some unusual benefits... Support rafters overhead. I had put out the word for a roll over on a Saturday so lots of time was available for people to be around. I first drilled 4 small holes in the rafters at the basically 4 corners above the boat. These became the tie in points for some rope loops. The boat is estimated to be around 300 lbs right now so that’s only about 75lb per point. I built in some overkill and had each point made with rope and a loading strap which could easily hold the entire boat weight. A sling and ratchet was run in under the boat both at the front and back.
click images to enlarge |
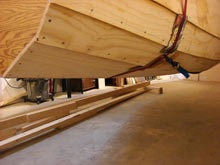
| A bridle between the front and back straps would keep them from slipping over the ends (it is a curve after all) I placed cardboard at the plank edges to protect them. With some tension and load placed on them I proceeded to take the jig apart. First, removing the last remaining screws that held the boat to the jig, and then disassembling the lifts under the hull. When the last lift was removed, the boat was basically left hovering there in the shop. |
 |
Kinda cool if you ask me. It seemed that it would be easier to disassemble the jig to the side rather than under the boat, not to mention a whole lot safer. A boat is hanging overhead after all. The jig was epoxied to the concrete floor when I built it, so I gave it a good kick. It came loose, but took chunks of concrete with it. You gotta love the power of epoxy!
 |
My buddies showed up, we chatted and each took a turn trying to lift the boat a bit just to get a gauge on its weight. We agreed that the straps would carry the weight and we just provide rotation. I didn’t need any injuries; I would be calling on these guys again so I need this to go smoothly. With me on one side and 2 guys on the opposite side we made the first little push. Me pushing down, them lifting one side. It rotated... a lot.
|
| I asked if anyone was trying to lift the whole boat. Both answered that they hardly touched it. Was I sitting on it? “No” I replied. Ok lets move it some more.... |
 |
 |
And some more, and more.... |
| And again we pushed, and pulled, checking that nothing was hooking up or that the coaming would be stressed. |
 |
In a couple of minutes it was done.
“That’s it?” was the question.
I responded somewhat dumbfounded, “Yeah I guess so”.
“What do we do now, I got the whole day.”
I said, “Well I can go get a bucket of chicken and we watch a movie.”
“Sounds good”.
The rest of the day was spent eating, watching movies and marvelling at how simple that job was. I’m still in a little awe of how easy it went. Note to self, straps to be tightened to lift boat to jig height for next roll over. During the roll over the straps were not adjusted for height until it was lowered to the floor. This was a big bonus since there was no chance for a slip with the straps tight and tied off.
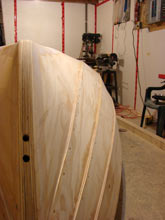
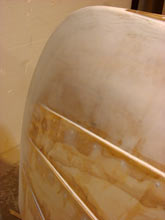
With the boat upside down, there was quite a bit of clean up to do. I needed to trim the extra centerboard case flush to the bottom, epoxy drips, and round off the floor to first plank. Once again the grinder with heavy grit disk was used for the rough work. I finished it off with the belt sander.
 |
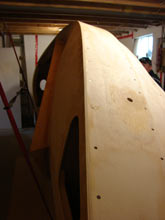
The stem got cleaned up with the planking trimmed and made flush with the stem post. The gap between the floor and first plank joint was filled with epoxy filler and sanded flush once cured. |
| The other divots, knots, and imperfections got a treatment of filler as well. |
 |
 |
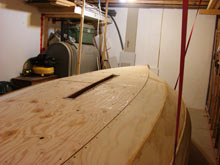
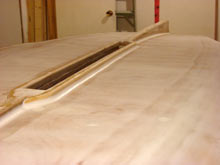
Once sanded flush I laid down my 2 layers of biaxial tape over the seam. I overlapped them and staggered them so not to make too big a hump. |
| I gave it a rough sanding after, so the glass cloth would stick better and flatter. The 6 oz cloth practically fell into place with virtually no wrinkle so a cut wasn’t needed nearer to the front. |
 |
 |
I trimmed it to size and mixed up a bunch of epoxy for an evening of sticky work. The runs near the stem had to be kept in check but it wasn’t too bad. More epoxy was rolled on later and a layer of biaxial tape was run up the stem for reinforcement. |
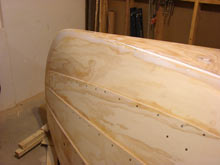
| I let that all cure for a couple of days before I washed off the blush and started adding the fillers, and more fillers, and again more fillers. A LOT of surface area needed to be cleaned up. The sanding took time but I could see the results better on the white surface than the wood which is all I’ve seen to this point. The plank edges got faired each evening and then a fillet of epoxy filler along the bottom edge. |
 |
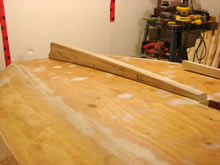 |
The skeg got constructed of maple and laminated. |
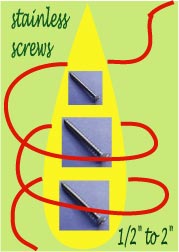
| It was glued and screwed to the bottom. |
 |
 |
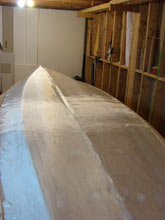
Once sanded the whole hull got 2 coats of epoxy in one evening. |
I believe I finished 1am Saturday morning doing this, but I liked the results and just sat for a few minutes trying to picture it with paint. Yeah I think I’m nearly ready. Another milestone reached, painting is next. I spent an evening with the shop vac and the compressor cleaning up all the dust on the rafters above and every other surface I could reach. The “Paint shop” is now open.
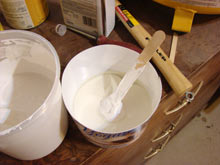
I chose Interlux “primecote” for the base coat since it had to be the link for the paint to follow. It’s a two part primer but when I opened the gallon can it looked rather thick... perhaps it’s the hardener that does the thinning and eventual hardening. I scooped out the prescribed amount and waited for it to settle in the cup. That sentence should be enough warning, but no, I had to add the hardener. I mixed as best I could but to no avail.
| To get my point across on its thickness, put a paint stir stick into bread dough. Yeah, thick. Perhaps some thinner will fix it... Wrong on a biblical scale! |
 |
Not only did it not thin it, it nearly instantly turned into putty and left the thinner as a medium. Like a brick in a tub of water. I opened a spare quart kit and poured it out, with much better results. It also mixed well. But again, thinner was the catalyst for instant putty. Somehow it was wrong thinner, it had to be. I now had A gallon kit of no use, and a quart kit ruined. Remember the bonfire? Yeah I was this close to making one.
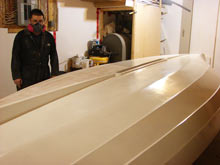 |
Luckily the boat is trapped in the basement so it was a non starter. No point to dwell on it, summer is upon me. With some discussion with the supplier and happy results, I went and used the quart kits with no thinner. It rolled on pretty good and levelled nicely. |
| After 2 coats I started painting with a one part polyurethane “Brightsides” paint. Runny, but went on easily and levelled very well. |
 |
 |
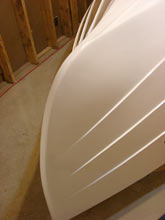
As for the shine, it was like a new car. Well beyond the required “no runs” and “cover the boat in one color” goal I had. |
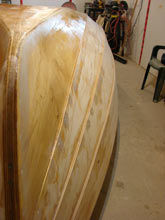
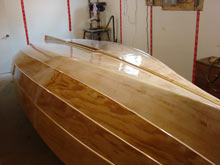
| Four evenings and 4 coats later I had the hull painted with the top plank sapphire blue. |
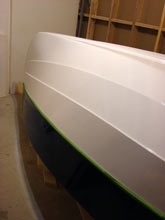 |
John has a nice looking design in the Pathfinder. I think even with a rush build, as long as she’s straight and water tight it would look much the same regardless who builds it. The planking in that lapstrake design really shows the boats lines and even with all the mistakes, hiccups and setbacks it’s pretty to look at. All Johns boats got that special look to them.
 |
Oh, you mean I have to roll her over again?... Excuse me I gotta go light the Bat Signal... |
***** |