Custom Search
|
|
| sails |
| plans |
| epoxy |
| rope/line |
| hardware |
| canoe/Kayak |
| sailmaking |
| materials |
| models |
| media |
| tools |
| gear |
 |
 |
| join |
| home |
| indexes |
| classifieds |
| calendar |
| archives |
| about |
| links |
| Join Duckworks Get free newsletter Comment on articles CLICK HERE |
|
|
| Make and Make Do |
By Rob
Rohde-Szudy - Madison, Wisconsin - USA A Two-Sheet Pirogue - Part 1 |
 click for bio |
|
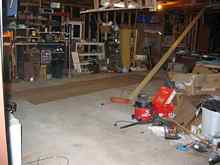
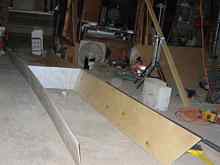
My devoted readers have seen the new shop, in my relatively spacious three-car garage. Well, for most of this summer that spaciousness was storing a friend's stuff. Yeah, I know, you probably feel naked just thinking about life without shop space. I do too, but this isn't just a have-beer-and-watch-football, friend - it's a trust-with-your-life friend. As fall arrived, he was able to move into his new place and the garage began to open up! I admit I miss having him around, but look at this space!
Those sheets of plywood are there only for scale, I assure you. OK, who am I kidding? Upon gaining some free floorspace I was seized with the uncontrollable urge to build a pirogue. This is a healthy urge, too. I had noticed that the sailboat was getting a lot less use now that we live 30 miles from the nearest sailing lake - like three times in as many years. The motorboat got more use, since the Lower Wisconsin River is nearby, but the majority of that river is skeg- draggingly shallow.
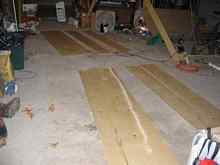
The ideal boat for this river is clearly a pirogue. The setup of a paddle-drive boat is the quickest of anything available, and a simple, lightweight boat is easy to take out for an impulse trip. Best of all, the flat bottom of the pirogue gains you access to more of this river than any other form. So here we go! First StepsFirst I drew lines down the length of the plywood dividing it into long 12-inch wide strips. Two of these are cut off to form the sides, and the stem angles are formed by marking the bottom 6 inches back from the bow and drawing the diagonal. Plans? Naaaah..
Then we make some Dynamite Payson fiberglass butt joints.
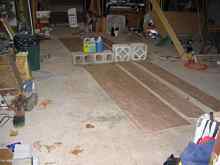
It being October in Wisconsin, I needed an electric blanket and a mylar survival blanket to get the epoxy to cure. (NOTE: The electric blanket was useless, and the work lamps seen below worked a lot better.) This was an hour and a half and $18 into the project. Another $9 got me that 18-foot 2x6 you see propped up diagonally. We'll get to ripping that shortly. Sanding the fiberglass butt joints took another half hour. It should have been quicker, but I did them the stupid way. Concrete blocks were not nearly enough weight to straighten out the folds in the plastic. I think the better way to do this is one side at a time using clear packing tape. That stuff can make a really smooth, finished surface. OK, now on to ripping. This too should have been much quicker, but I was too stubborn to change to a sharper blade on the tablesaw. I would love to tell you I won't make that mistake again, but I probably will. I spent about 45 minutes ripping three long pieces of 1.5 x .75 inches for the gunwales and bottom skid. This is a good time to cut some 1x2 or 1x1 for the temporary form as well - maybe 30 inches, 24 inches and two pieces at 12 inches. Finally, we need stemposts and some braces to go across the gunwales, but I'll cut those later, when I know the bevel angles. You can skip ahead and cut them now if you want, but I'd wait on the permanent frames until you can measure your own bevels and cut to fit. About that temporary center form. I tried using a piece of scrap Styrofoam. Don't do this - you'll see why below.
Here are the dimensions.
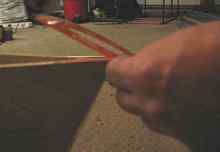
That sets us up for going three dimensional. I did this with tape at first, so I could measure stem bevels.
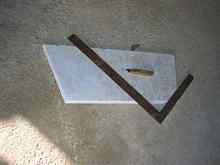
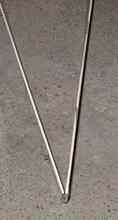
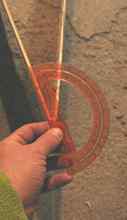
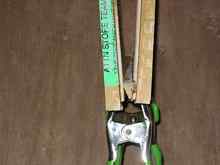
I know the math and drafting tricks to calculate these bevel angles, but it is hardly worth it when the boat is this quick to slap together. We just need to look straight down the line formed by the stem, like so.
Viewing from this angle, we measure the angle between the side panels. Be sure to measure at both stems and average them!
I know this angle isn't exactly perfect, since we will be spreading the sides apart slightly to accommodate the width of the stem piece. But it will be a narrow part, so this is close enough. I measured 27 and
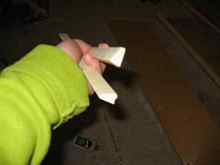
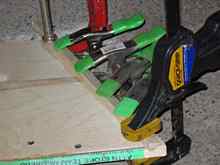
I made these with a ¼ inch front surface, keeping it narrow for lighter weight and a finer entry. Next, it's time to attach gunwales to sides. Here I used TiteBond III, since it's supposed to be able to cure in 40-degree temperatures. I should have about five degrees to spare. I generally like stainless nails for this sort of job, but I was out. I used 7/8 inch badly-galvanized roofing nails. After the glue cured I had to sand the gunwales smooth. This was totally wasted time, since I could have avoided it by using a hollow ground planer blade in the table saw (forgot I had one) and ¾ inch nails (7/8 inch was juuuuuust long enough to poke the very tip out). Once that nonsense was done, I glued on the stemposts to one side. With no mechanical fasteners it would have been too slippery to try to clamp three layers. Then I glued the other side to the stems. Note that I'm using the middle form as a spacer so the sides meet the stems at the right angle.
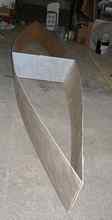
However, for gluing the stems, I'm only spreading the sides at the gunwale, which keep the gunwales flat on the floor for stability.
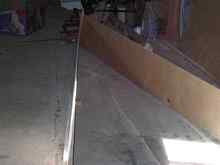
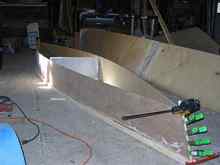
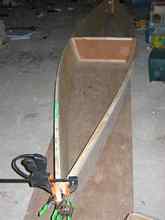
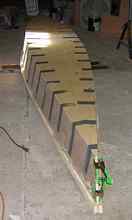
When the glue is cured, we can pull the bottoms of the sides together to meet the form, the sheer and rocker will spring into being. This is where the limitations of Styrofoam as a center form made themselves readily apparent.
The added spring power of the gunwales snapped the foam right along the centerline I drew with a ballpoint pen. I guess that was enough of a weak point. This, of course, necessitated re-gluing some broken stem joints.
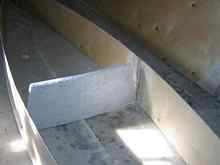
A real center form and going 3-D Well, I guess we really do need a real center form. Trying to avoid this was wasted time too, since making the plywood center form didn't take much longer than making the foam form.
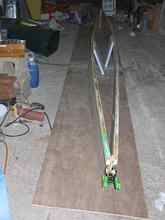
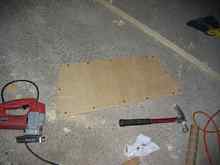
I lost count a little, but I think I'm around eight hours in at this point. Be sure to dry fit and sight down the boat at this point. You don't want it twisted. Now we can lay the bottom in place and trace it. This can be upside down or right side up with a boat this small - I did it right side up so I could see better. This is a simple matter of getting the bottom's centerline to line up with the center on the stems and center form, then holding the bottom against the sides while marking their intersection on the bottom panel. Honestly, I didn't get the centerline lined up and it was fine. Just be sure to eyeball it lengthwise to see if the hull looks straight. Cut the bottom with 1/8 to 1/4 inch to spare outside the line - we'll trim to fit later.
Now we can tape the bottom in place, and start attaching it. Duct tape seems to work best for this.
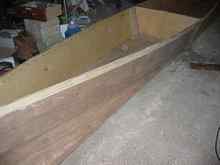
Time for some plastic. Space Age PolymersTaping the bottom in place allows me to make the interior seams. This was straightforward work with Bondo and an old credit card with one corner cut to a rounded profile. The pictured "tongue depressor" shape was to get in the narrow spots inside the stems. I used almost a full quart of Bondo on this boat.
To be continued... |